[–] 3 points 8 hours ago (1 child)

Lance Hendrick is kind of the ice queen of coffee and promotes brewing and drinking at quite cool temps. He's said below 50C and even I think below 44C as recommended temps. I'd avoid over 60C at least. I think that's around the range where some data has even suggested higher rates of throat cancer with chronic exposure. Personally I now set my Ember at 123F (50C) which is about as low as I'm comfortable going presently. It is true that more complex flavor profiles tend to reveal themselves at cooler temperatures (closer to body temp - 37C)

  • source
  • [–] 2 points 2 days ago

    If you enjoy lighter roasts / fruitier flavors I don't think you can beat EA. I've had some really nice EA roasts and drink this regularly in the evening. I think SW isn't as harsh on darker roast notes.

  • source
  • Yeah this always bothered me. If it can kill birds is it really OK for you? A coal miner wouldn't approve of this. I can certainly smell it. I only do this every three years or so and always in the fall when I can leave the windows open for quite a few hours.

  • source
  • parent
  • context
  •  

    I imagine this post will mostly get eyerolls, but if it eventually reaches just one goofball like me that didn’t figure this out on their own, I think it’s a net positive. For the first couple of years after I started using a hand-grinder I dreaded the early morning pre-caffeinated task of loading beans from my dosing tray into my grinder. If I wasn’t super cautious about the alignment and pour speed, I’d end up with beans scattering onto the countertop or floor.

    I love combining 3d printing and coffee, so I finally started searching for stls of funnels that would fit my specific grinder. There definitely are some, but I noted in the comments of one a criticism asking why the developer of the stl wasn’t just cupping his hand around the top of the grinder? The next morning I tried doing just that and it worked beautifully. It was so simple and now seems so incredibly obvious to the point where I feel a little silly even talking about this.

    I’ve shown previously how the Z1 fits nicely over the K-ultra grinder, and if you use it as a dosing cup you can flip it right into the grinder. Grinder receptacles will often work like this too, but you don’t want to be pouring any residual grinds back in the grinder. Anyway, if you’re still spilling beans like I was – try this, it works for all grinders, it’s easy, and here are some pics demonstrating the simple technique.

    cupping hand over coffee grinder to assist with loading coffee beans
     

    I've been thinking about doing this for a long time, but finally got fed-up enough with coffee taking up food space in the freezer. It's a cute 1.8 cubic foot (probably about a quarter albatross for those using the metric system) little cooler-style fridge/freezer. Justified it further since if I ever needed to it has a 12v dc adapter for car use (doubt I ever will). It does feel pretty special for the coffee to have its own storage unit, and it makes finding frozen fruits and meat in the standard freezer easier to sift through. A couple of times I even threw stuff out of the freezer to make room for coffee, so I knew it was time to try this.

    Spoils from NYC! (sh.itjust.works)
     

    Picked up what I could on foot in the brief time I had available In NY.

    I'm most excited about Devocion. I love single country of origin roasters!

    At the watch house they were making a very mild green tea and then heating that up and using it to brew coffee with (caffeine warning!). It almost felt like cheating as a way to boost floral and grassy notes in the coffee. Nonetheless I'll probably try it sometime.

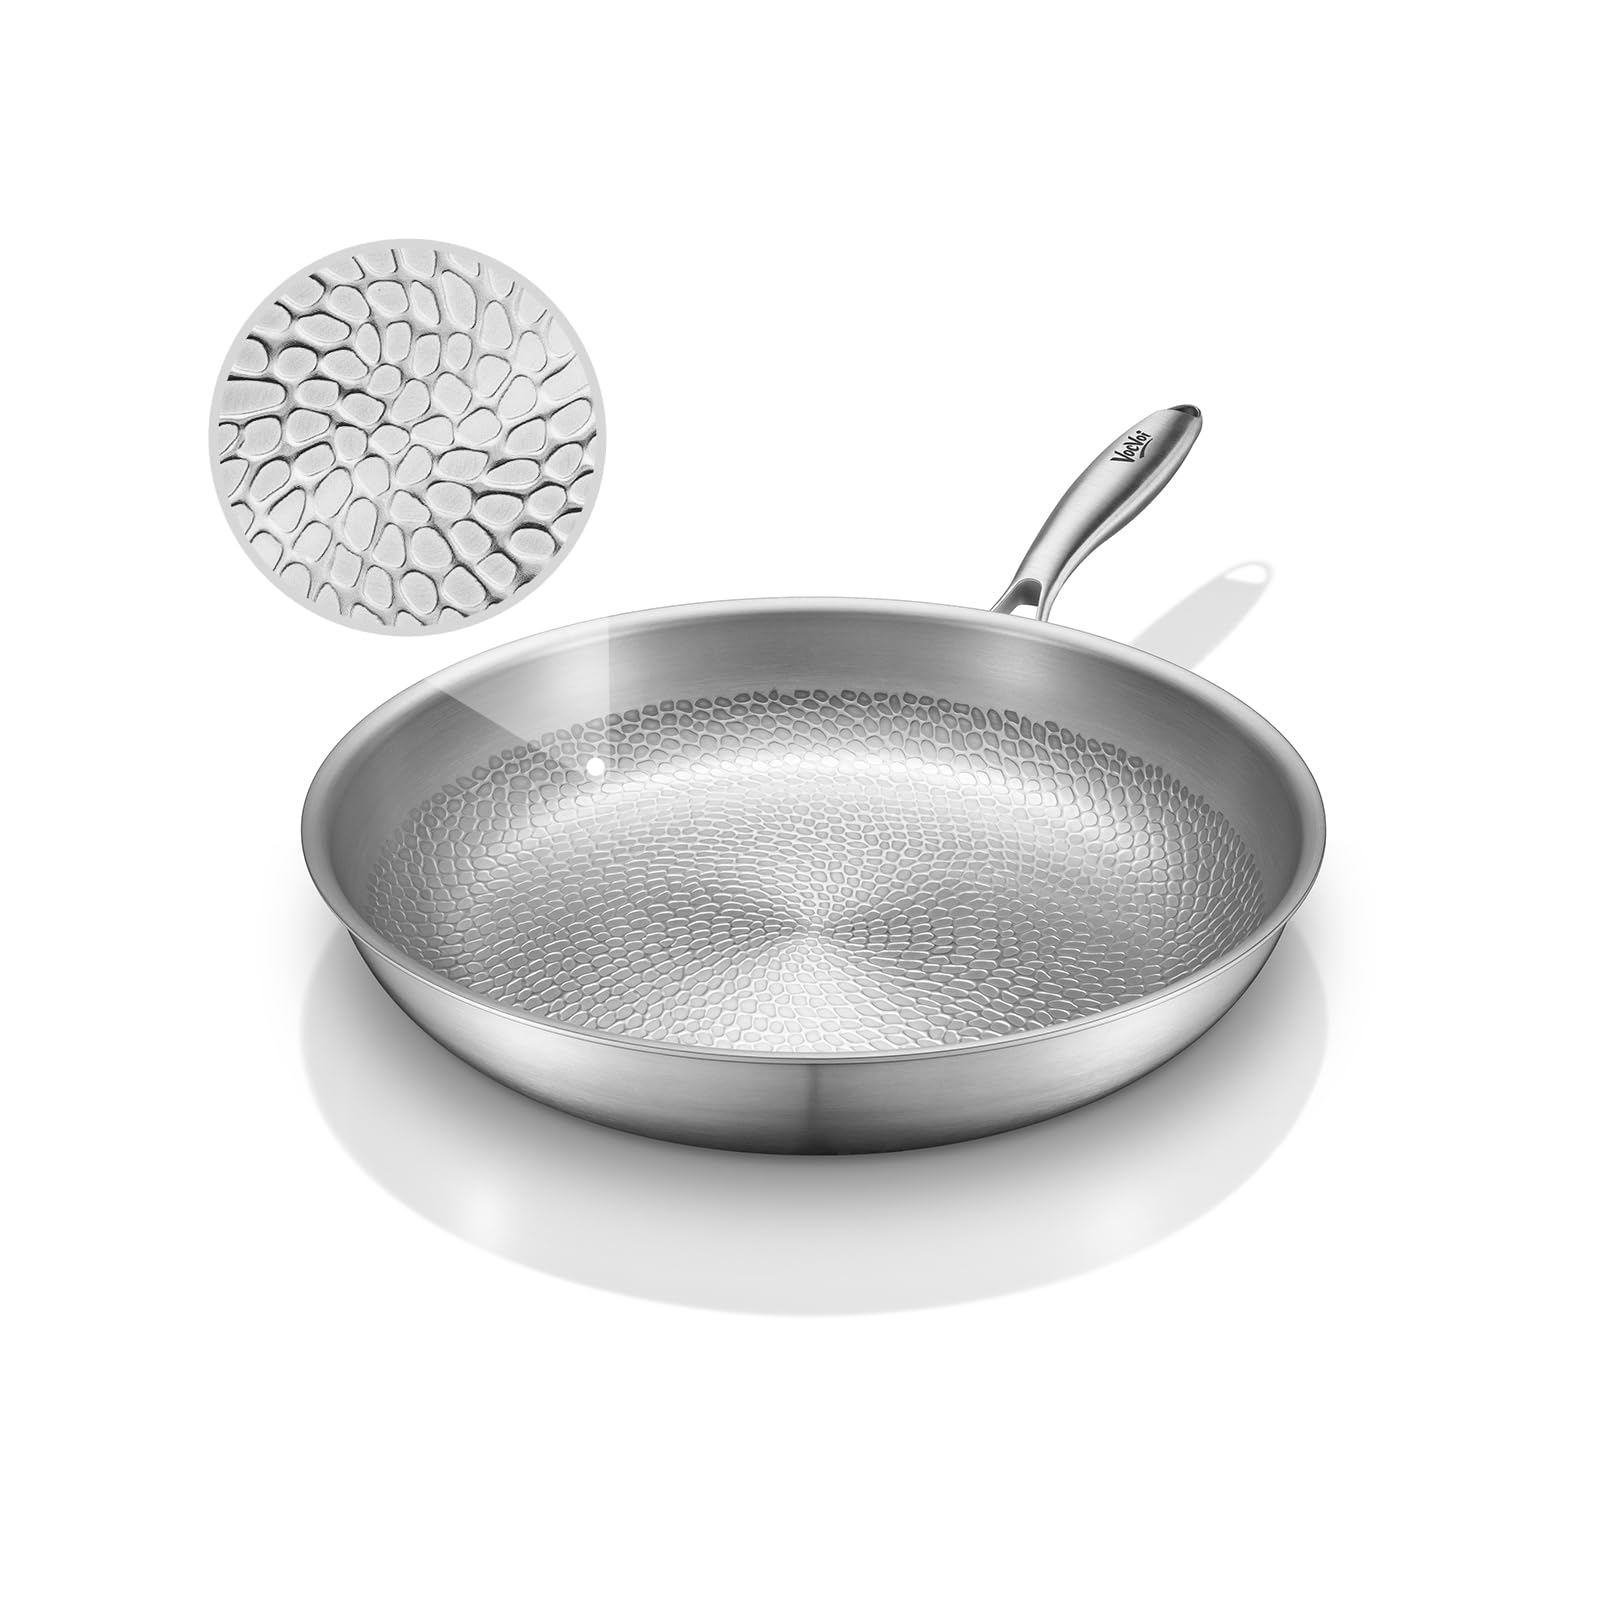
    Titanium coated pan (m.media-amazon.com)
     

    I really don't like nonstick pans. I love my CI and CS pans and my beloved mirror finished SS pan. I do always keep one medium sized nonstick around as they do have their utility. I replace it every two years though as no matter if it's a cheap as seen on TV one or a fancy name brand, they all loose their nonstick properties with regular use. I had enough and decided to try a non-treated titanium coated pan. I have to say, so far I'm pretty impressed. Nowhere near the performance of a freshly purchased nonstick, but a bit less sticky than SS. Where it's really shining is with cleanup. It been very easy to wash clean even when there is charring or adherence. I haven't tried yet, but I think it's going to be perfect for cold-searing. Has anyone else tried these? Does the nonstick quality fade with microabrasions over time? If so hopefully lasts longer than 2 years?


    When I have my grinder in my carry-on there is about a 70% chance I get my bag searched. No one seems to be trained on these as a luggage item.

    Two things make me a little nervous when this happens.

    1. They find my portable bidet (not pictured) and start waving it around asking questions about it

    2. They come across my favorite travel scale with a picture of a plane and the word "bomber" on it (pictured) and start asking questions.

    Have any coffee / coffee gear travel / security tales to share?

    The one about water (sh.itjust.works)
     

    Water matters

    At some point every coffee nerd has to do a piece on coffee water. It is, after all, the main ingredient in our favorite beverage. The topic can get genuinely extensive and intimidating; the rabbit hole is deep, and others have explored far deeper than I ever could. This is a condensed, easy-to-implement version with just a handful of points that have made an appreciable difference in my brews without overcomplicating my brewing.

    For a proper deep dive, I recommend the Coffee Chronicler's guide to the best water for coffee, which even includes a TLDR section. He also offers a paid course if you seek true mastery. My other favorite source is James Harper's The Science of Coffee podcast (Filter Stories)— he has several excellent episodes on optimizing water, and he's a joy to listen to.

    What to measure

    TDS, GH, and KH

    The Chronicler's TLDR is handy, but I think it over-simplifies a bit: it's worth spending a few dollars on a simple fish-tank test kit to check the GH (General Hardness) and KH (Karbonat Hardness, or alkalinity / water's buffering capacity) in your tap water.

    • TDS (Total Dissolved Solids) is the overall mineral load measured by simple conductivity. A cheap TDS meter is the best place to start and the easiest way to tell if your tap water is drifting over time. Keep in mind that consumer-level meters don't correct for water temperature, and it makes a big difference — always measure water that's settled to room temperature.

    • GH is the calcium and magnesium salt concentration.

    • KH is alkalinity, which buffers against acidity.

    My target ranges

    Here's the simple starting point that has served me well. You can absolutely tune these to taste or to match specific roasts, but these numbers get you into a good place. If your current numbers are way off from these, try tweaking your brews a bit before dismissing what might be a significant taste change – I genuinely believe you’ll find better cups overall if you give these a chance.

    • TDS between 40 and 150 ppm (I prefer 50–75)

    • GH between 40 and 80 ppm

    • KH between 25 and 65 ppm

    • GH should be higher than KH (ideally around 2:1, but don't stress the ratio)

    I'd be a little more flexible on the GH and KH numbers and a little more focused on the TDS range — it's the anchor that tells you when your tap water has changed.

    Simplified Workflow

    Most people can build a very good coffee water by blending tap water with filtered water. If that doesn't get you there, try filtered plus bottled, or start from distilled water (in the US it's usually labeled for machine use, but it's perfectly safe to drink) and add a commercial coffee water mineral kit. You can tune the tap-to-filtered ratio by taste, but tap water changes over time, and re-tinkering blind is frustrating — you want anchoring numbers to work from. That's where the Culligan ZeroWater pitchers come in: they have a TDS meter built into the lid, which simplifies the whole workflow enormously. Yes, I’m plugging this product, but rest assured I have no conflicts of interest. You’ll need to ditch the filter (or get two of these if you don’t have a way to purify water already), but once you’ve figured out the ratio of purified water to tap water that achieves the parameter ranges above, you can then quickly mix your water in real time in the ZeroWater pitcher to dial in the TDS. I fill mine and store it in the fridge for nearly a week's worth of coffee water. Yes, it takes a bit more time and energy to heat in the kettle, but it's still fast enough that it's rarely a bottleneck in my sleepy morning pour-over routine. Remember, the TDS on the meter will drop by about 20 points once it’s in the fridge and this is simply an artifact of how TDS meters work.

    Espresso tweaks

    The same basic rules apply, but this is where you can really dial in acidity. Keep the TDS very low (15–30 ppm) if you want to emphasize acid notes, and bring it up (60–90 ppm) to smooth it over. You can do similar tricks with pour-over, but I find it most remarkable with espresso.

    TLDR;

    • Get a cheap TDS meter and a fish-tank test kit for GH/KH.

    • Aim for TDS 40–150 ppm, GH 40–80, KH 25–65, with GH above KH. Find your favorite TDS with the water options available to you.

    • Blend tap water with filtered water to hit your numbers.

    • For espresso, drop TDS low for acidity, raise it to smooth things out.

    how to optimize your water for perfect coffee
     

    A bit of coffee history for today:

    Coffee has long been a significant part of the world economy. With that status comes interest from corporations, governments, ad agencies, and interest groups. In the late 50s in America consumers were more financially sound than ever before, but wartime culture persisted and roasters catered to an appetite for financial prudence and a national palate that had become more and more accustomed to low quality beans and progressively more dilute cups. This kind of coffee consumption though was not optimal for growers, and the Pan-American Coffee Bureau was an advertising group that formed to represent South American growers. In 1959 they created an artificial community known as the League of Honest Coffee Lovers (LHCL). This “group” promoted the idea of quality coffee and strong coffee (with a primary emphasis on the latter as embodied by their catch phrase “more coffee in our coffee!”. A large ad campaign feigning elaborate protests with passionate well-dressed hypo-diverse coffee enthusiasts spread through newspapers and magazines. So passionate were they, that weapons were a strong theme in these ads. These smiling wool-suited young men and women were ready to slaughter any barista that might serve them anything weaker than the golden ratio. If these ads awoken anything in you and you wished to show support for these crusaders but maybe weren’t quite willing to spill barista blood on your Sunday best, you were invited to write a letter to the Pan-American Coffee Bureau to receive your very own official certificate as proof that you gave a damn about the concentration of your coffee. The whole thing didn’t last very long and had limited lasting impact on coffee brewing trends, but for better or worse it was a notable and historically entertaining effort at improving coffee quality.

    Enjoy some of the ads, a downloadable certificate, and a website where you can customize your very own LHCL certificate!

    Source: https://www.weirduniverse.net/blog/comments/league_of_honest_coffee_lovers

    When the stakes are this high, you damn well better bring your crossbow! Source: https://www.weirduniverse.net/blog/comments/league_of_honest_coffee_lovers

    Source: https://philip-cardamone.pixels.com/featured/league-of-honest-coffee-lovers-certificate-phil-cardamone.html

    Customize your own Certificate!

    Good luck trying to scald my nipples with your boiling hot dilute coffee swill Barista! Prepare to perish for your crimes against coffee! Source: https://www.goantiques.com/league-of-honest-862043


    I’ve been using the K-Ultra more recently and have noticed the commonly reported difference in flavor profile that this provides in comparison to the Comandante c40. Presumably this is due to differences in the particle size distributions produced by these grinders. I have heard that the K-Ultra has a bit wider distribution and leans towards more fines. I had not seen very convincing proof of this though. I do not have access to a fancy particle distribution analyzer, but I do have a Shelbru Sifter taking up shelf-space. I decided to do a little comparative test between these two grinders with a medium roast natural Ethiopian (known for higher fines).

    Notably, fines are typically defined as particles less than 100 microns, but for the purpose of pour-over at least, the 500 micron filter on the Shelbru seemed appropriate enough. You certainly wouldn’t want very many particles in the sub 500 micron range in your pour over. I set the K-Ultra to 7.6 clicks and the Comandante to 24 clicks and ground 10.0g of beans in each. I ran each through the Shelbru for one full minute. The sifted-out fines are shown for each below.

    ::C40 Fines:: ::K-Ultra Fines::

    While it looks like a decent amount – these fines are light – I could not register them at all on my 0.1g accuracy coffee scale. The overall volume looked very similar between the two samples, and I decided to go volumetric for quantification since I couldn’t do mass. They came out very similar – each was just under ¾ Tsp using a ¼ Tsp measuring spoon.

    It wasn’t really part of my goal here, but I wasn’t going to waste the filtered out coffee (the >500 micron portions). I discarded all the fines and mixed the remaining two specimens together and tossed them in the Kalita Mino. Frankly it came out a little vapid tasting. This may be because I trimmed off a little too much of the particle distribution curve that does give some nuance to the brew. This fits in with what I’ve mentioned before about the Shelbru, while it may clean up a messy grinder – for these higher end grinders it probably hurts more than it helps.

    This was sufficient for me at least to say that I do not think the K-Ultra produces significantly more fines than the C40. I think that’s an important point, as low fines production is hallmark of high-end grinders and rumors that the K-Ultra produce more of these are a bit of a knock. The noted difference in flavor profiles between these two grinders almost certainly has to do with particle-size distribution (I’ve seen some unimpressive amateur analyses, but nothing of quality that I can link to for a good demonstration of this), but that difference does not appear to be a simple higher preponderance of fine particles in one vs. another.

    k-ultra vs. Comandante grinders with relevance to fines production
     

    There are plenty of travel brewing options, the aeropress, pipamoka, espro, and an eruption of practical portable espresso options lately. Unless you are either traveling a lot or using these regularly at home, they can be difficult to dial in to the brews you might be used to if you are a primarily pour-over brewer. There have been a number of foldable, portable, optimized pour-over brewers, but these tend to do best with a gooseneck kettle which is a deal-breaker for me when selecting a travel companion. Immersion options like the clever dripper have been touted for their travel-friendly simplicity, but it’s a notably different brew profile if you are used to pour-over. Two recent zero-bypass brewers have caught my fancy as work / travel options, the Ceado Hoop and the Orea Z1. Neither is really touted as a primarily travel brewer, but they are both super simple to use, do not require a gooseneck, and they are durable with high quality simple construction. In brief, either one of these is worthy of its space in your luggage, but which is the best?

    Brief Rundown of devices

    I’ve described the Hoop a bit briefly but only in reference to its filters. It’s a unique radial infusion brewer where the coffee grounds sit in a central chamber and water flow into the chamber and over the grounds is determined by a series of small holes that connect to a larger outer water reservoir.

    The Z1 is basically a spinoff of the tricolate zero-bypass brewer but utilizes a fast Sibarist filter and has a built-in melo drip disperser which allows for a clumsier water source than a gooseneck kettle since it converts any pour into a diffuse uniform drip.

    Packing

    Let’s look at portability and practicality for travel first. Both are high quality food grade, high heat tolerant plastic. The z1 is Tritan and the Hoop is BPA free plastic but the resin type is not published. Both fit pretty practically in luggage, and while you can’t do that cute thing like you can with the aeropress where you slide a grinder inside of it, they certainly aren’t space hogs. The Hoop has a little bigger footprint, but if you are willing to stuff a clean pair of socks or something in it, I think it actually takes up a bit less space.
    Winner: this one’s a tie

    Brewing

    I’ll lead with saying both can brew an excellent cup. They are very simple to brew with, but the Hoop takes the cake for simplicity if that’s what you crave when being out of the comfort of your kitchen coffee lab. The Z1 on the other hand is going to require a few pours and does offer some variables you can play with a little to tweak your brews. Both brew best on the coarser end of the pour-over range which is good news if you want to have a separate travel grinder – a middle of the road grinder will do very well with these. The Hoop is extremely flexible with how you pour the water in. You could take a large pot and just dump the water into the reservoir and you’d be fine. The z1 is fairly forgiving too, but you do need something with at least a bit of a spout. I usually use a collapsible travel kettle or a hotel kettle and these work fine, but you can’t pour too quickly or the Melodrip will overflow and slower pour rates can lead to dribbling and dripping with conventional spout kettles. I do usually make a little bit of a mess with the z1, but nothing terrible. Of note, I’ve learned that since I bought my Z1 (very early adopter), Orea sells a travel kit which includes a little cup with a pour spout. I remain skeptical about how usable this is, as I imagine this must be very hot to hold when filled with near-boiling water. The big issue with both of these is their big bottoms. That’s right, they both have weirdly large back-sides and it’s a frustrating design attribute that can really leave you stuck on the road. Neither fits on my Hario 02 carafe at home, nor do they fit with most standard sized coffee mugs. The Hoop is the bigger offender here requiring a 7cm diameter opening on the vessel below it. The Z1 isn’t much better, but enough so that I can typically find a large mug at an Airbnb or thankfully the wide mouths of the hotel paper cups typically fit. I’ve traveled with the z1 a lot and have always lucked-out with this, but I can imagine a situation that leaves me stuck with hotel coffee and it does give me some anxiety. I’ve found a nice 3D printed adapter that I’ve previously plugged for the Hoop – it’s durable and easy to travel with, but still – it’s another thing.

    The Coffee Soldier's typical hotel room setup =)

    With a filter in place the z1 doubles nicely as a dosing cup and fits nicely onto some grinders.

    I do like how the Comandante grind cup fits perfectly onto the z1 as well for a no-mess transfer.

    Winner: it’s close, but the z1 has an edge here.

    Cleanup

    Both are easy to clean and have just two parts that need washing off. The perforated bottom grate of the Z1 does require a little agitation to get residue fully off it, and I find the Hoop rinses off a little faster.
    Winner: Hoop by a margin

    Cost/Value

    Orea seeks helpless coffee gear heads like online betting websites seek gambling addicts, and I think even those that like their products resent them a bit for it. At over 80 USD for the z1 not including any of the growing list of accessories for this, it is obscenely overpriced for a small plastic cup with some holes on the top and bottom. You’ll also be quite locked in to the special Sibarist filters which perform well but are hard to come by and also very expensive. The Hoop is reasonably priced, and you can in theory use Aeropress filters, but in reality, the experience and cup are only worthwhile with either Sibarist filters or Scott Rao 62mm filters currently. The Rao filters are more reasonably priced when comparing them to the Sibarist options. Winner: Hoop by a longshot

    Wrap up/TLDR

    Either of these makes for an excellent travel brewer. These are worth considering if you don’t have a travel solution yet or if you are looking to switch your travel brewing to a pour over method. If you’re not traveling all that often and want to keep things as simple as possible, I would recommend the Hoop but do recommend the 3d-printed step down adapter to make sure you can fit it on your cup/mug. If you travel frequently or for longer durations and want to have some options to tweak your travel brew a bit, the Z1 offers some flexibility that is a little closer to more traditional pour over methods. If you haven’t quite gotten to the point where TSA is pulling coffee gear out of your luggage and giving you WTF looks, I would lean towards starting with the more reasonable price point and simplicity of the Hoop. What am I up to these days? I travel with the Z1 and I’ve parked my Hoop at work as a perfect yeah I have enough bandwidth to pay some attention to this Zoom meeting and brew a pour-over at the same time solution.

    -- I already have a recommended HOOP brewing recipe and hope to have my Z1 recipe available by next week.

    Do you already have a travel favorite brewer? Do you have another pour-over on the go solution?

    SCA Flavor Wheel (sh.itjust.works)
     

    The SCA flavor wheel is the standard reference for Q grader cupping, but it's also a nice reference to have on hand to help in the search for nuance in your own cup. Printing this out is both nice to have as a tool, but it's also kind of pretty and doesn't look too bad on a wall.

    You can buy a digital PDF for $10 from the SCA.

    OR, it's pretty easy to find high resolution English language versions at least online.

    Try 1: https://atlanticspecialtycoffee.com/wp-content/uploads/SCA_TasterWheel_English_8.5x11.pdf

    2: https://imgur.com/a/k1sFXXM

    sca flavor wheel
     

    Get pumped! This is the incredible coffee product review you’ve been waiting for! The hot new gadget that will revolutionize your coffee brewing experience! Ok, no it’s not, I’m literally taking a few minutes to dribble on about a tiny broom and dust-pan. There’s some precedent / inspiration for this at least. The Coffee Chronicler, a chap for whom I have much respect for as a coffee aficionado, once posted about one of his favorite coffee gadgets being a small dust-buster. While I agree, it’s paramount to have a quick and easy way to clean up the blizzard of grounds that come with a busy home coffee lab, I’m very much in favor of this simple device. I have a mini vac in my kitchen, but I rarely use it for counter-top clean ups.
    Maybe it’s that there’s not power or a place to mount it quite close enough or that my electric grinder doesn’t fit near the area I brew at. Maybe it’s that I’m up early and I don’t want to wake the dog or trigger my introversion with a loud hum. Whatever it is, I’ve found myself much tidier using this little hand sweep. I can quickly dump the pan in the sink or the bin. The brush magnetically adheres to the dustpan and it’s small and not at all ugly to look at. I’m not pushing this particular model or brand. I assume there must be mimics; it’s just the concept that I like. This has lowered the threshold for my willingness to clean up to the point that I find myself happily doing it on the regular.

    What do you use? Shop-vac? Wet sock? Lemmy know.

    view more: next ›