1


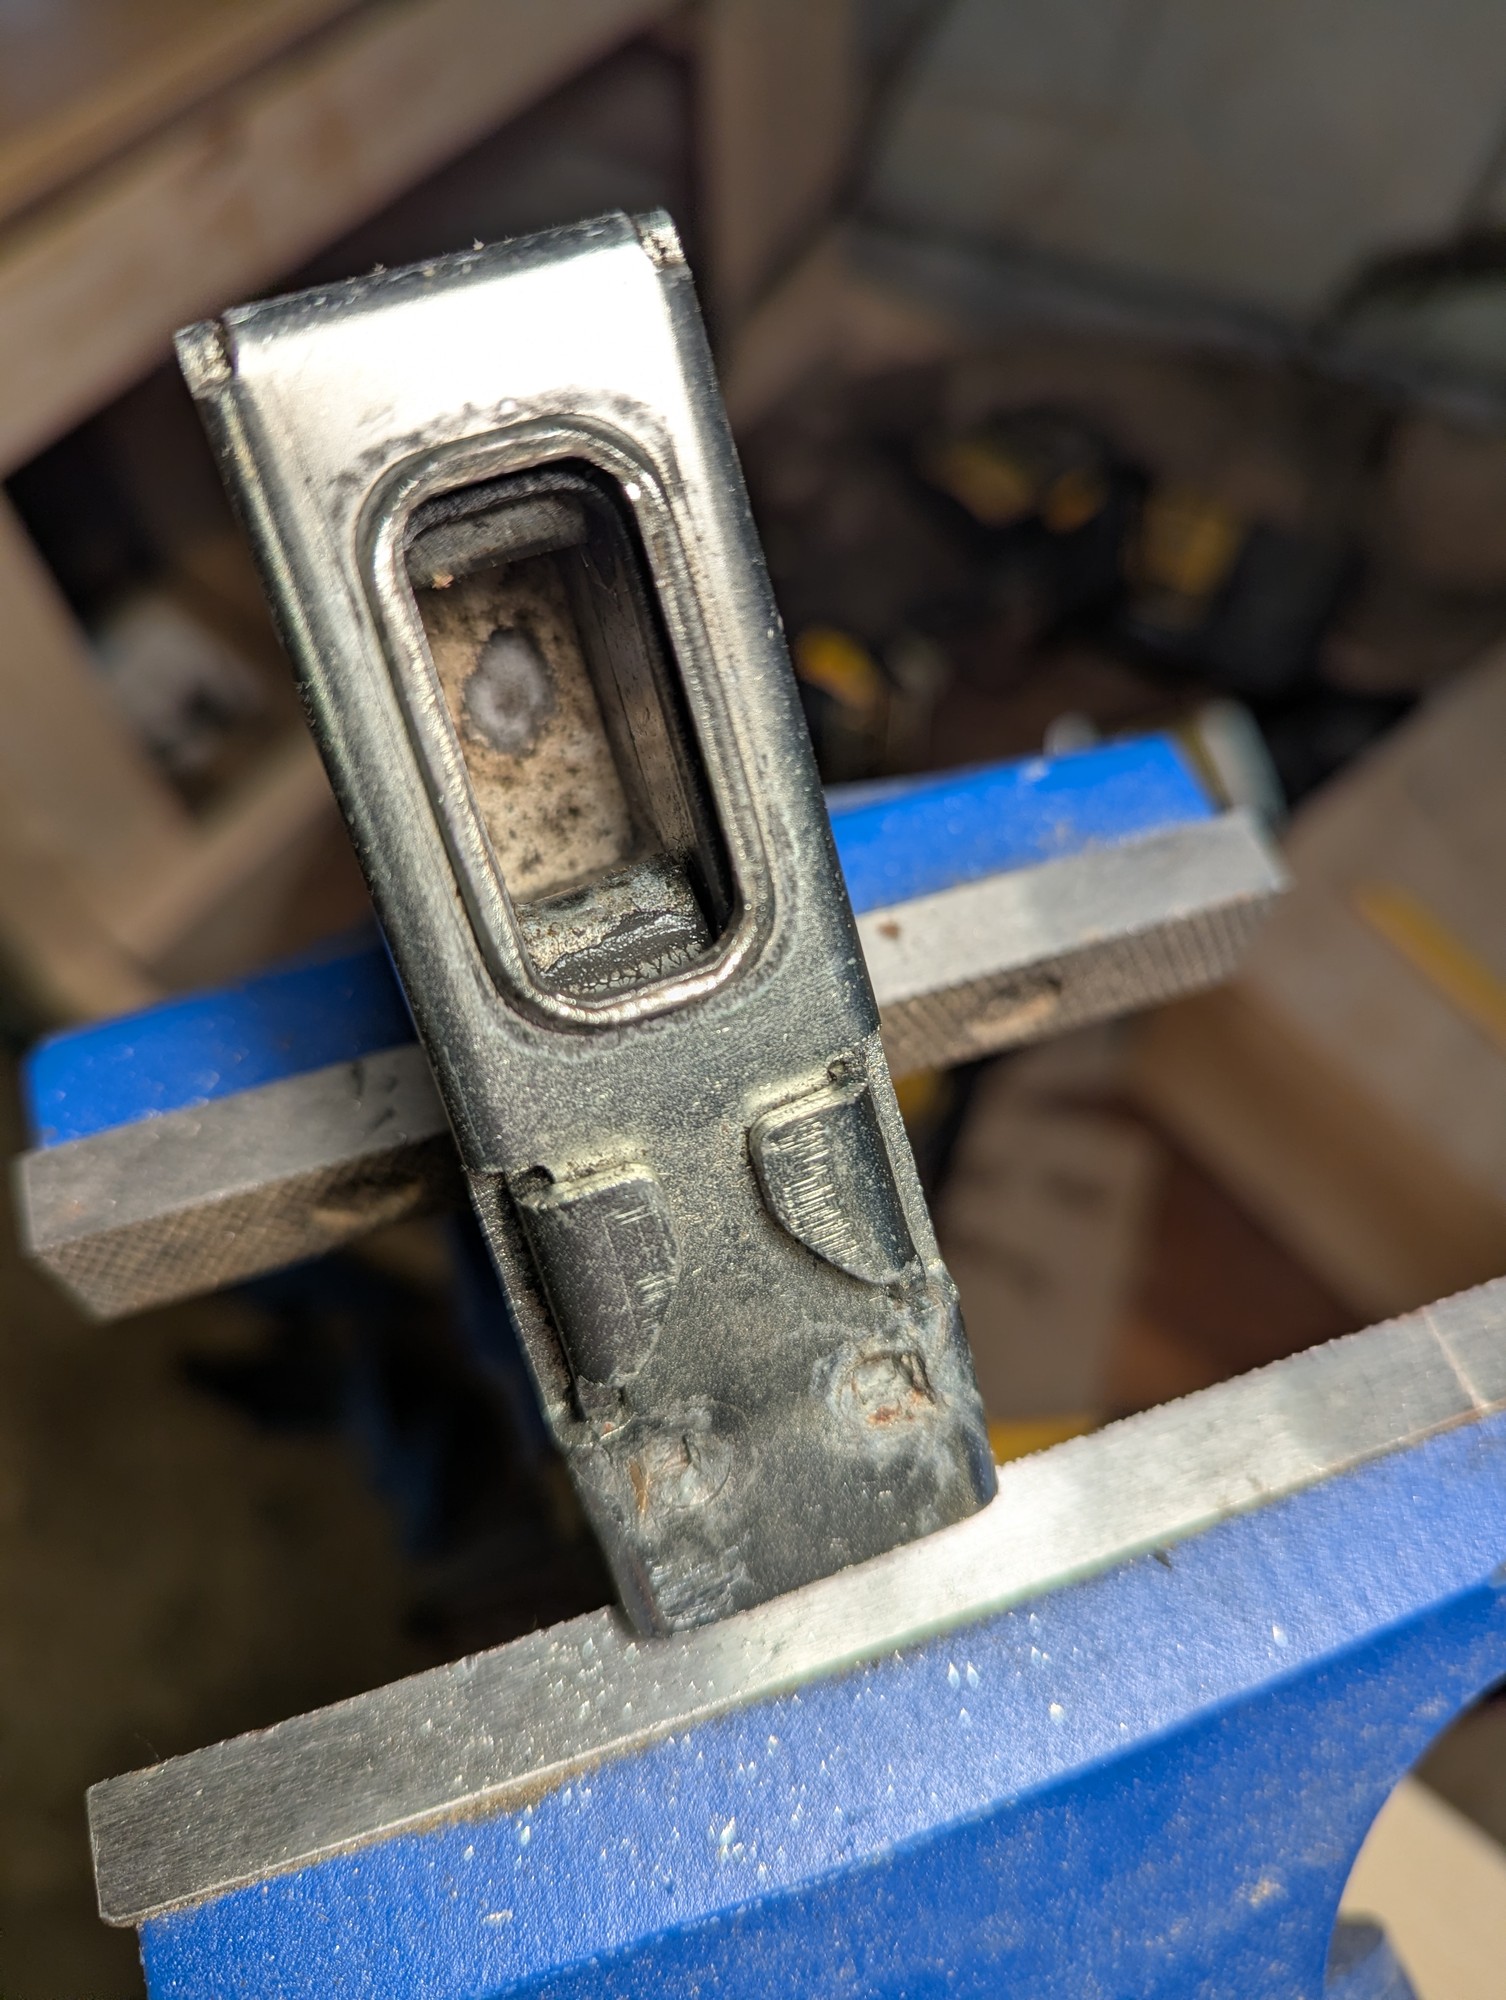
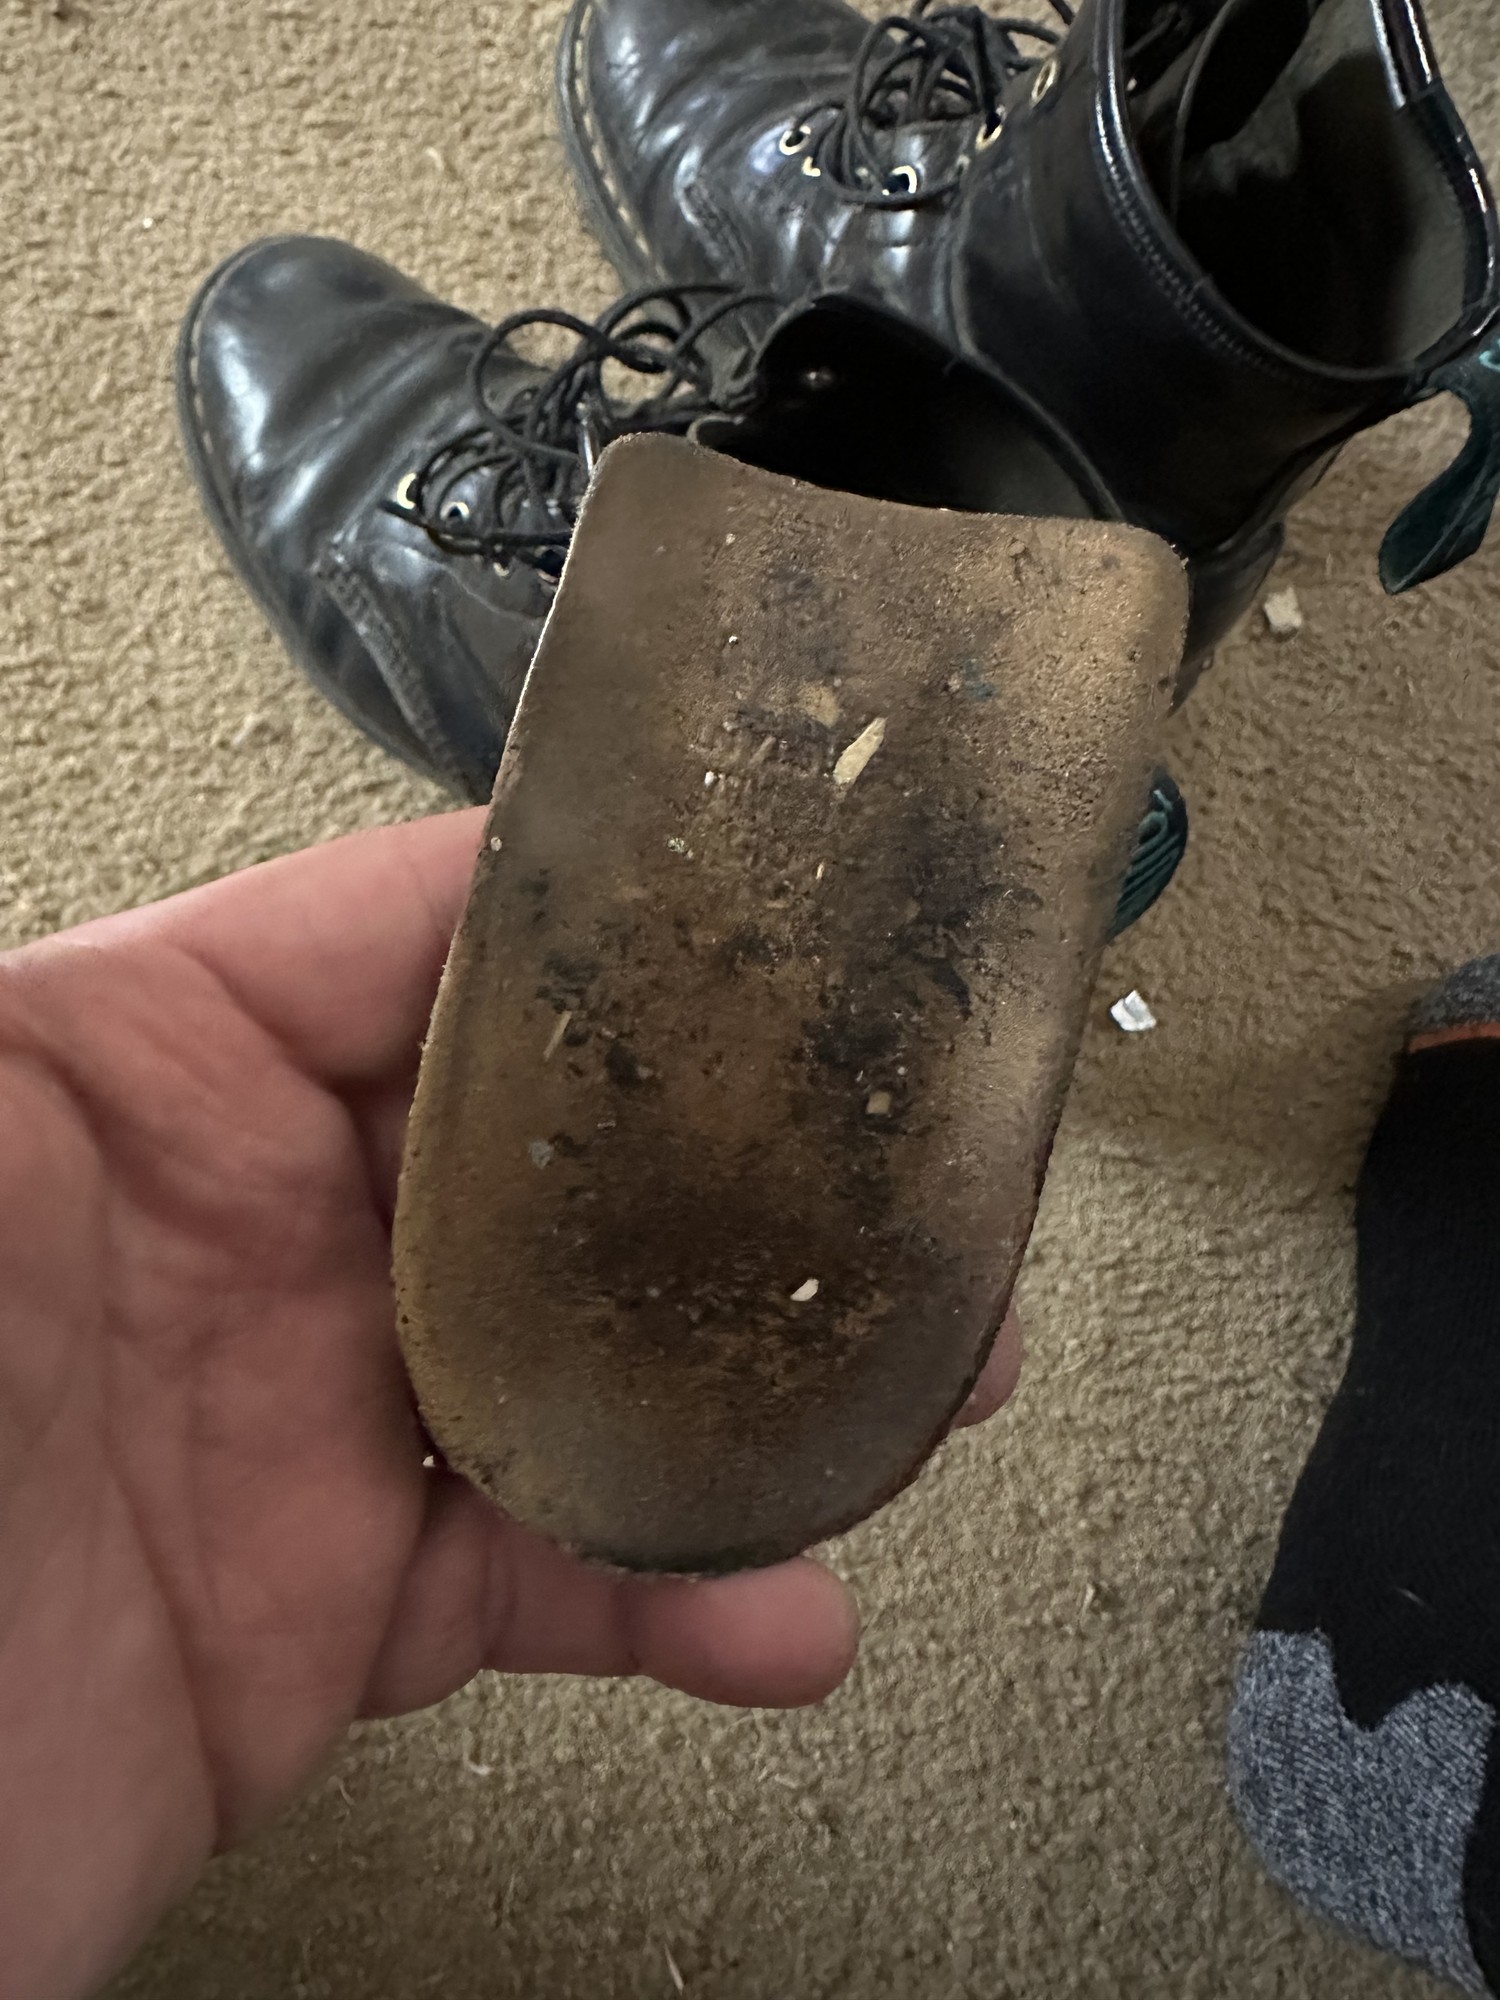
The inside heel came out of my Solovairs (Docs) and I am unsure the best way to secure it inside my boot again.

For the most part it is not a big deal, but it does get annoying when it slides out under my foot.

I thought maybe shoe goo, but I think that may be too permanent (and messy).

Fixing a boot heel (the inside one)
2


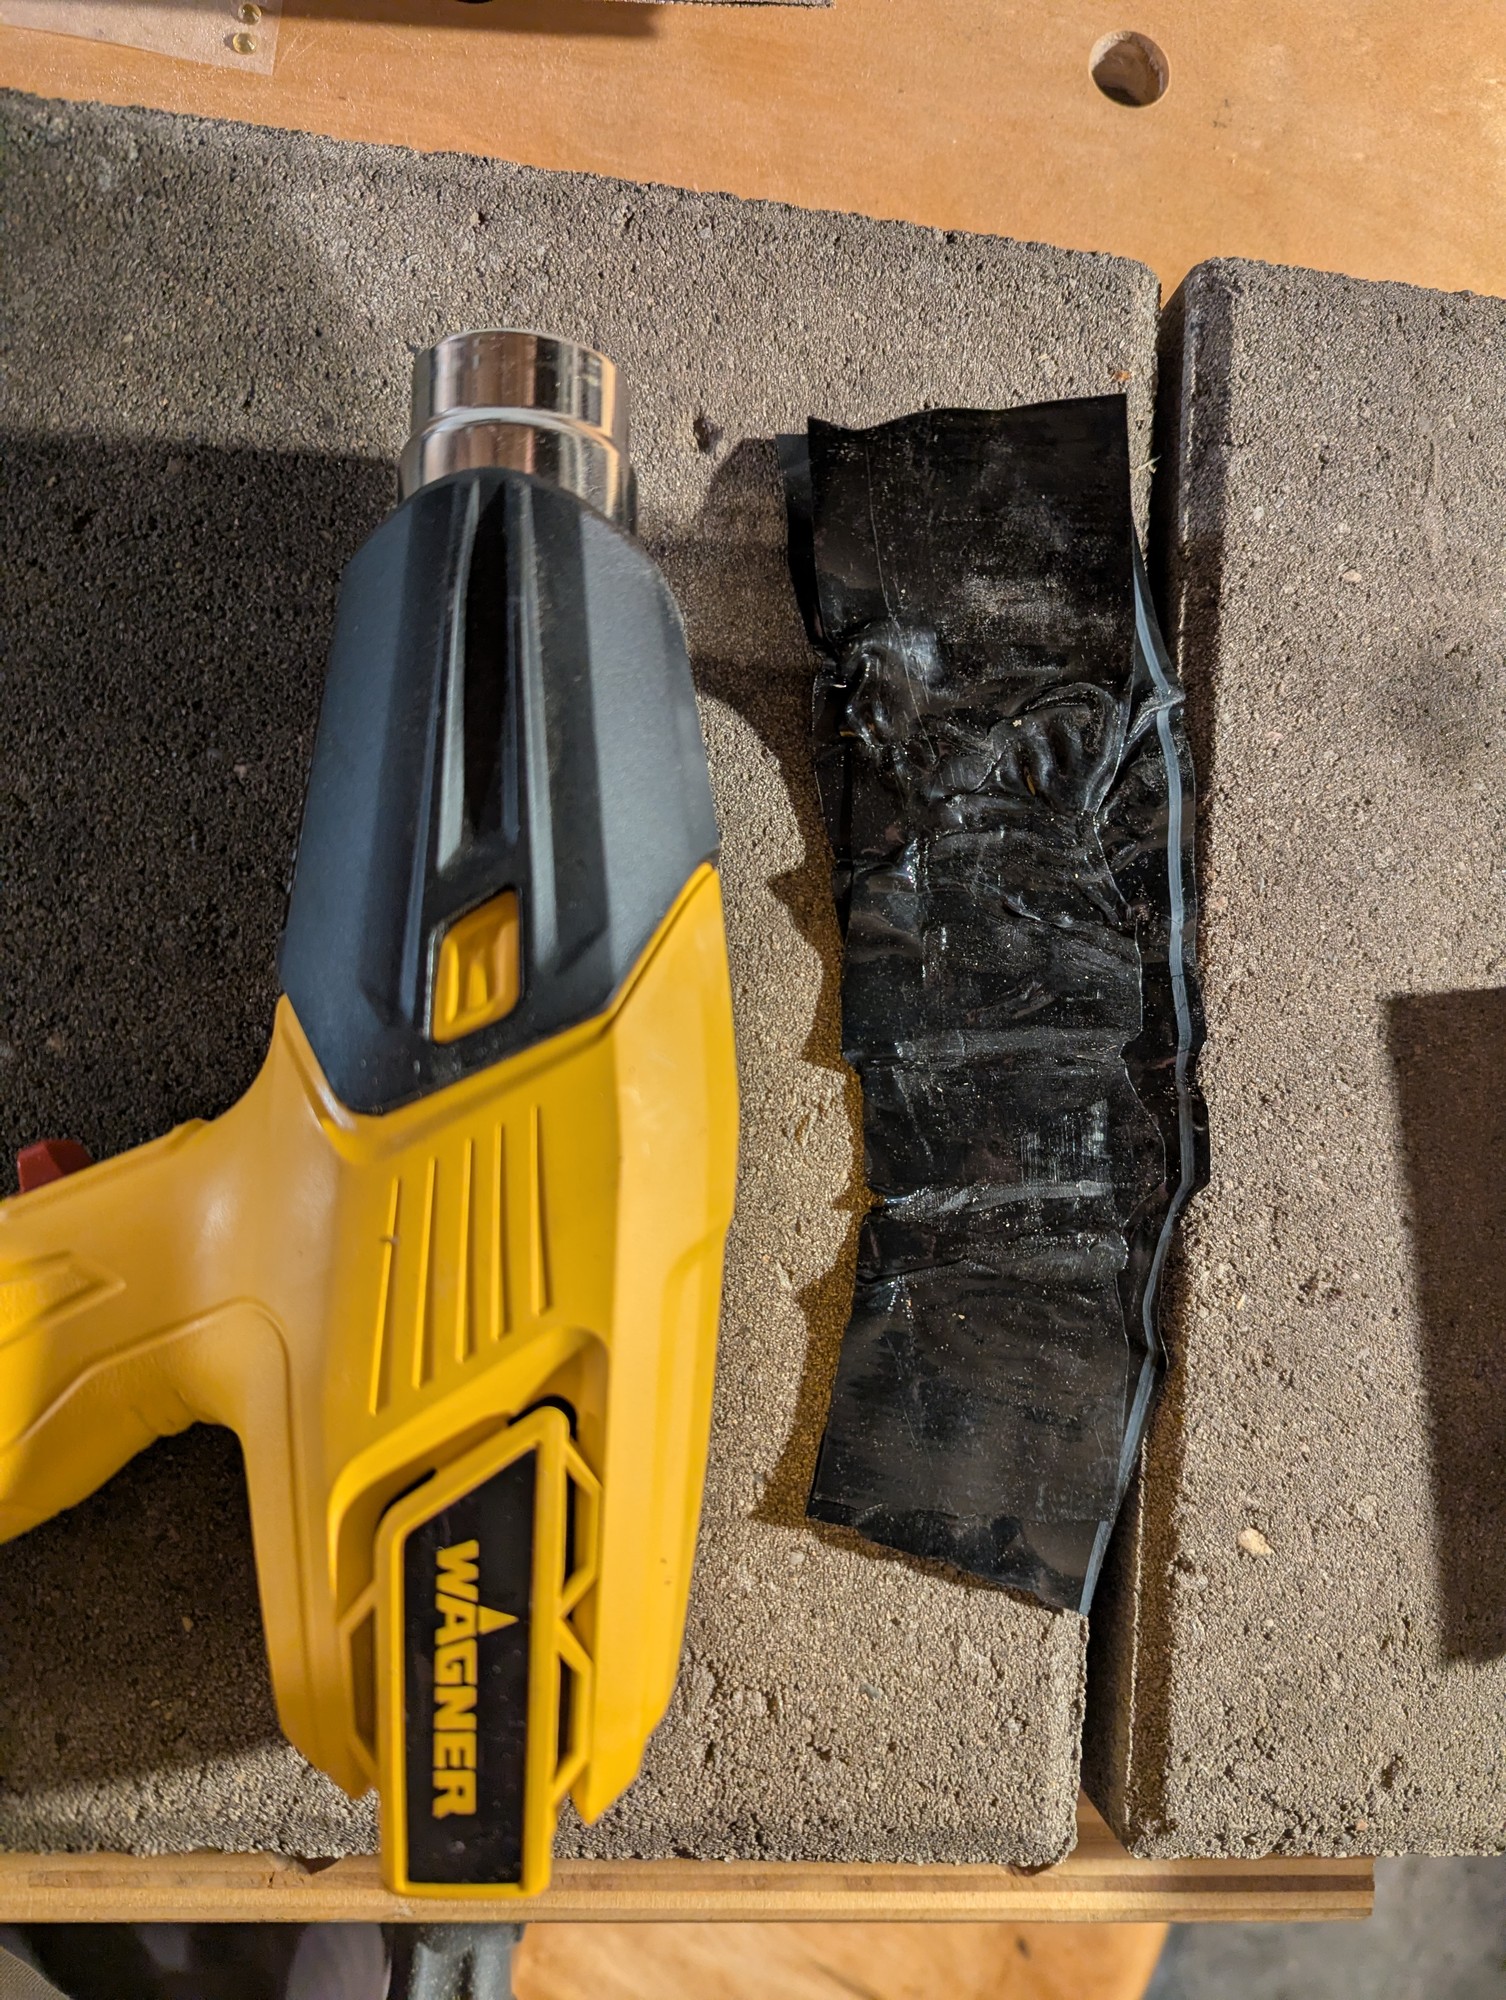
I needed to work around a corner of a shed green roof I'm building in a way that couldn't just be folded. Online sources say you need a specialized heat gun for HDPE welding (and that glues won't adhere).

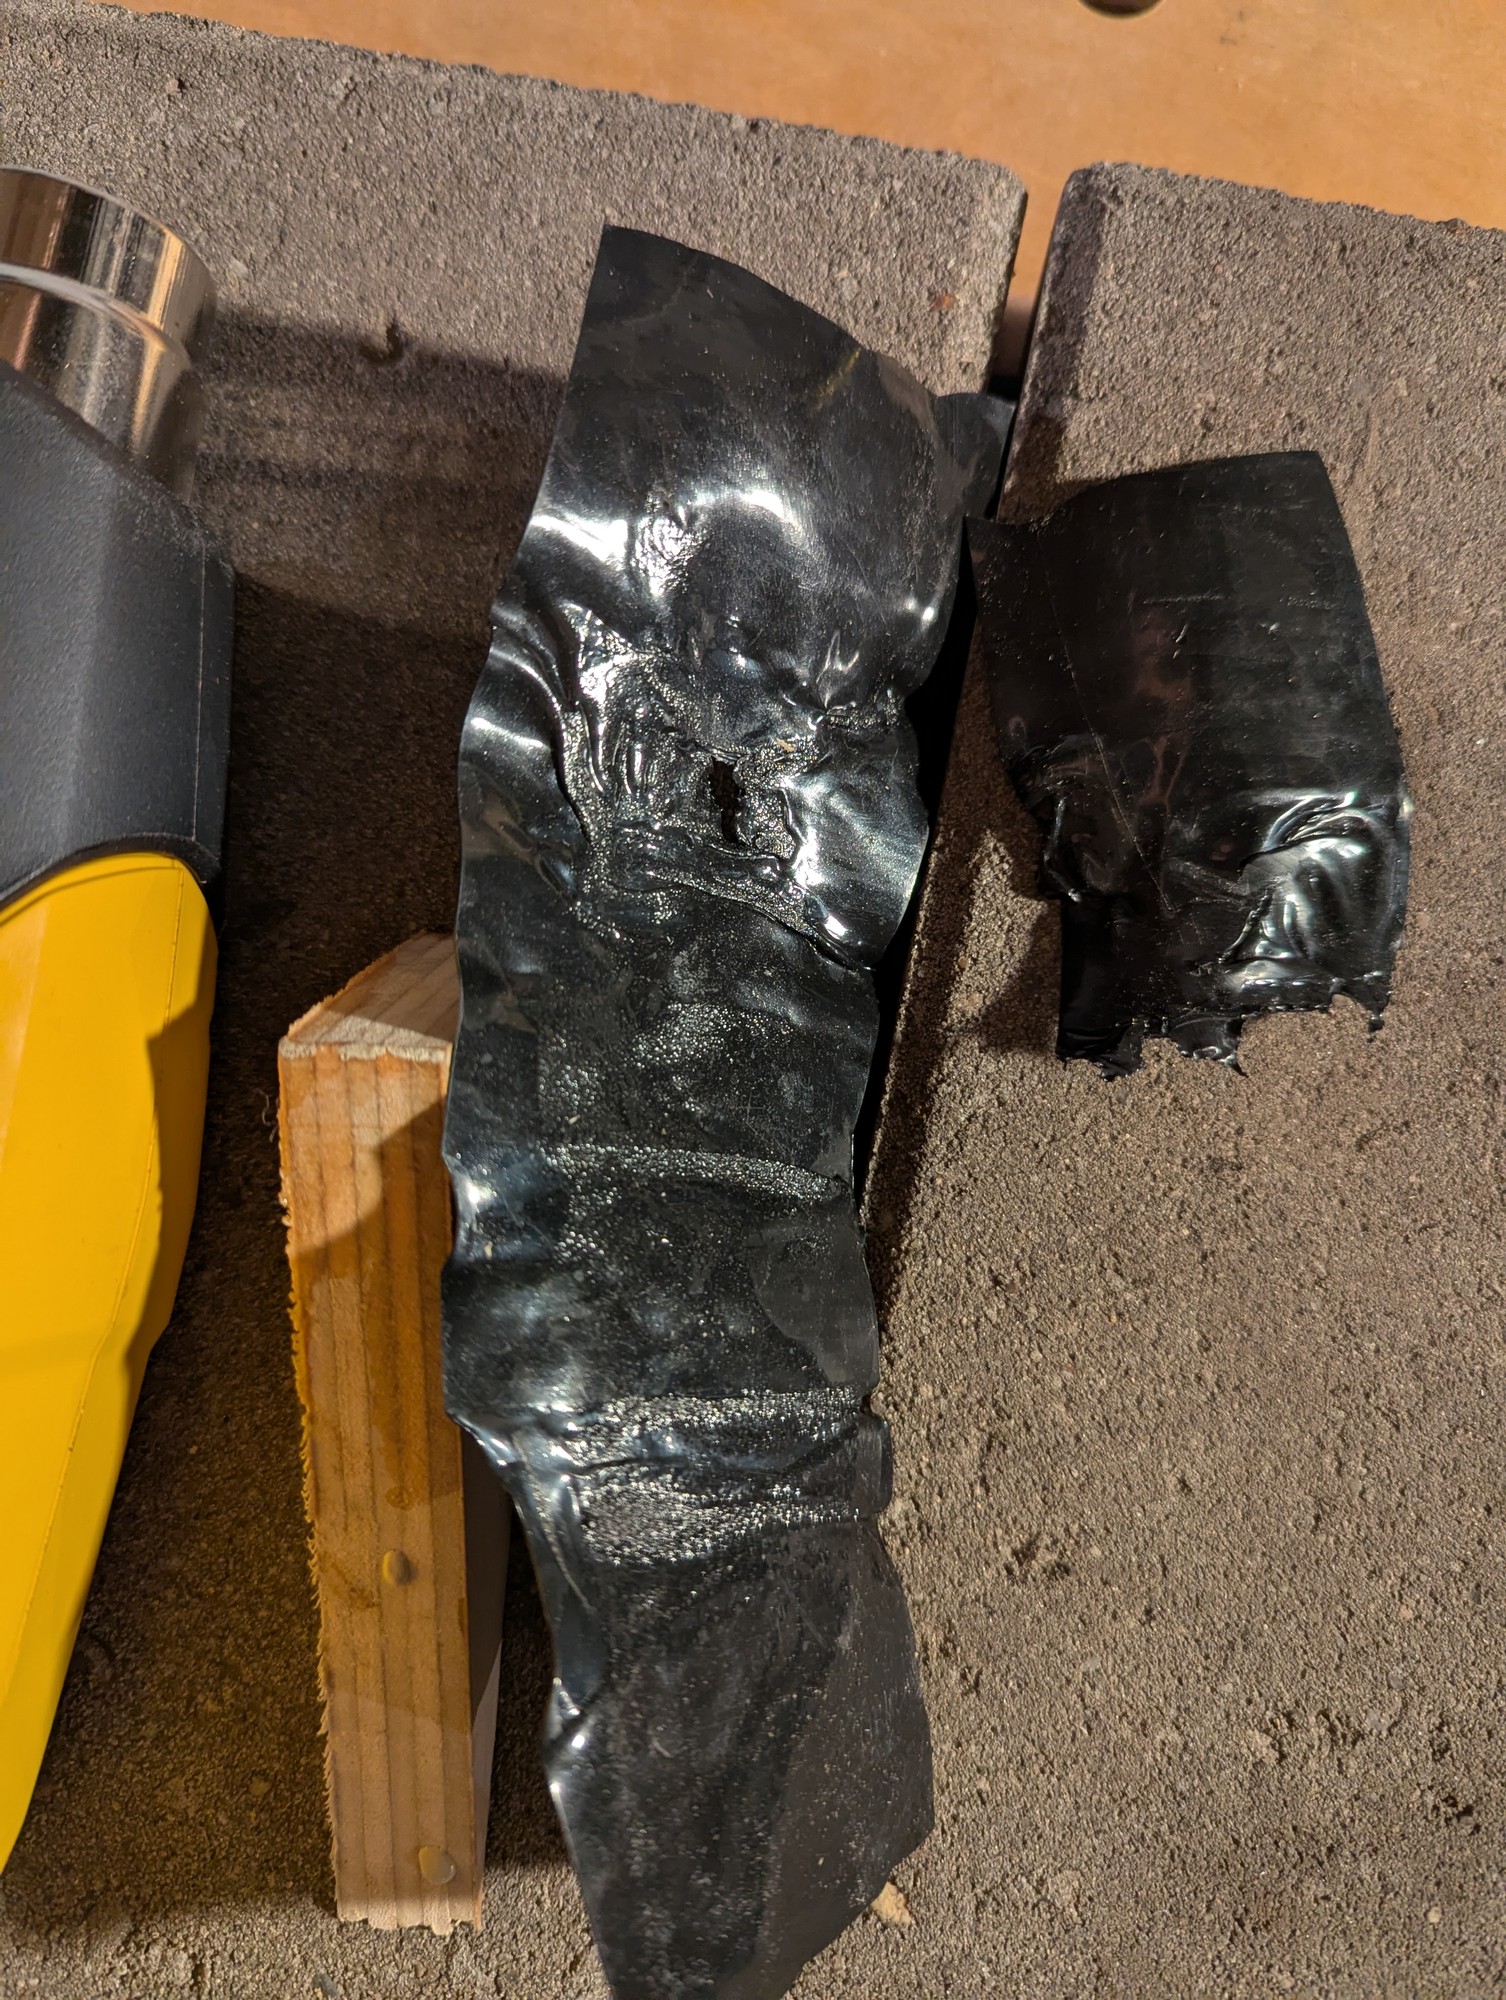
I tested a weld on a scrap:

heat gun and scrap

torn

It stuck well enough to tear the material around the joint.

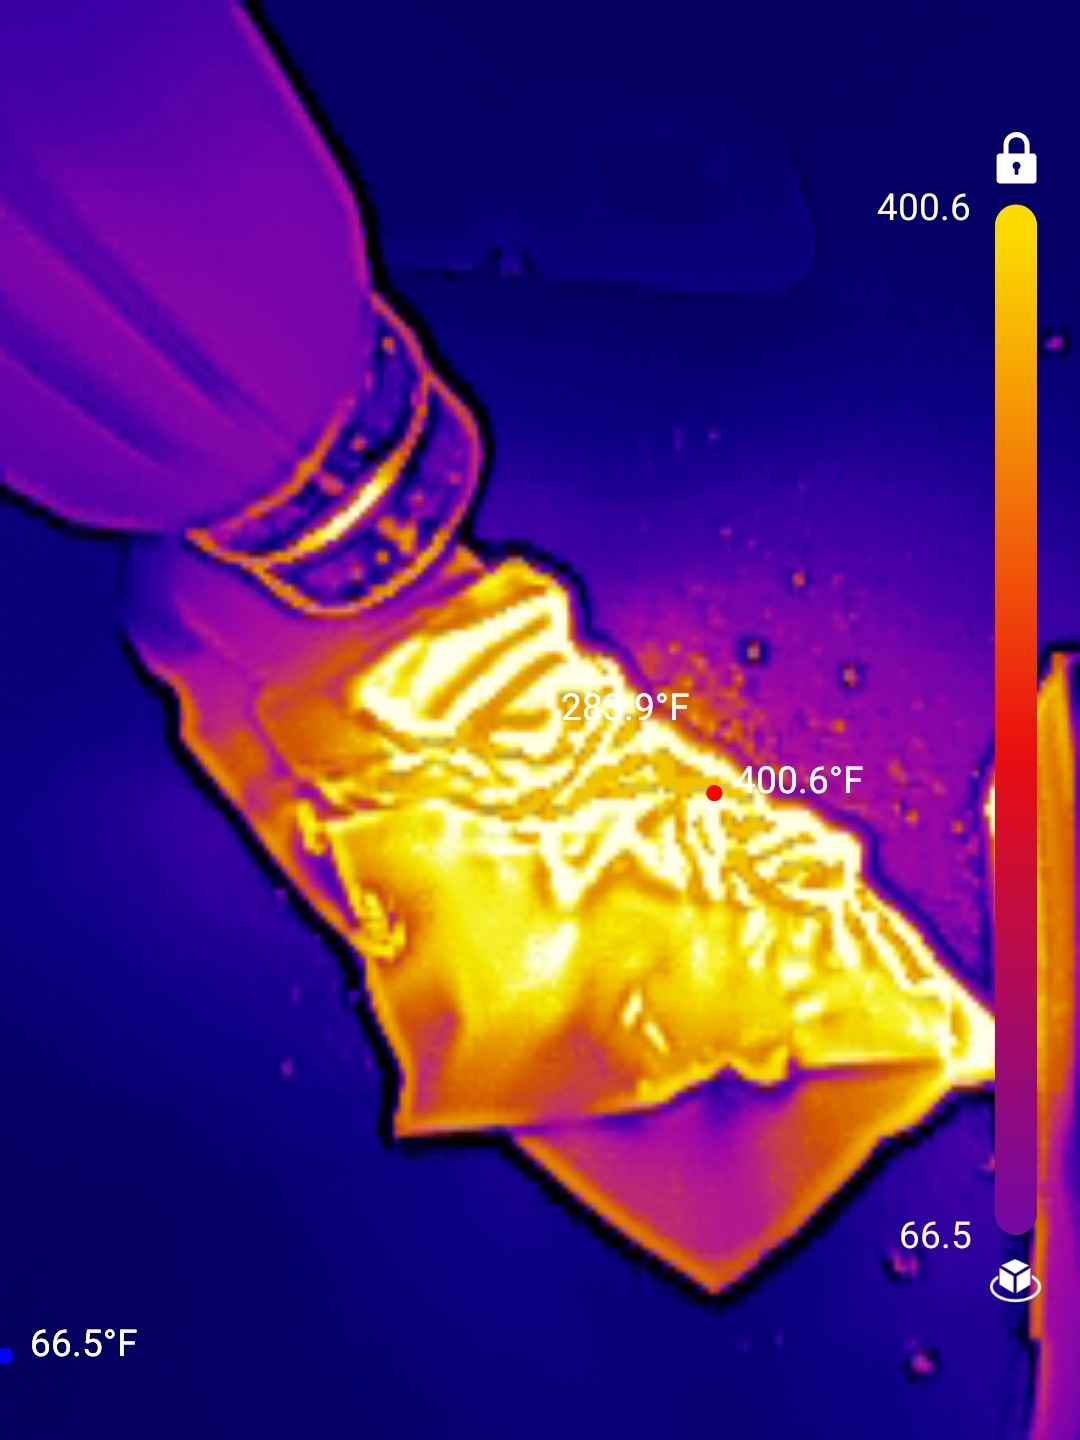
thermal image

The heat gun got it up to about 400⁰F (204⁰C), plenty to make it sticky but also easy to buckle, melt, and tear.

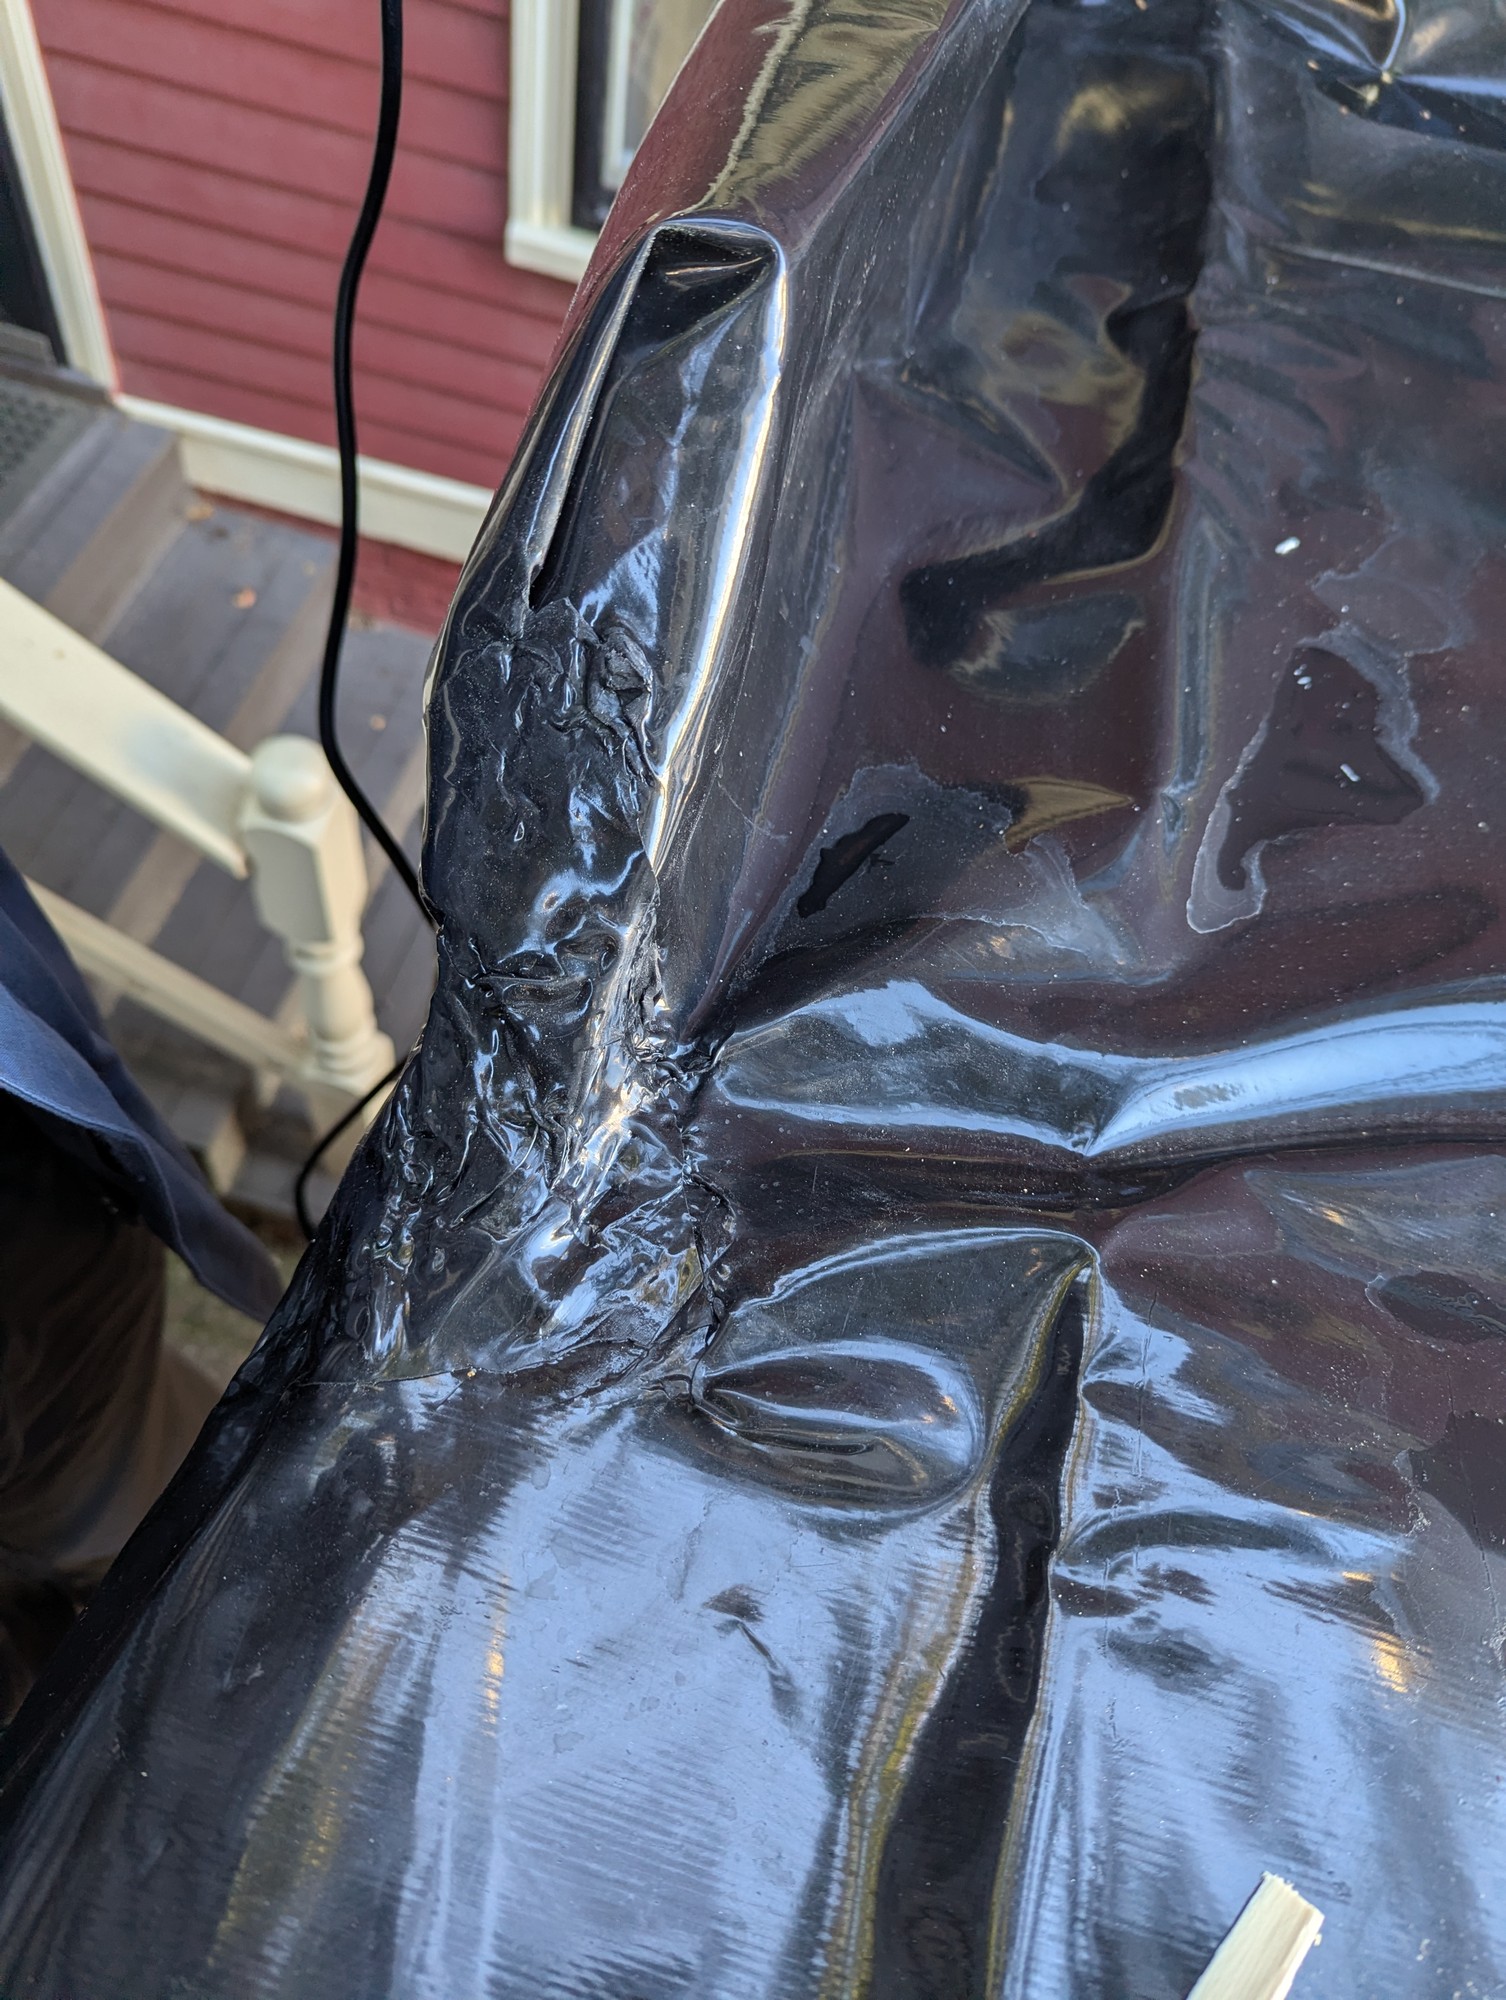
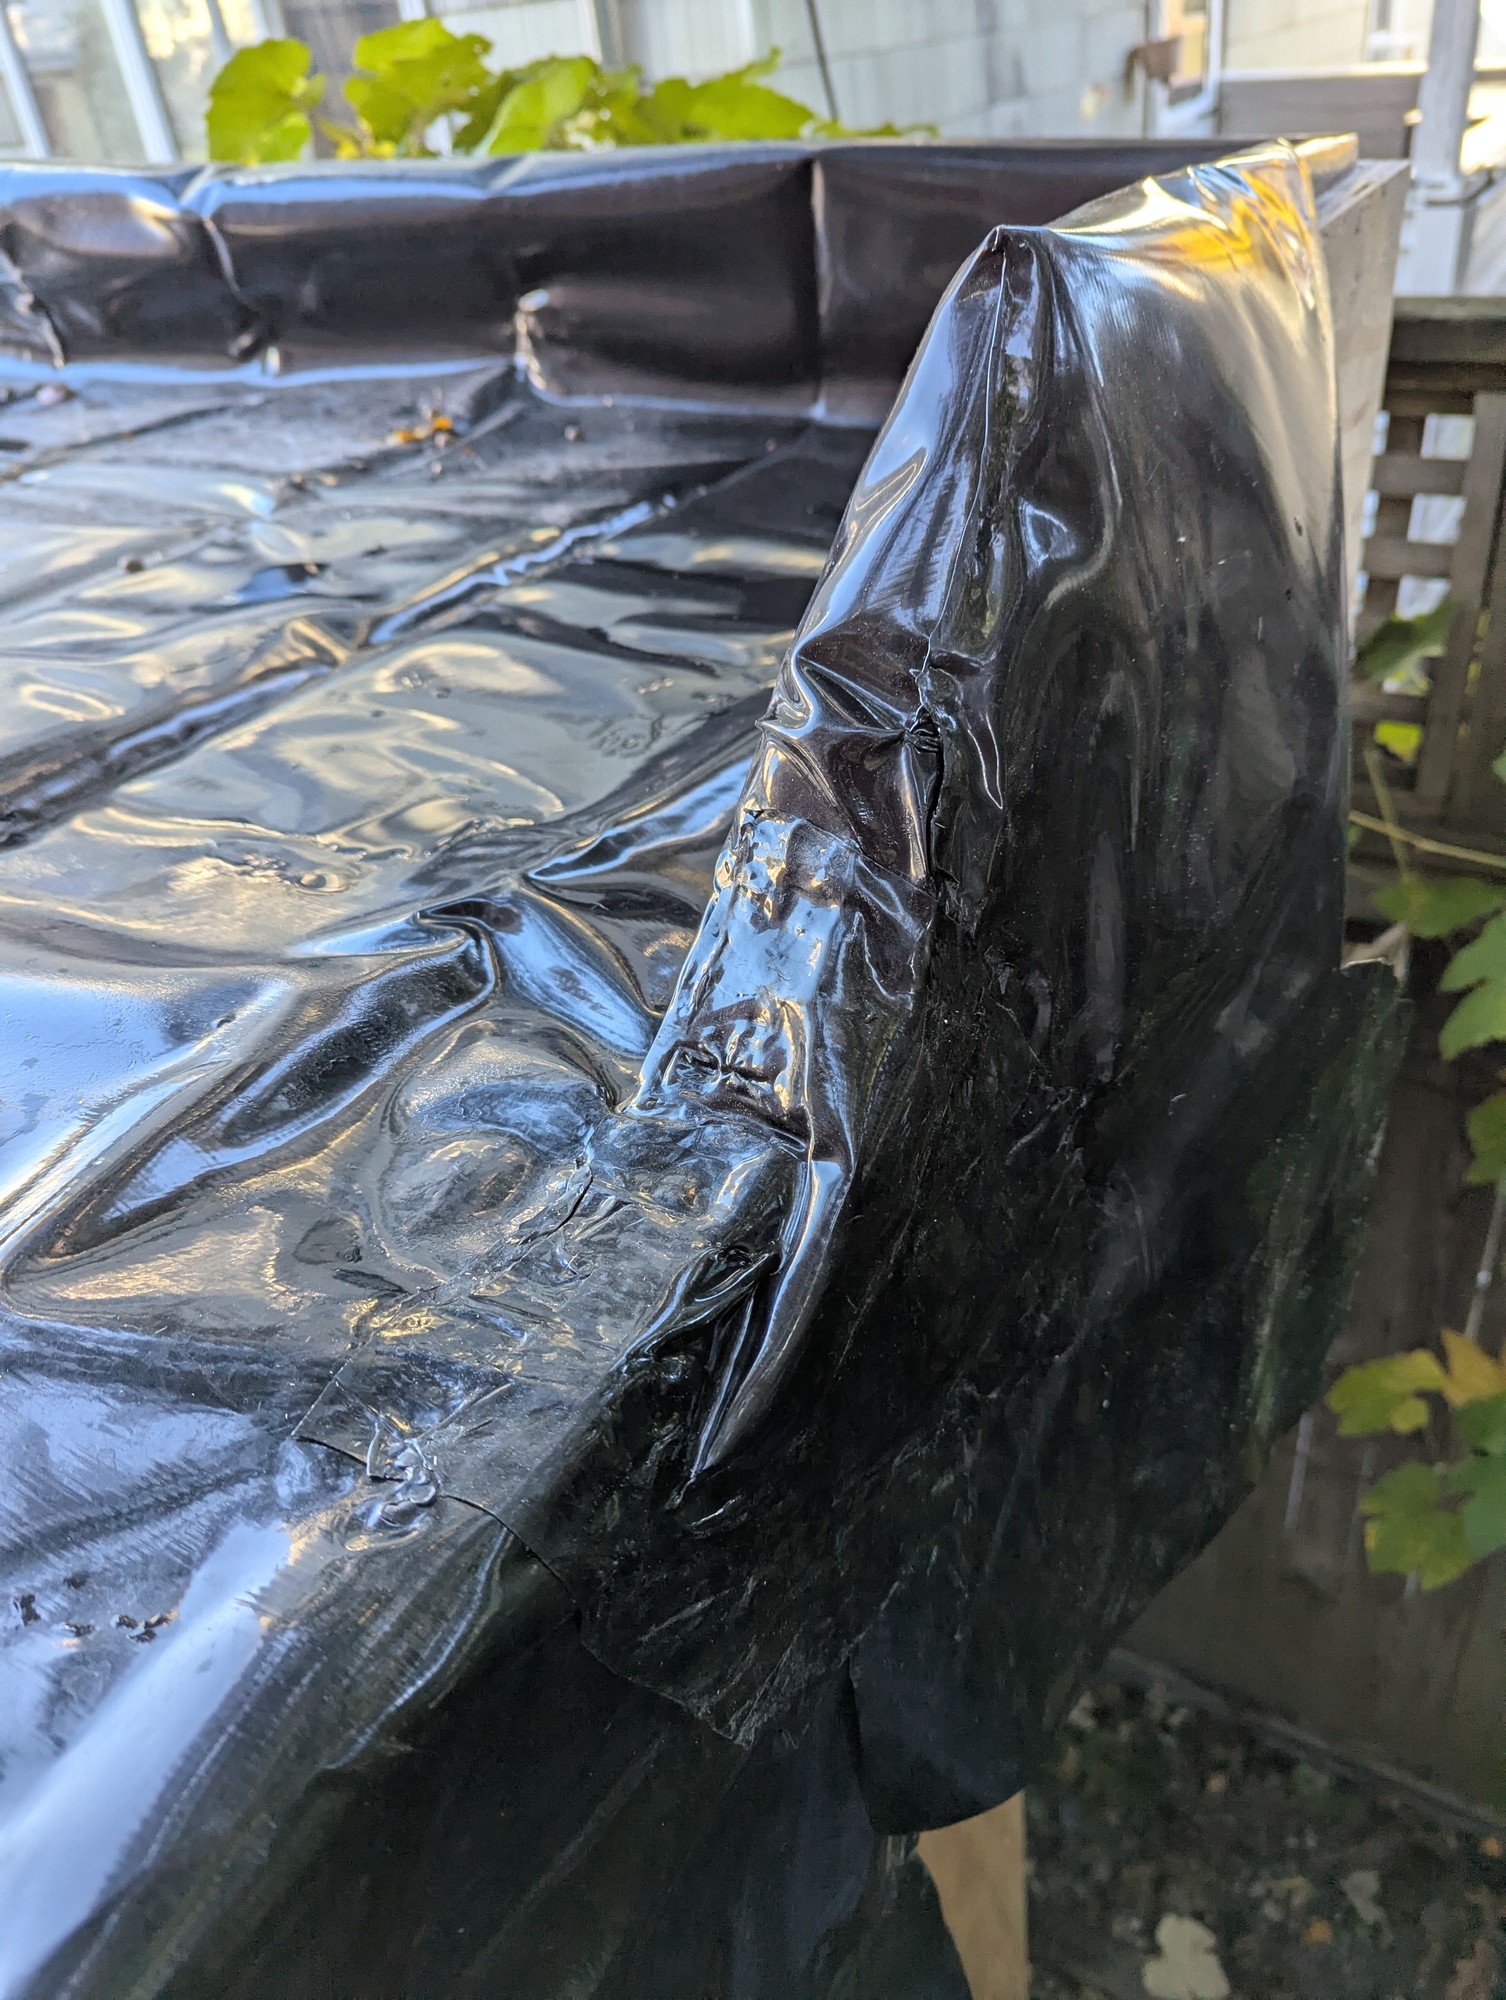
I can see that a specialized tool would be easier, but for a small, low tension/wear, non-critical area, this worked fine. I think it will keep significant water from seeping into the corner.

corner

Successful (if messy) welding HDPE pond liner with a regular heat gun
3


I'm working on a shed at home and, as I was ordering materials, found that OSB / chip board is much cheaper than plywood.

Why would an apartment building use plywood, when I imagine it'll be covered by insulation/vapor barrier anyway?

Why use plywood instead of OSB for sheathing?
4


cross-posted from: https://discuss.tchncs.de/post/66988984

What I have

I have an old Acer Aspire A515-51G and I also have a desire to have a home server. In combination this creates a need for the laptop to carry more HDDs than it can from factory. Usually it can take one M.2 SSD and one 2.5" SATA drive.

What I want

I want to make the laptop able to run at least 4 HDDs in RAID 5 for storage and have one SSD as boot drive.

What I did

The buying phase

  • 4 HDDs
  • M.2 to SATA adapter
  • 12V/5V SATA power converter
  • 12V 10A power supply

The designing phase

I needed space to hold the HDDs, so I designed a 3D printed a cage to attach to the bottom of my laptop. Two 80mm fans can be attach to it. You can see it on printables. Also I remixed a tray (here is the original) so the HDDs can slide in and out of the cage.

.

The assembly phase

A cutout at the bottom of the laptop was needed to give access to the SATA ports of the adapter.

I put a 2.5" SSD into the already present place for it in the laptop.

Then the cage was attached to the laptop, the HDDs were put in their trays, the trays inside the cage and the cables attached to the adapter and HDDs.

A laptop with a DIY HDD cage carrying 4 HDDs.
5


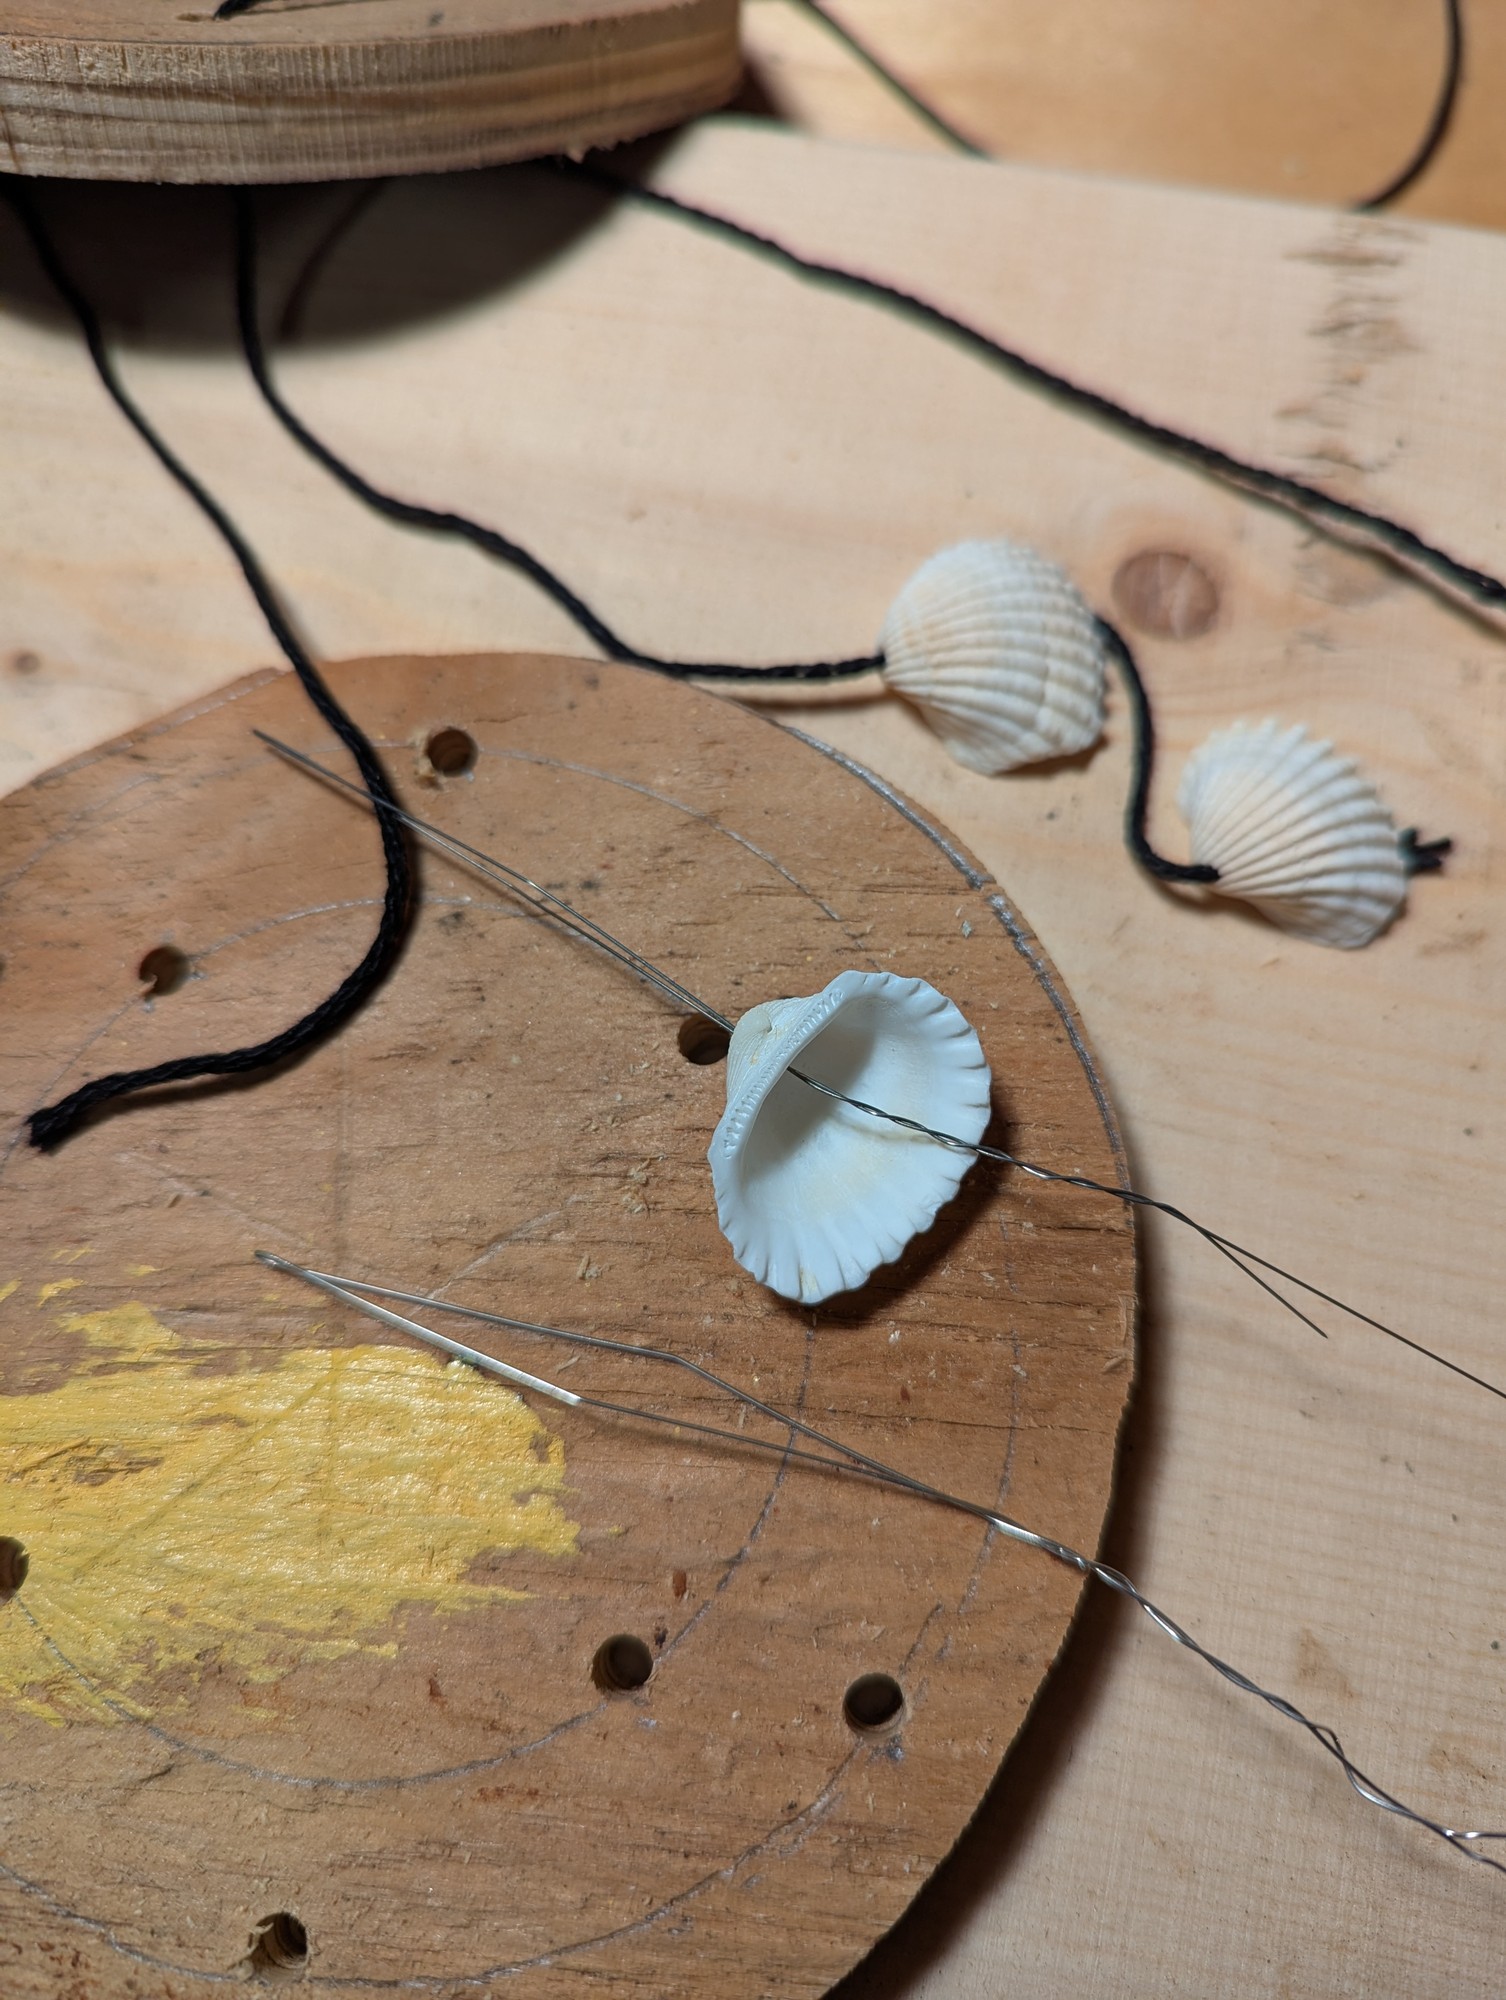
Setting up a kid's craft, I needed a way to get yarn through small holes for decorations. The idea is similar to a needle threader, just a bit bigger. The brass bead (just out of frame, sorry) on the end of the string makes a nice handle.

Threading tools out of old steel guitar strings
6


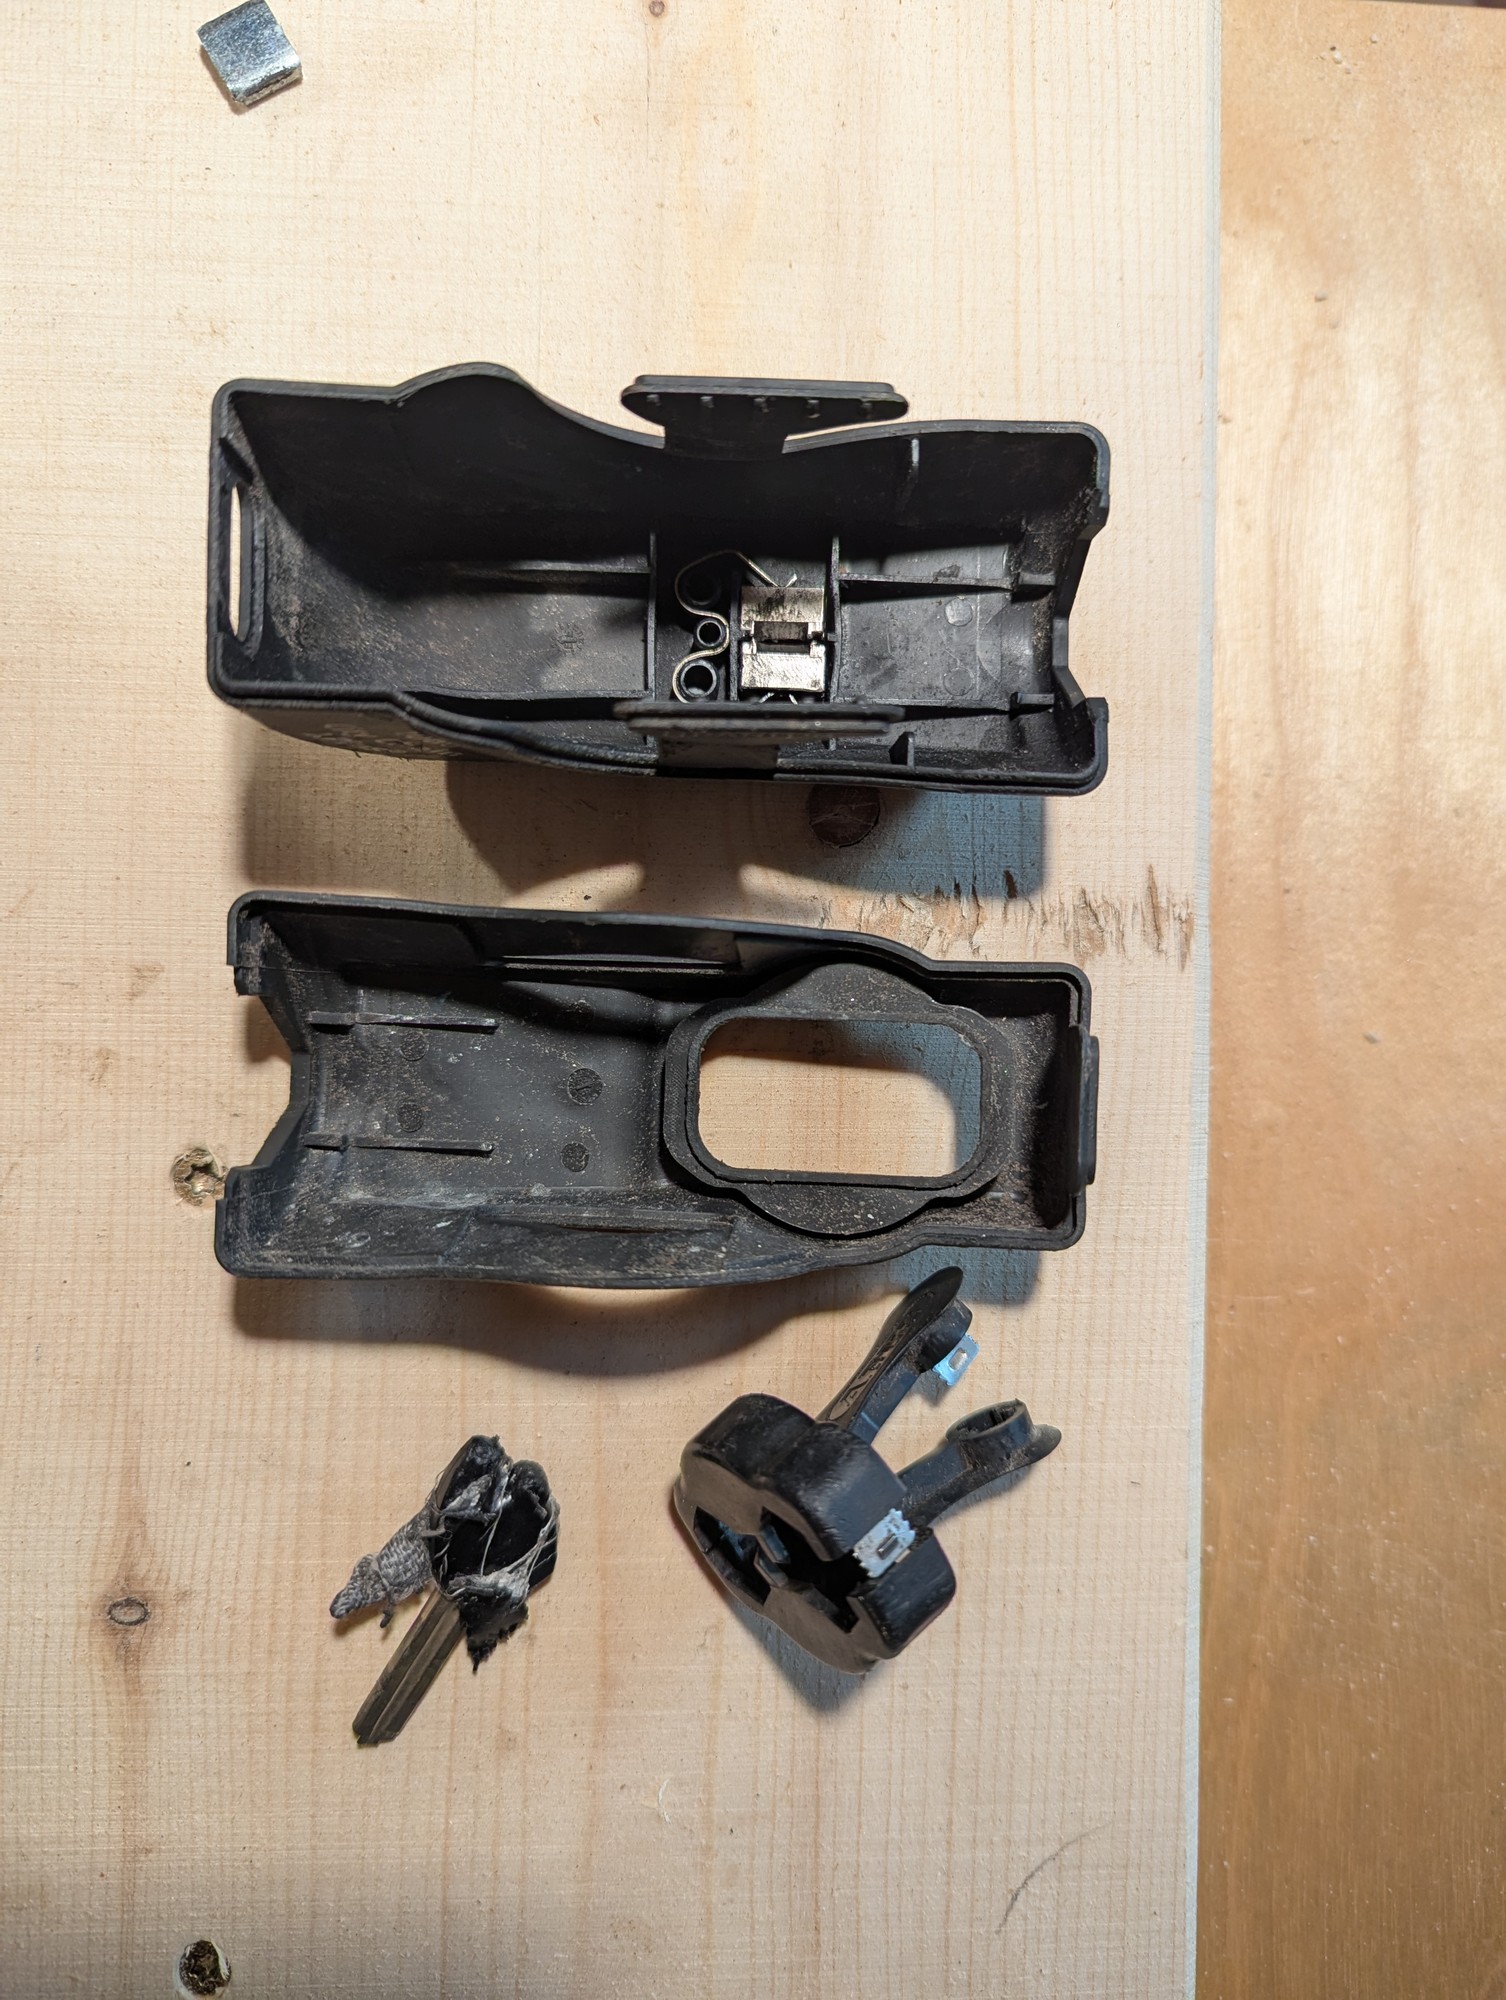
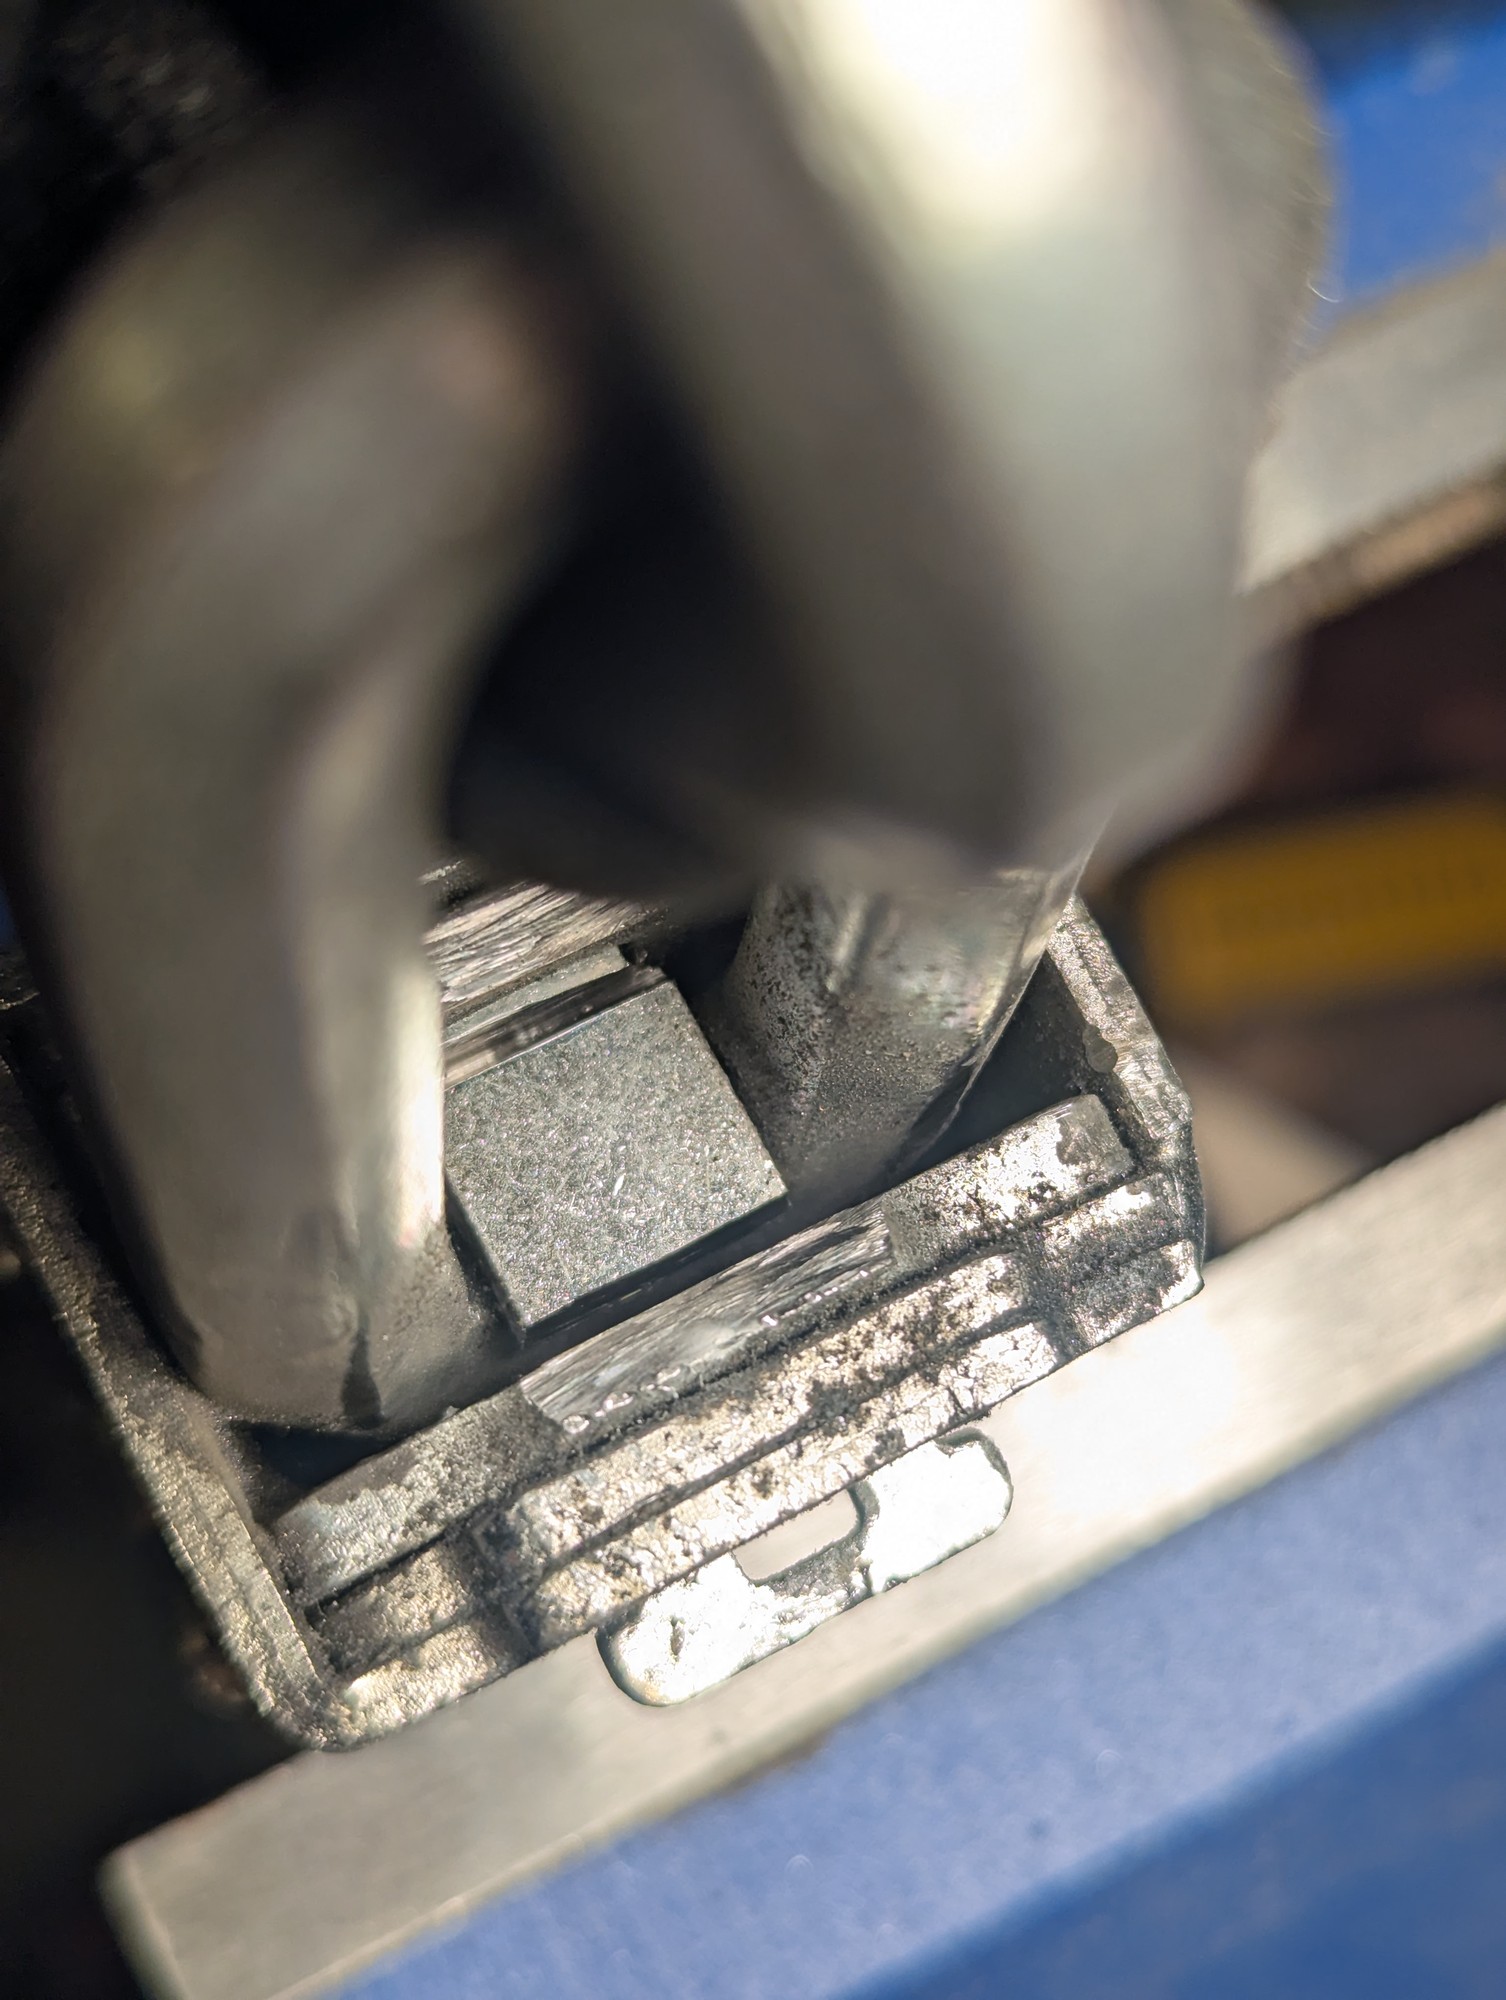
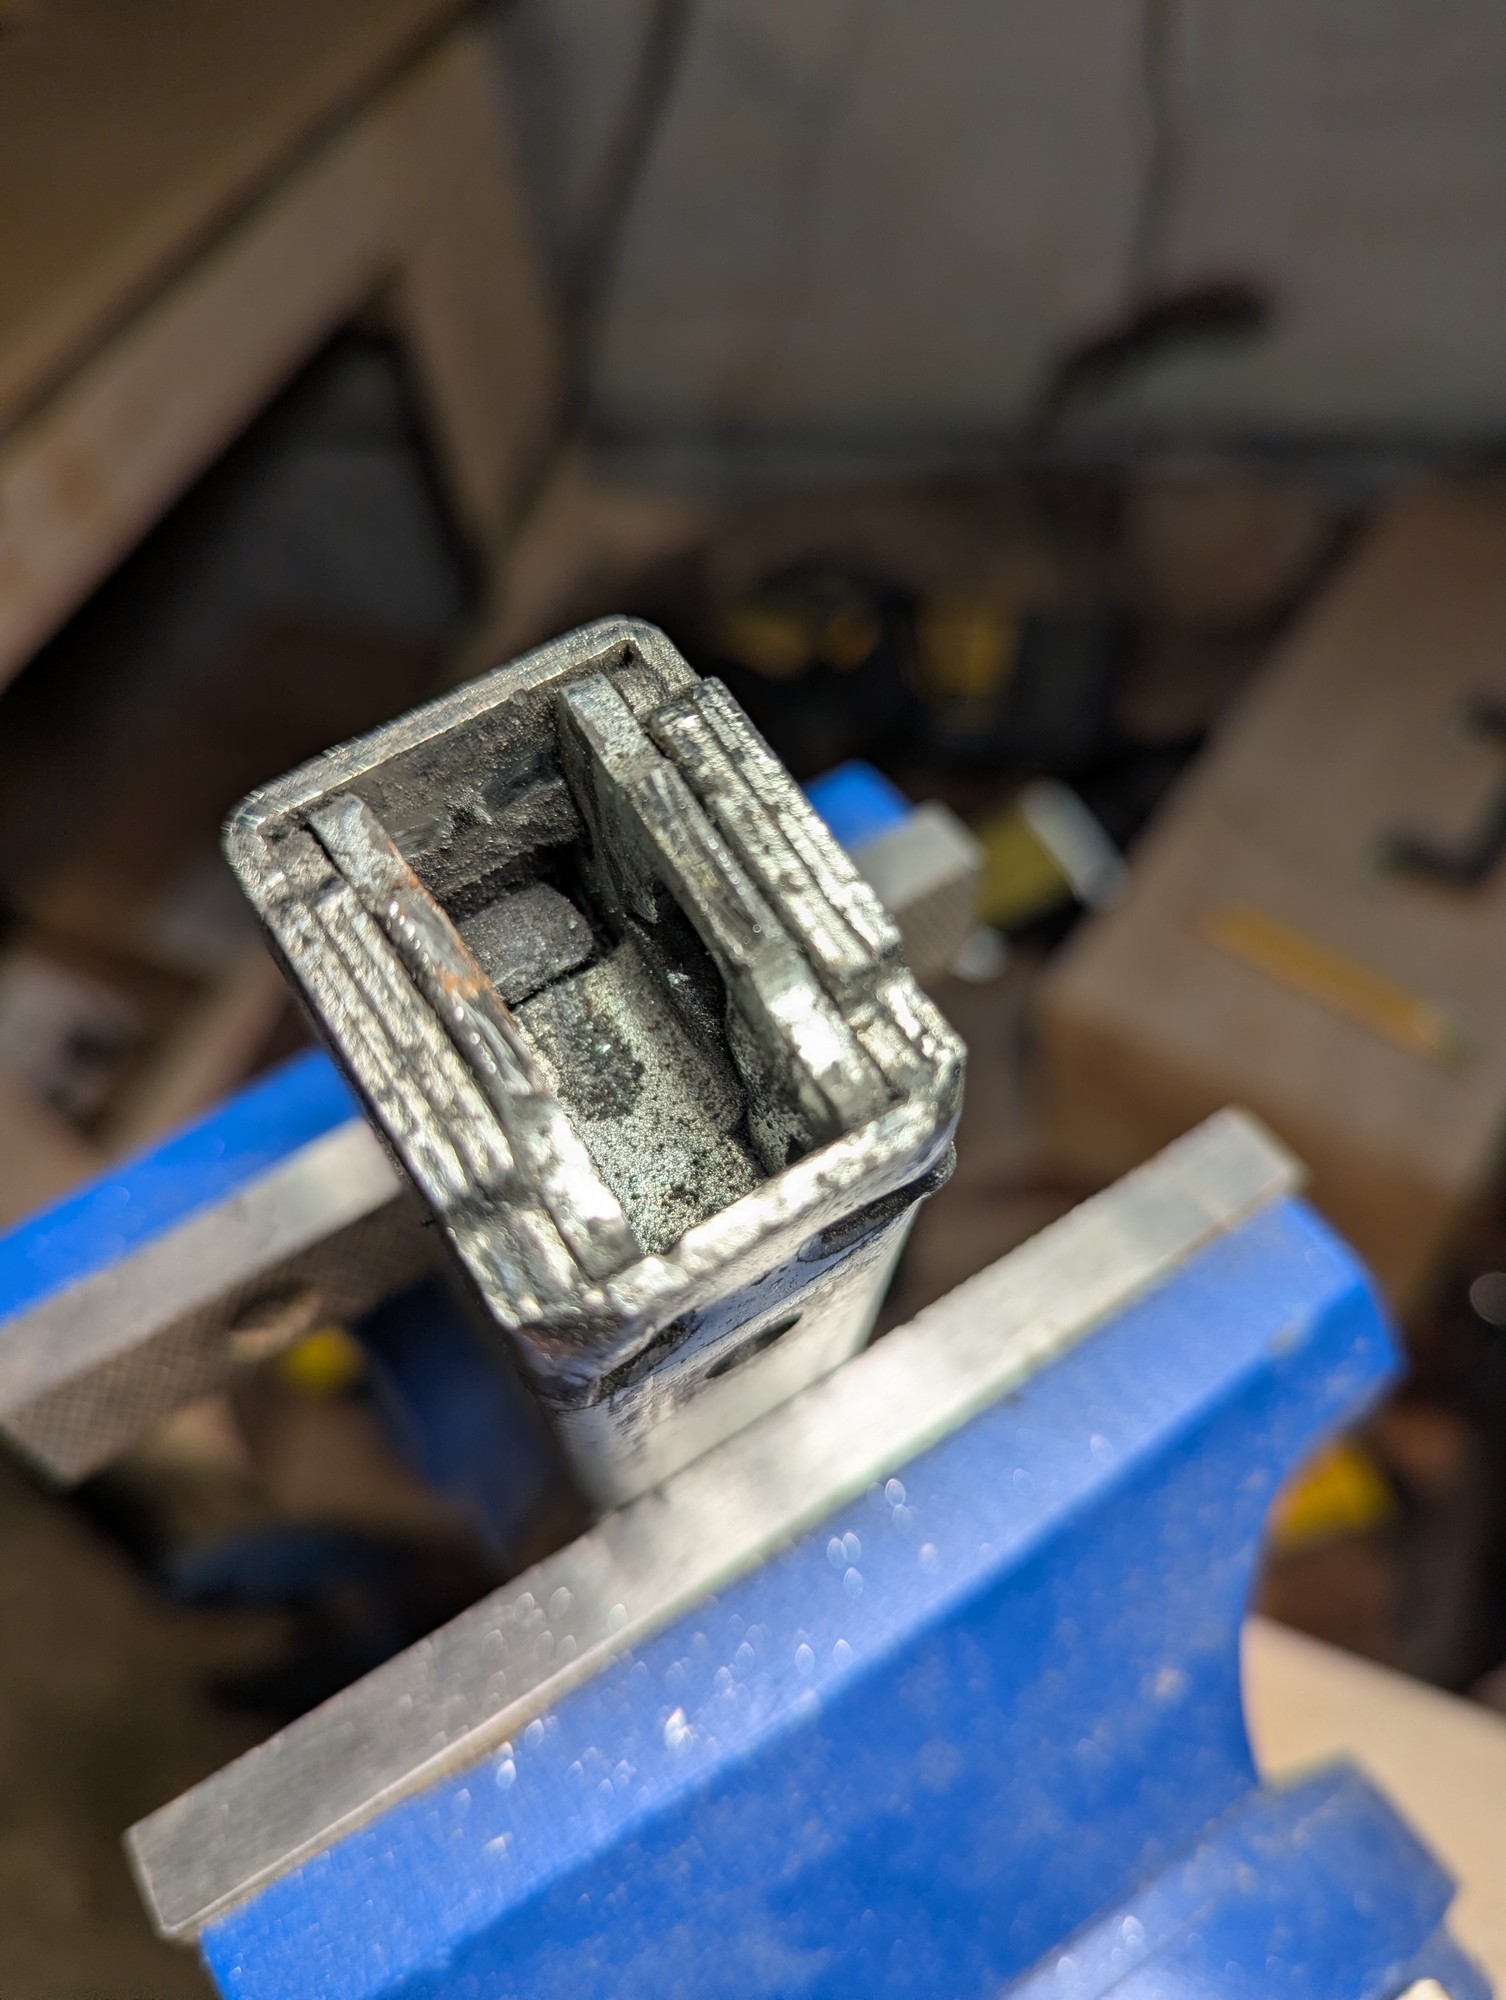
The key broke off inside my Abus GRANIT CityChain XPlus™ 1060. A new one is $250 but a new quality padlock (went with Paclock) is $60, so I spent a while Dremeling through the lock's case to extract the captive link. It did not reveal a way to remove the key core.

The plastic case pops off easily.

7
submitted 3 months ago by to c/diy@beehaw.org


My daughter tore a large rip in her favorite overalls (they already had a hole in the knee but this was a long vertical tear coming off the hole she wanted). I decided to try mending the tear and instead of trying to hide it, which I wasn't confident I could do well, to just make the mended tear part of some decorative embroidery. I think the final result turned out really nice looking!

I also did some backstitching around the edges of the hole in the knee that she wanted to keep just to hopefully stop it from widening or fraying even more. It's pretty difficult to see since I did it in white.

8


Top comes out on the roof:

Not sure what happens below. Haven't gone under the house to inspect. Seems like a vent that travels through the wall space, but unclear why it would do that.

Any ideas what its purpose is?

9


The water heater started leaking, the hydrofor started leaking, the pipes had several dead ends, no of it fastened to the walls, and what's not clear in the 1st picture is the complete mess at the pump.

New water heater, new hydropress, pipes mounted to the walls, re-routed electricity. Re-used what I could, but much is new. My pride: I could not get a flens that fitted the pump (yeah, an industrial one of twice the price of a similar jetpump). I found I could remove the flens and fit a coupling I have in a box for over 30 years and survived 3 moves. Removing it was exciting, it had been in place for 40+ years but I managed without damaging the cast irons pump housing.

There is still some 'floating' pipes to fix, but over 95% of the job is done. Man, did that improve the water flow !!!

10
In place (lemmy.world)
submitted 11 months ago by to c/diy@beehaw.org


And there it stands. Still a lot of work to do, but there will be grilling this weekend!

11


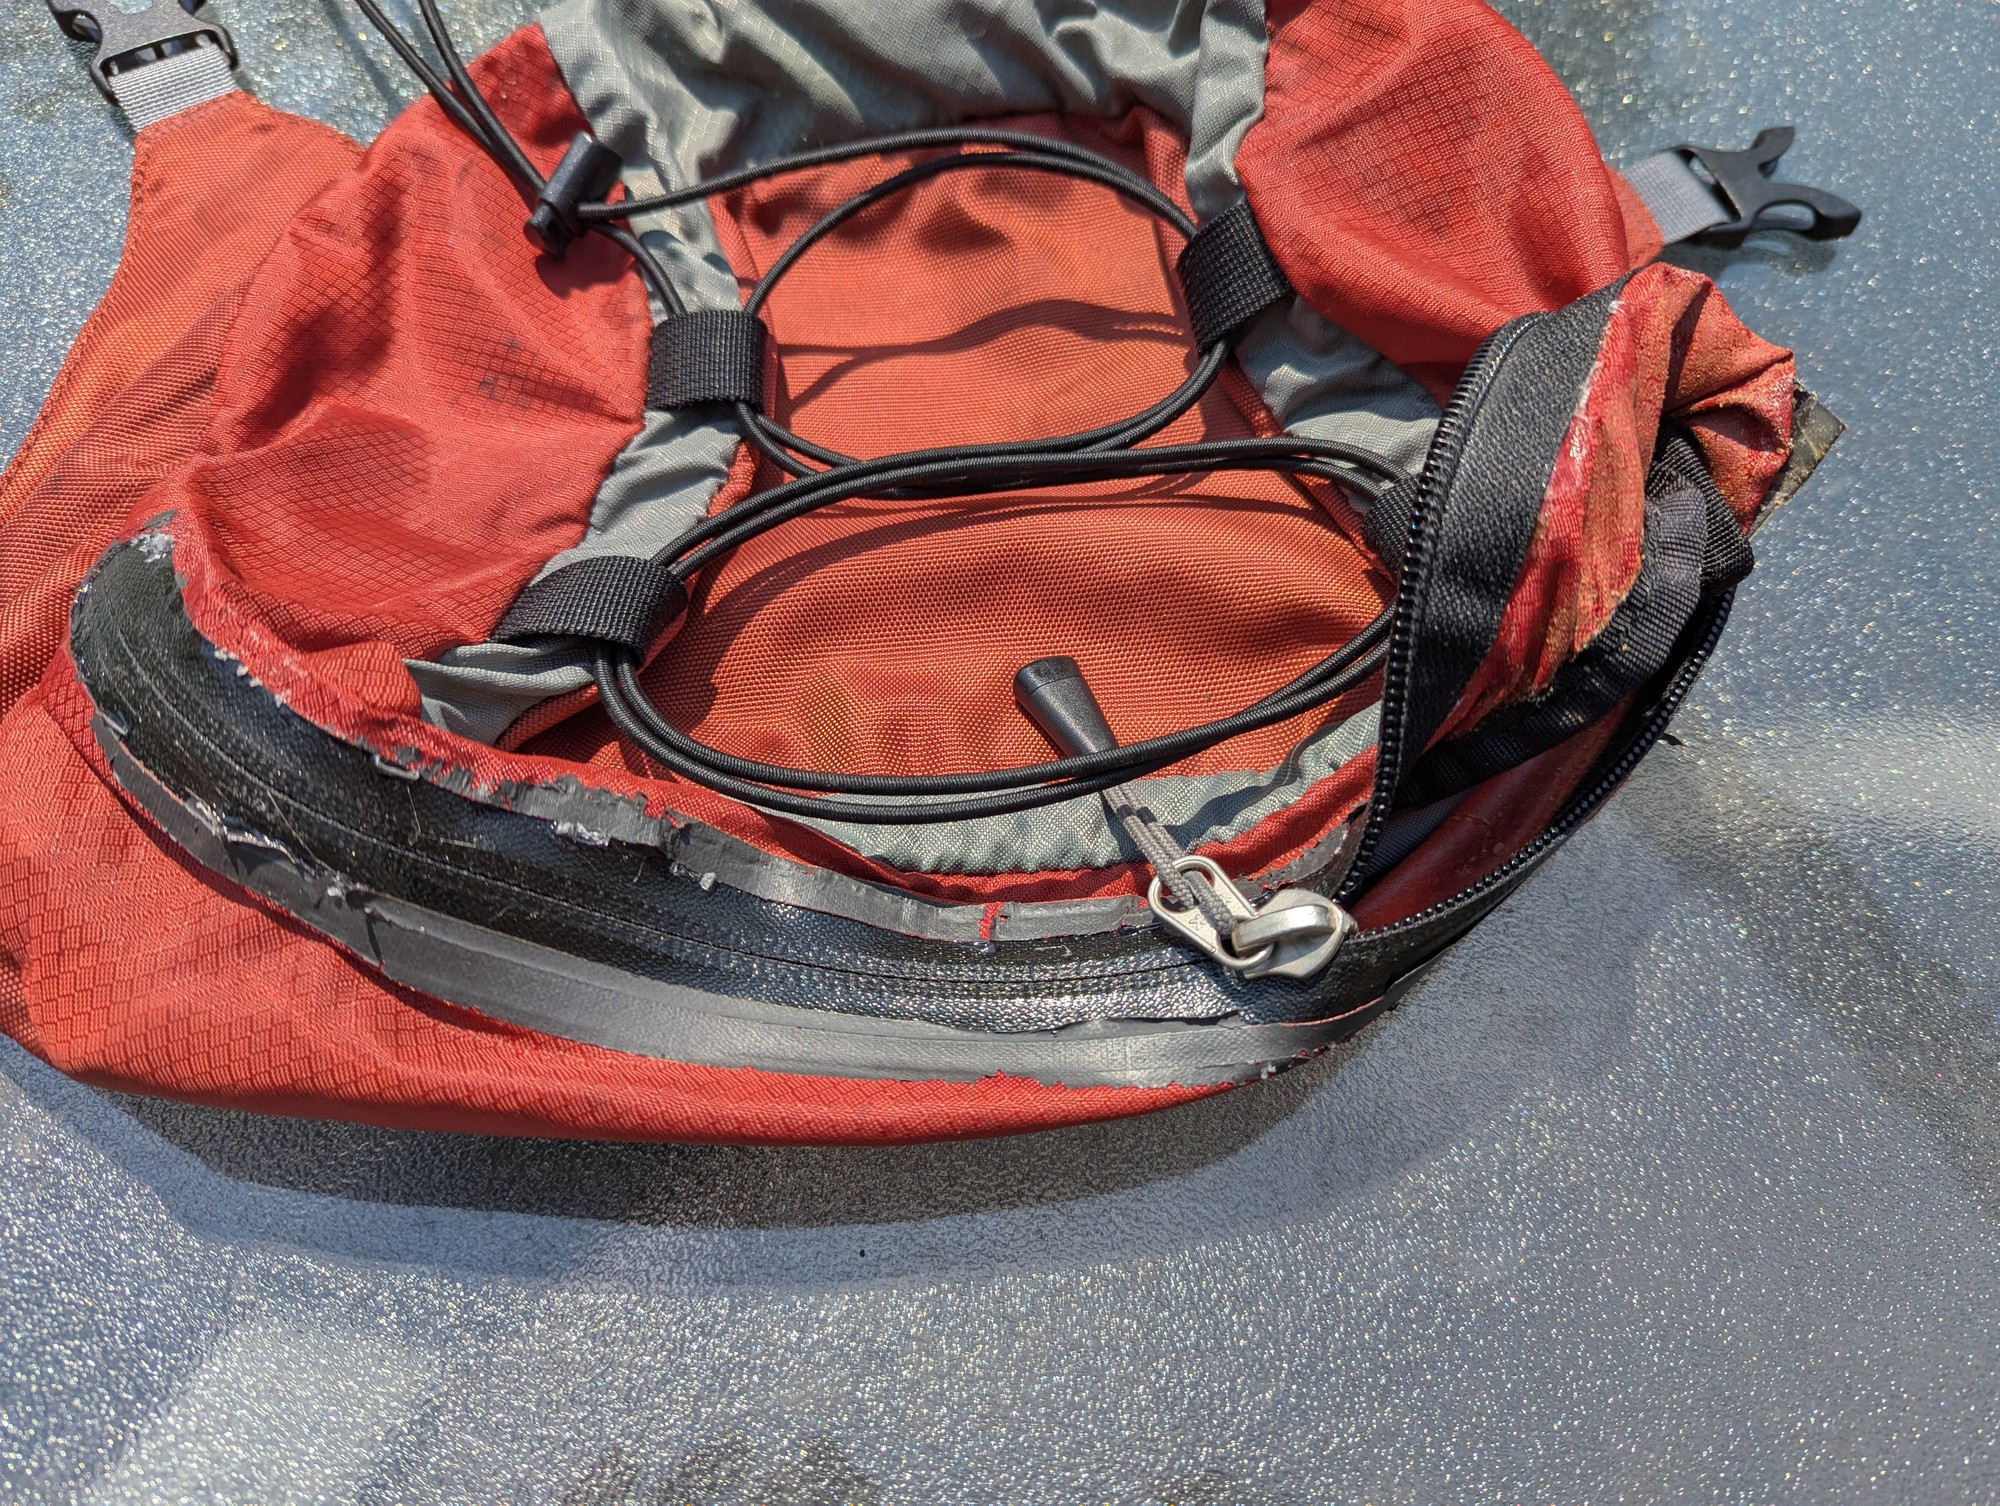
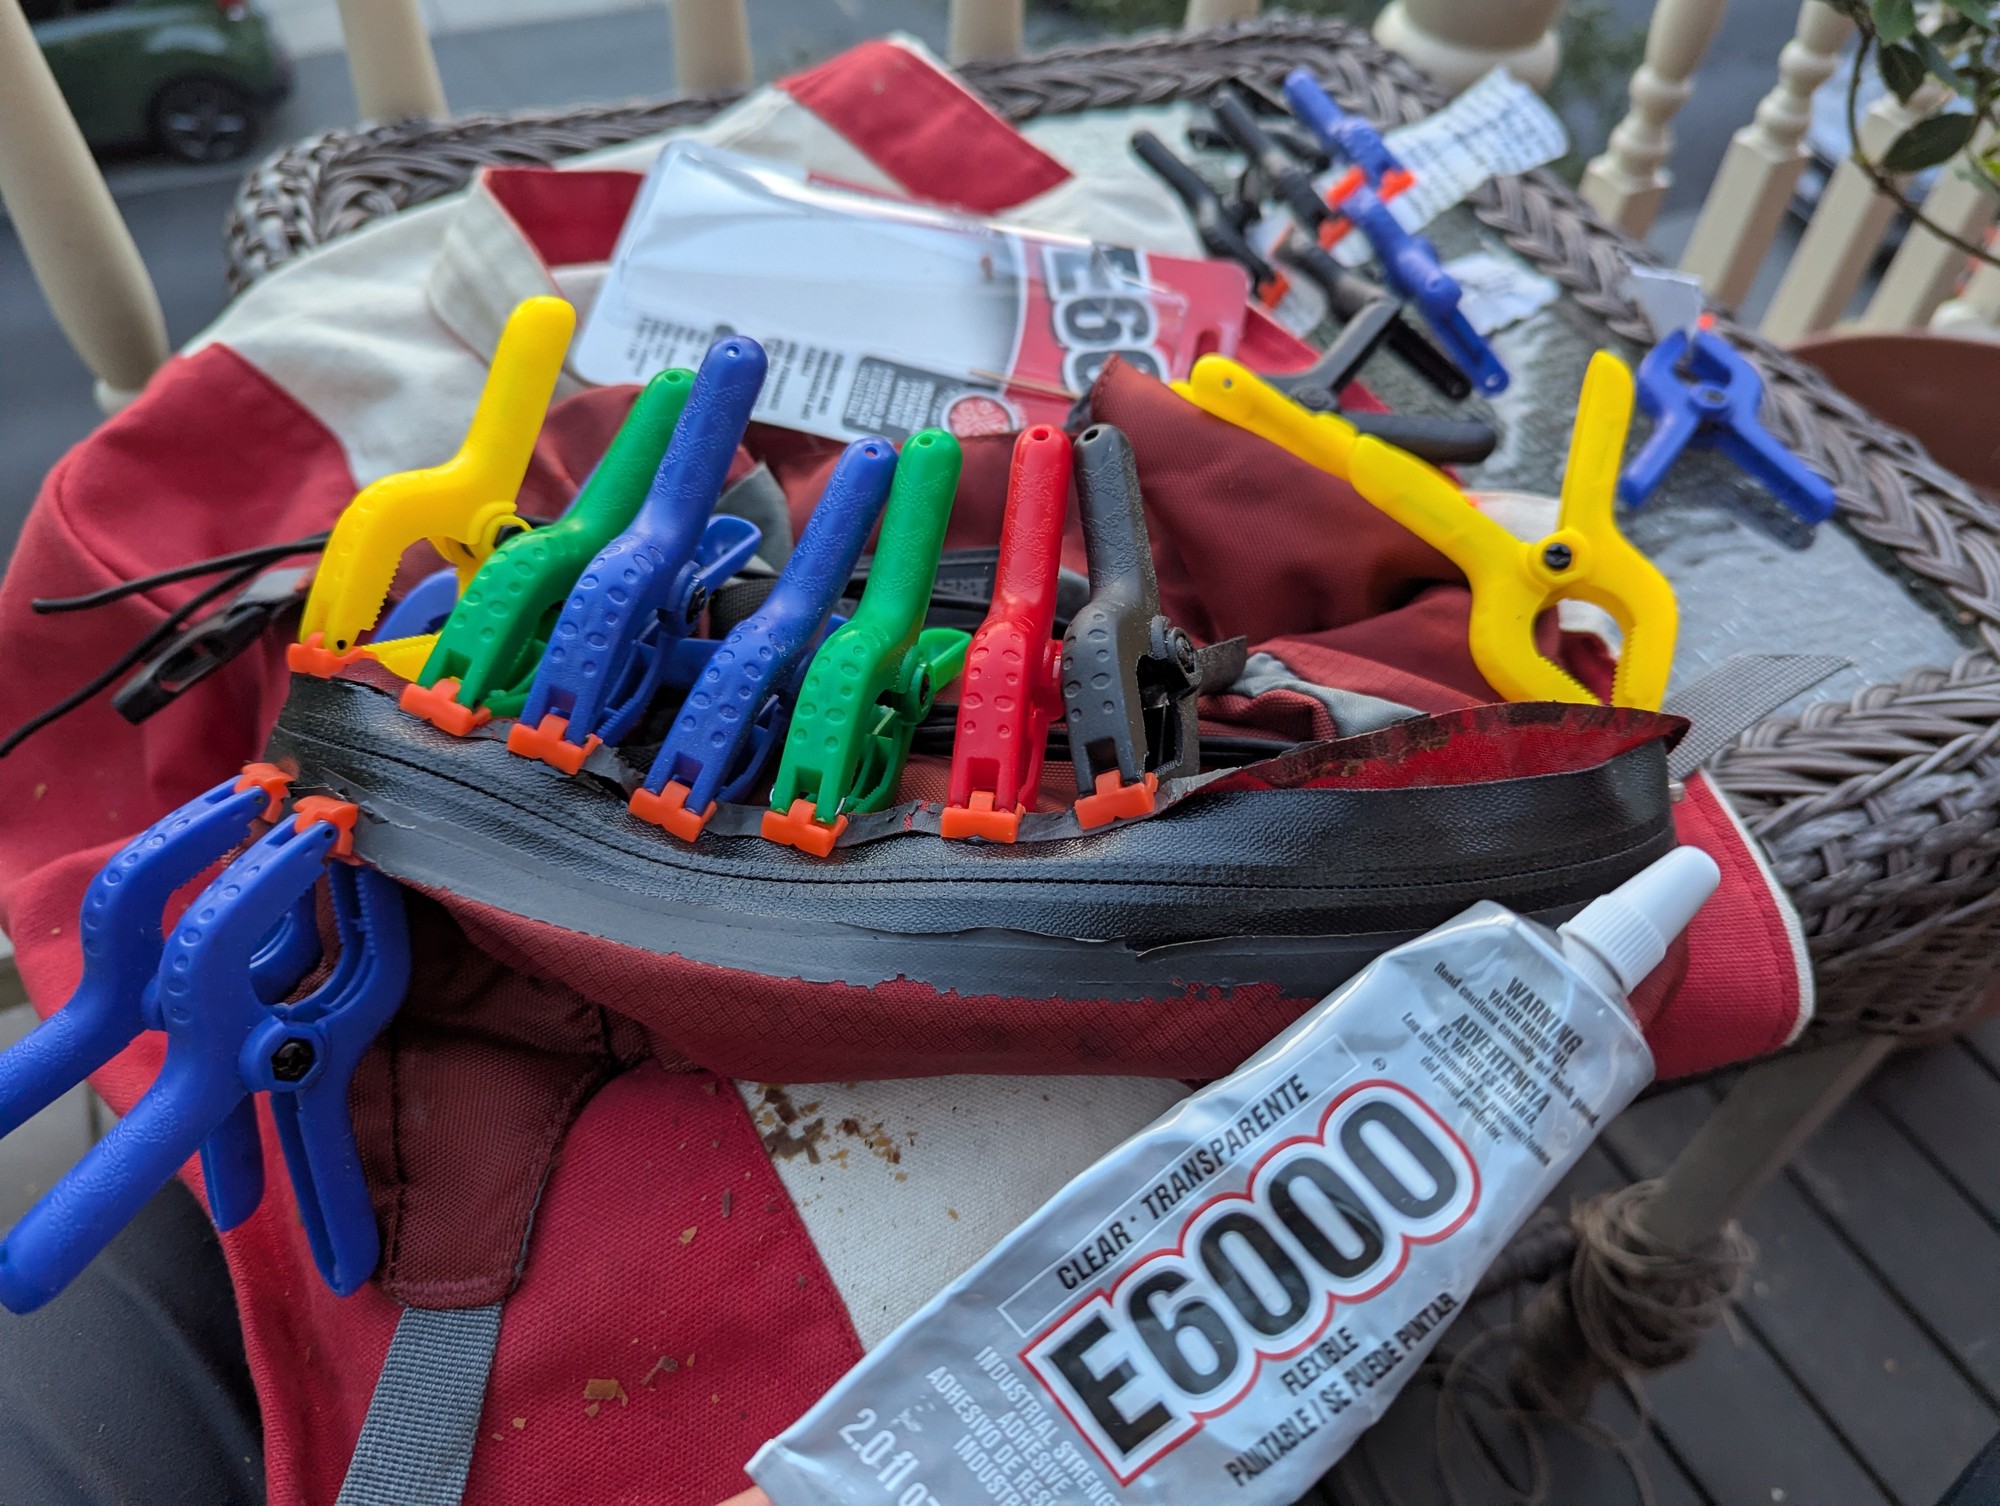
Seems to have stuck! I scraped/peeled away as much of the old adhesive as I could first

completed

Reattached zipper on backpacking pack pouch with E6000 and mini clamps
12
Replacing headphone foam (media.piefed.social)
submitted 5 months ago by to c/diy@beehaw.org


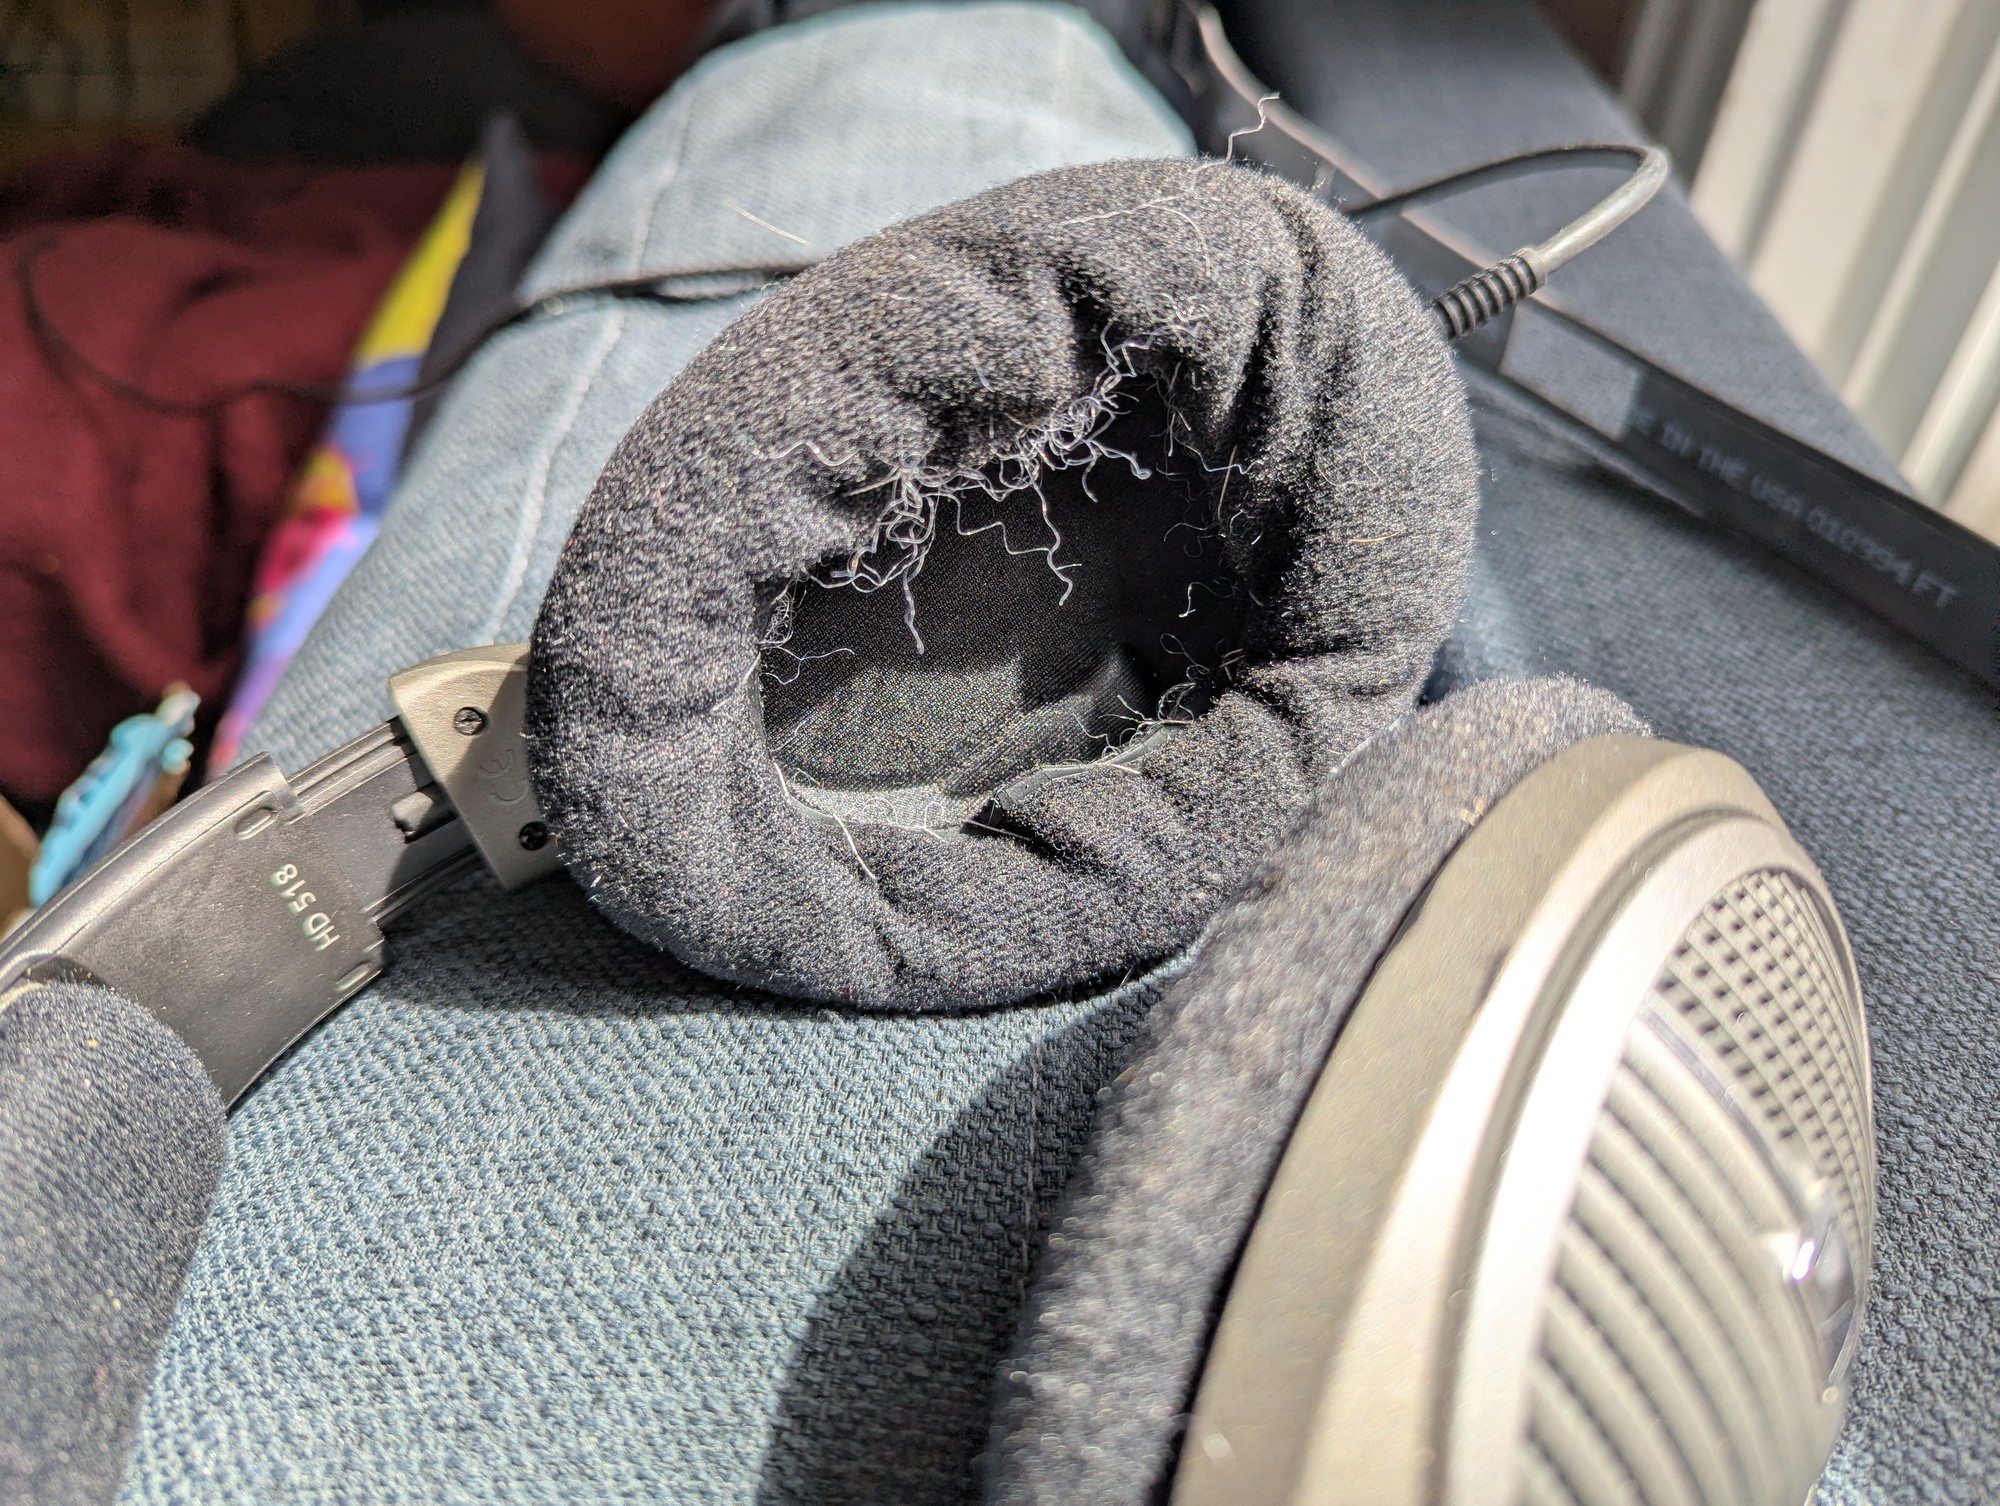
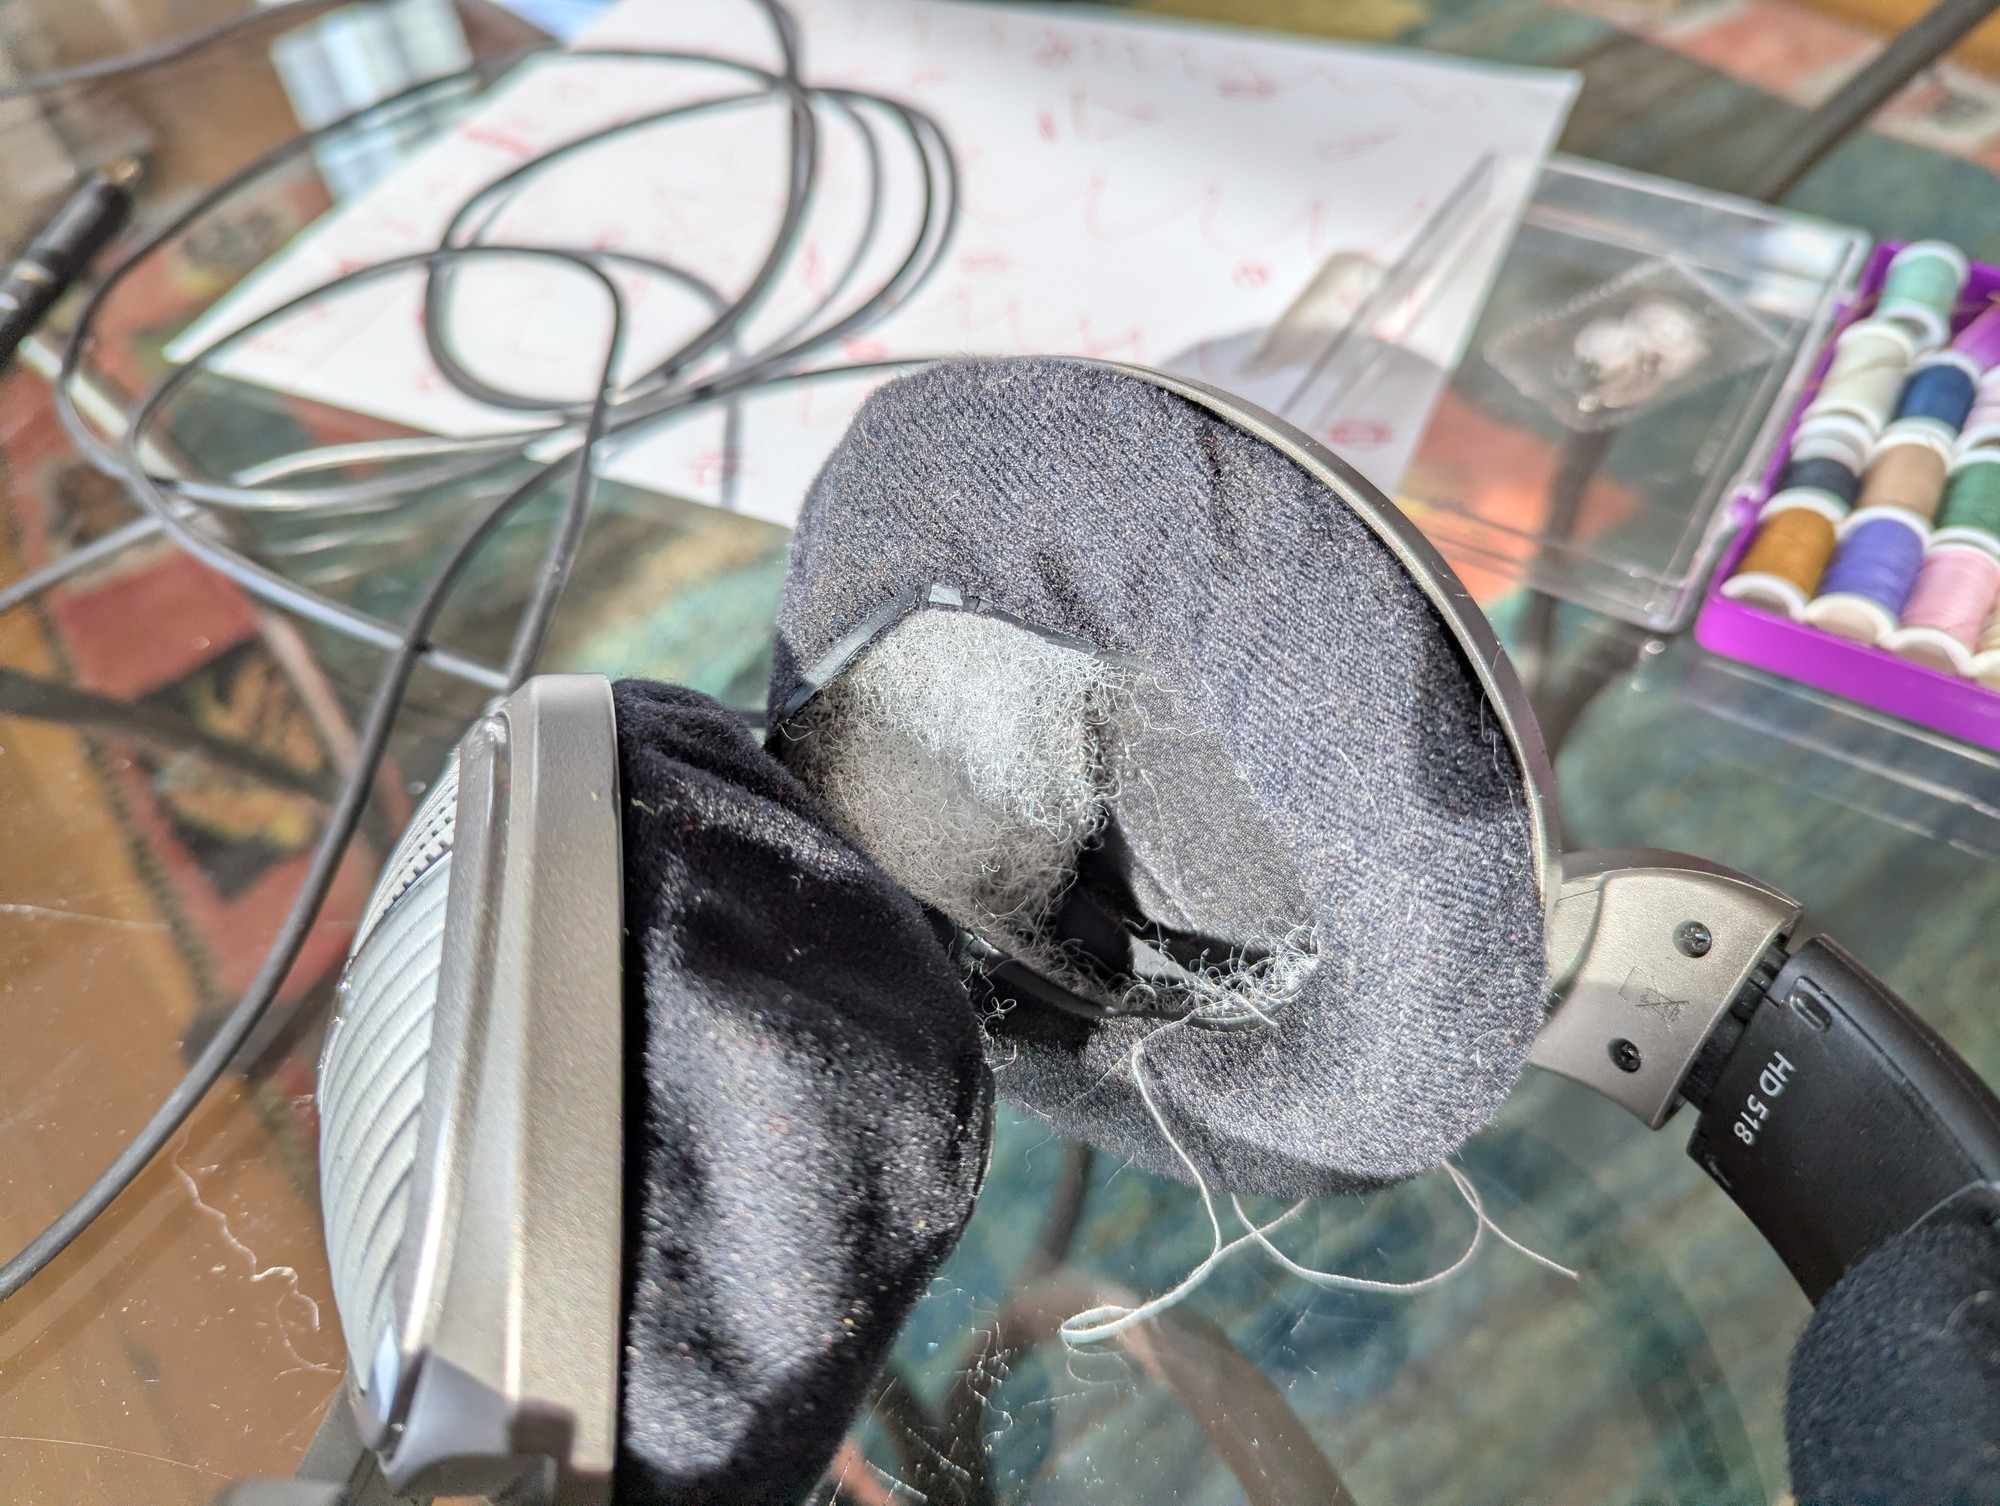
What I had on hand was polyfill. Sewing the ear bags (?) closed was a pain and messy. I think they're originally heat sealed, and the plasticized edges tear through pretty easily. But they're comfortable again for now. If I do it again I'll take the whole foam/bag off and make a new donut to maybe glue on.

function and comfort if not looks

Replacing headphone foam
13
submitted 5 months ago by to c/diy@beehaw.org


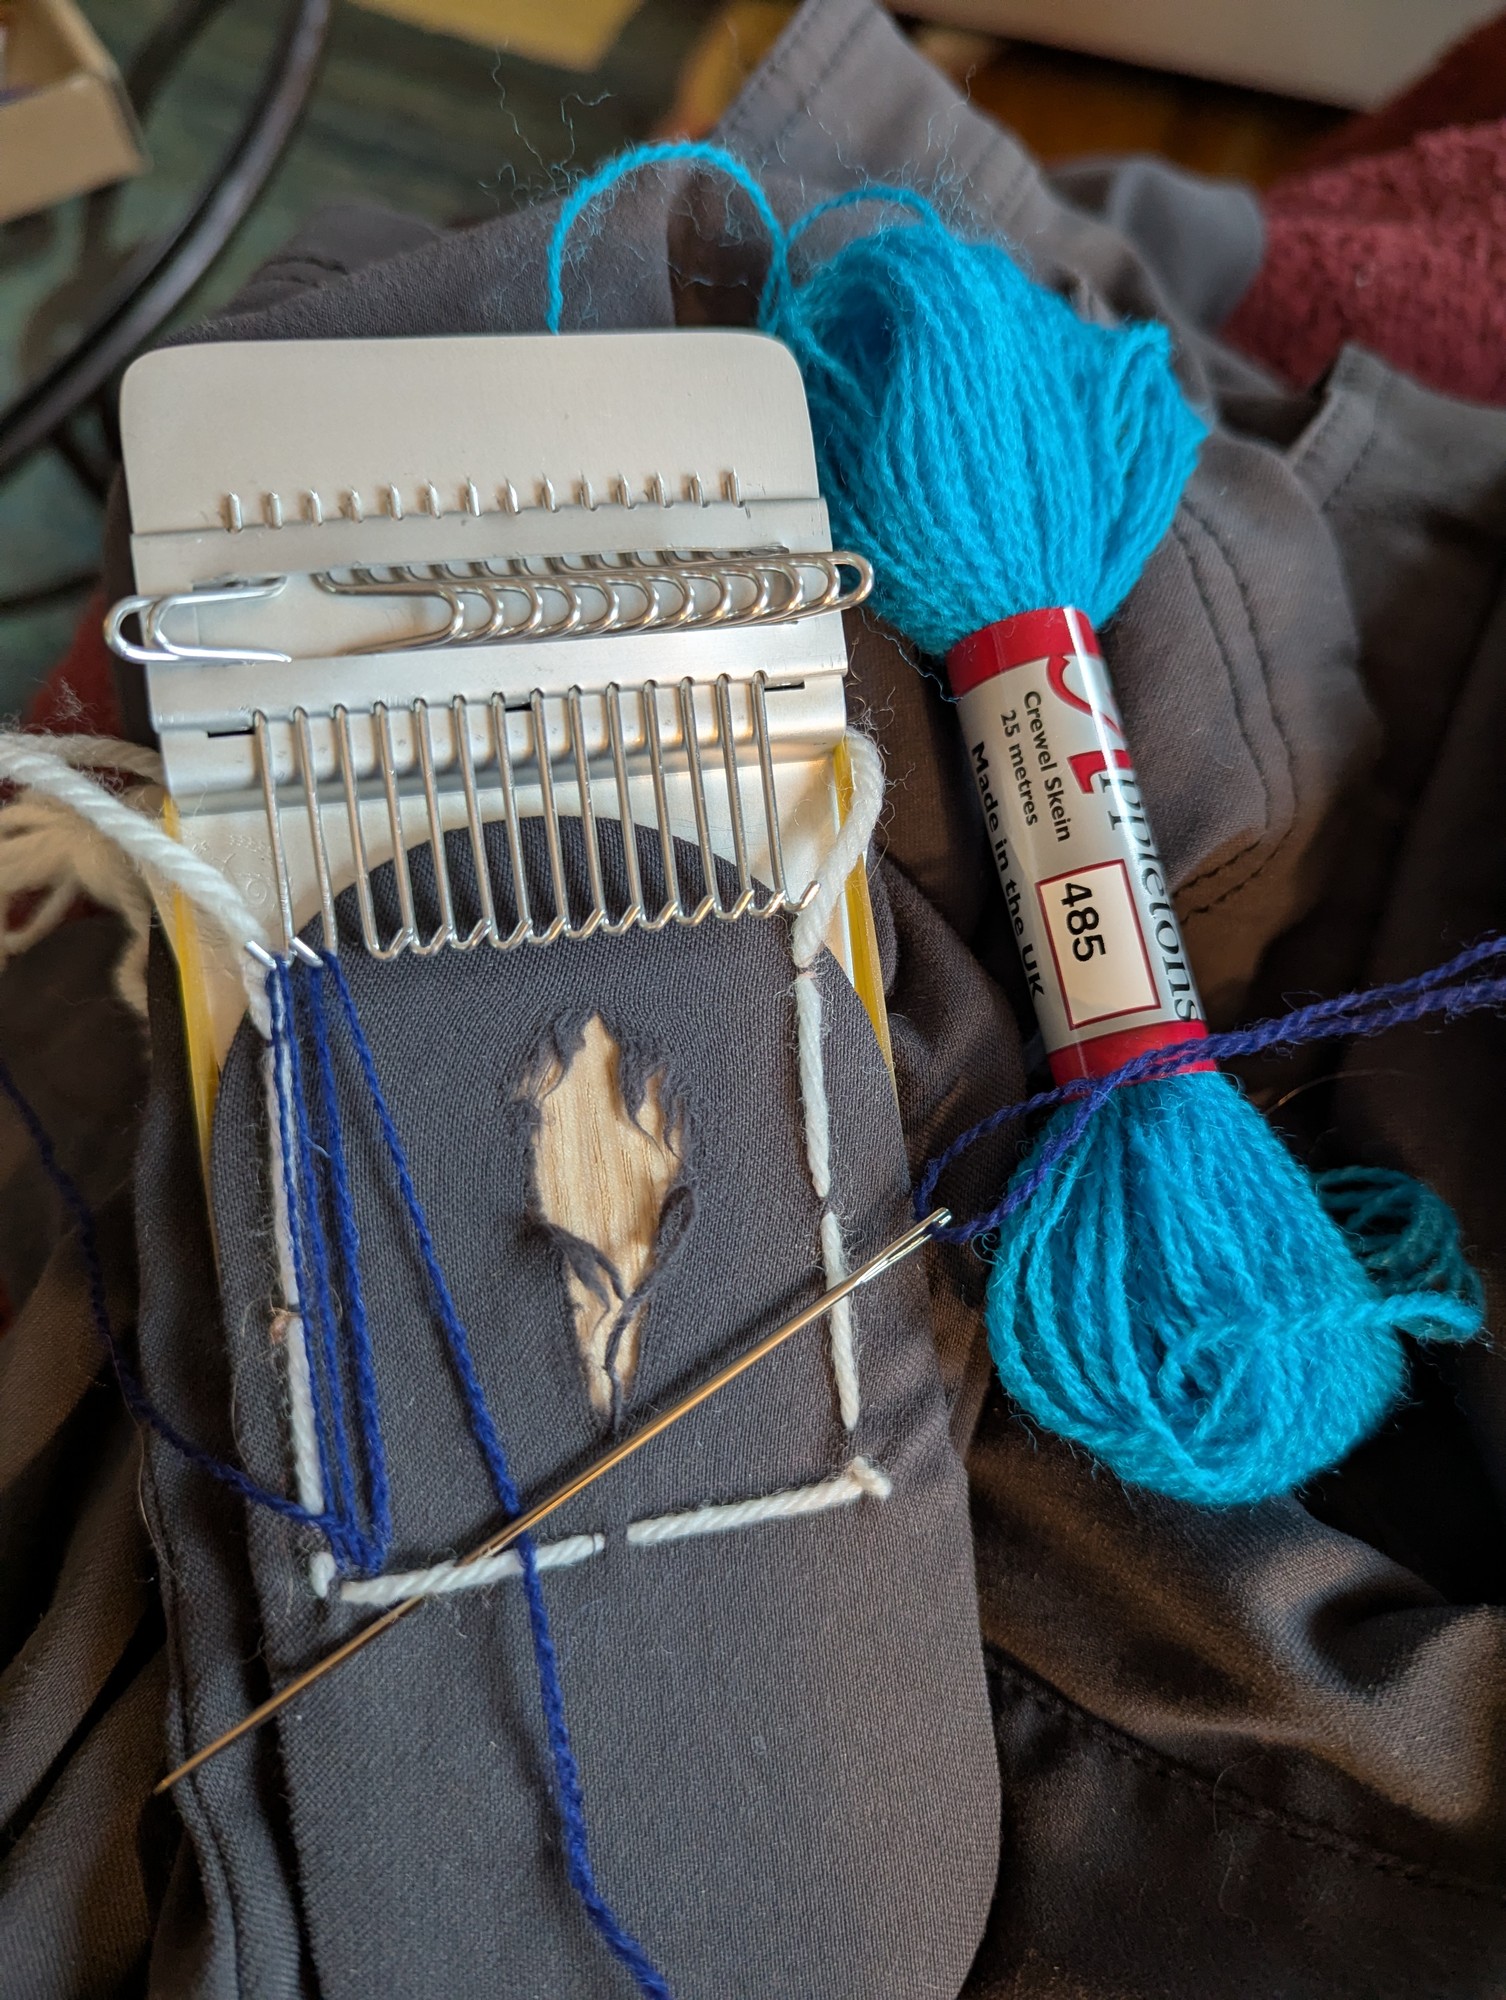
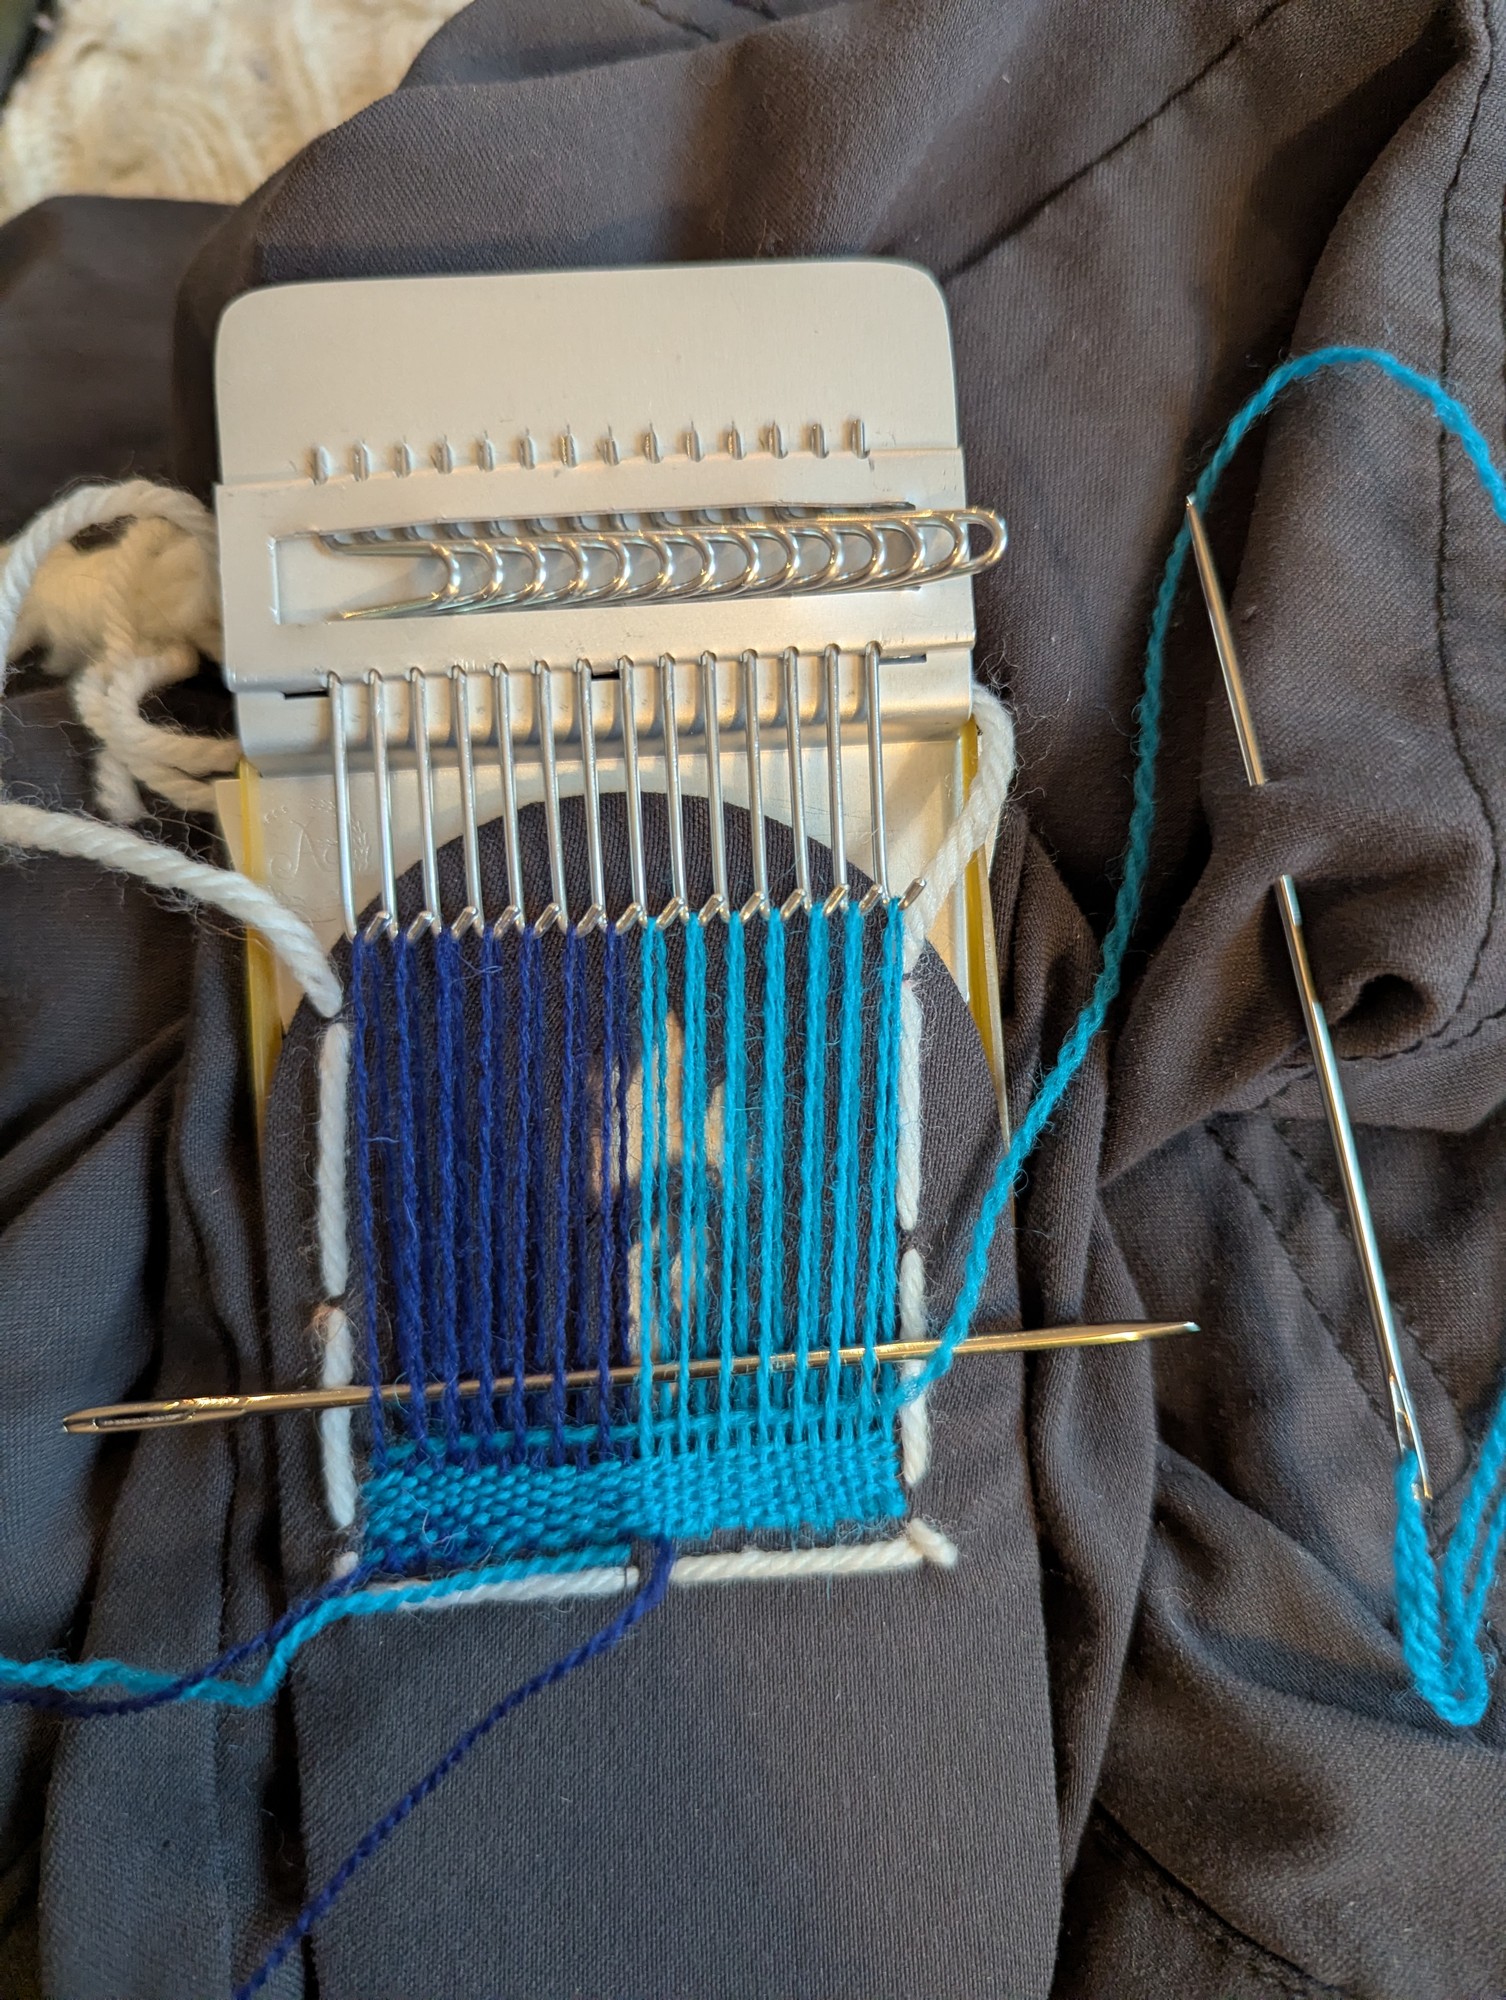
Patching a rip in the knee of pants.

rip

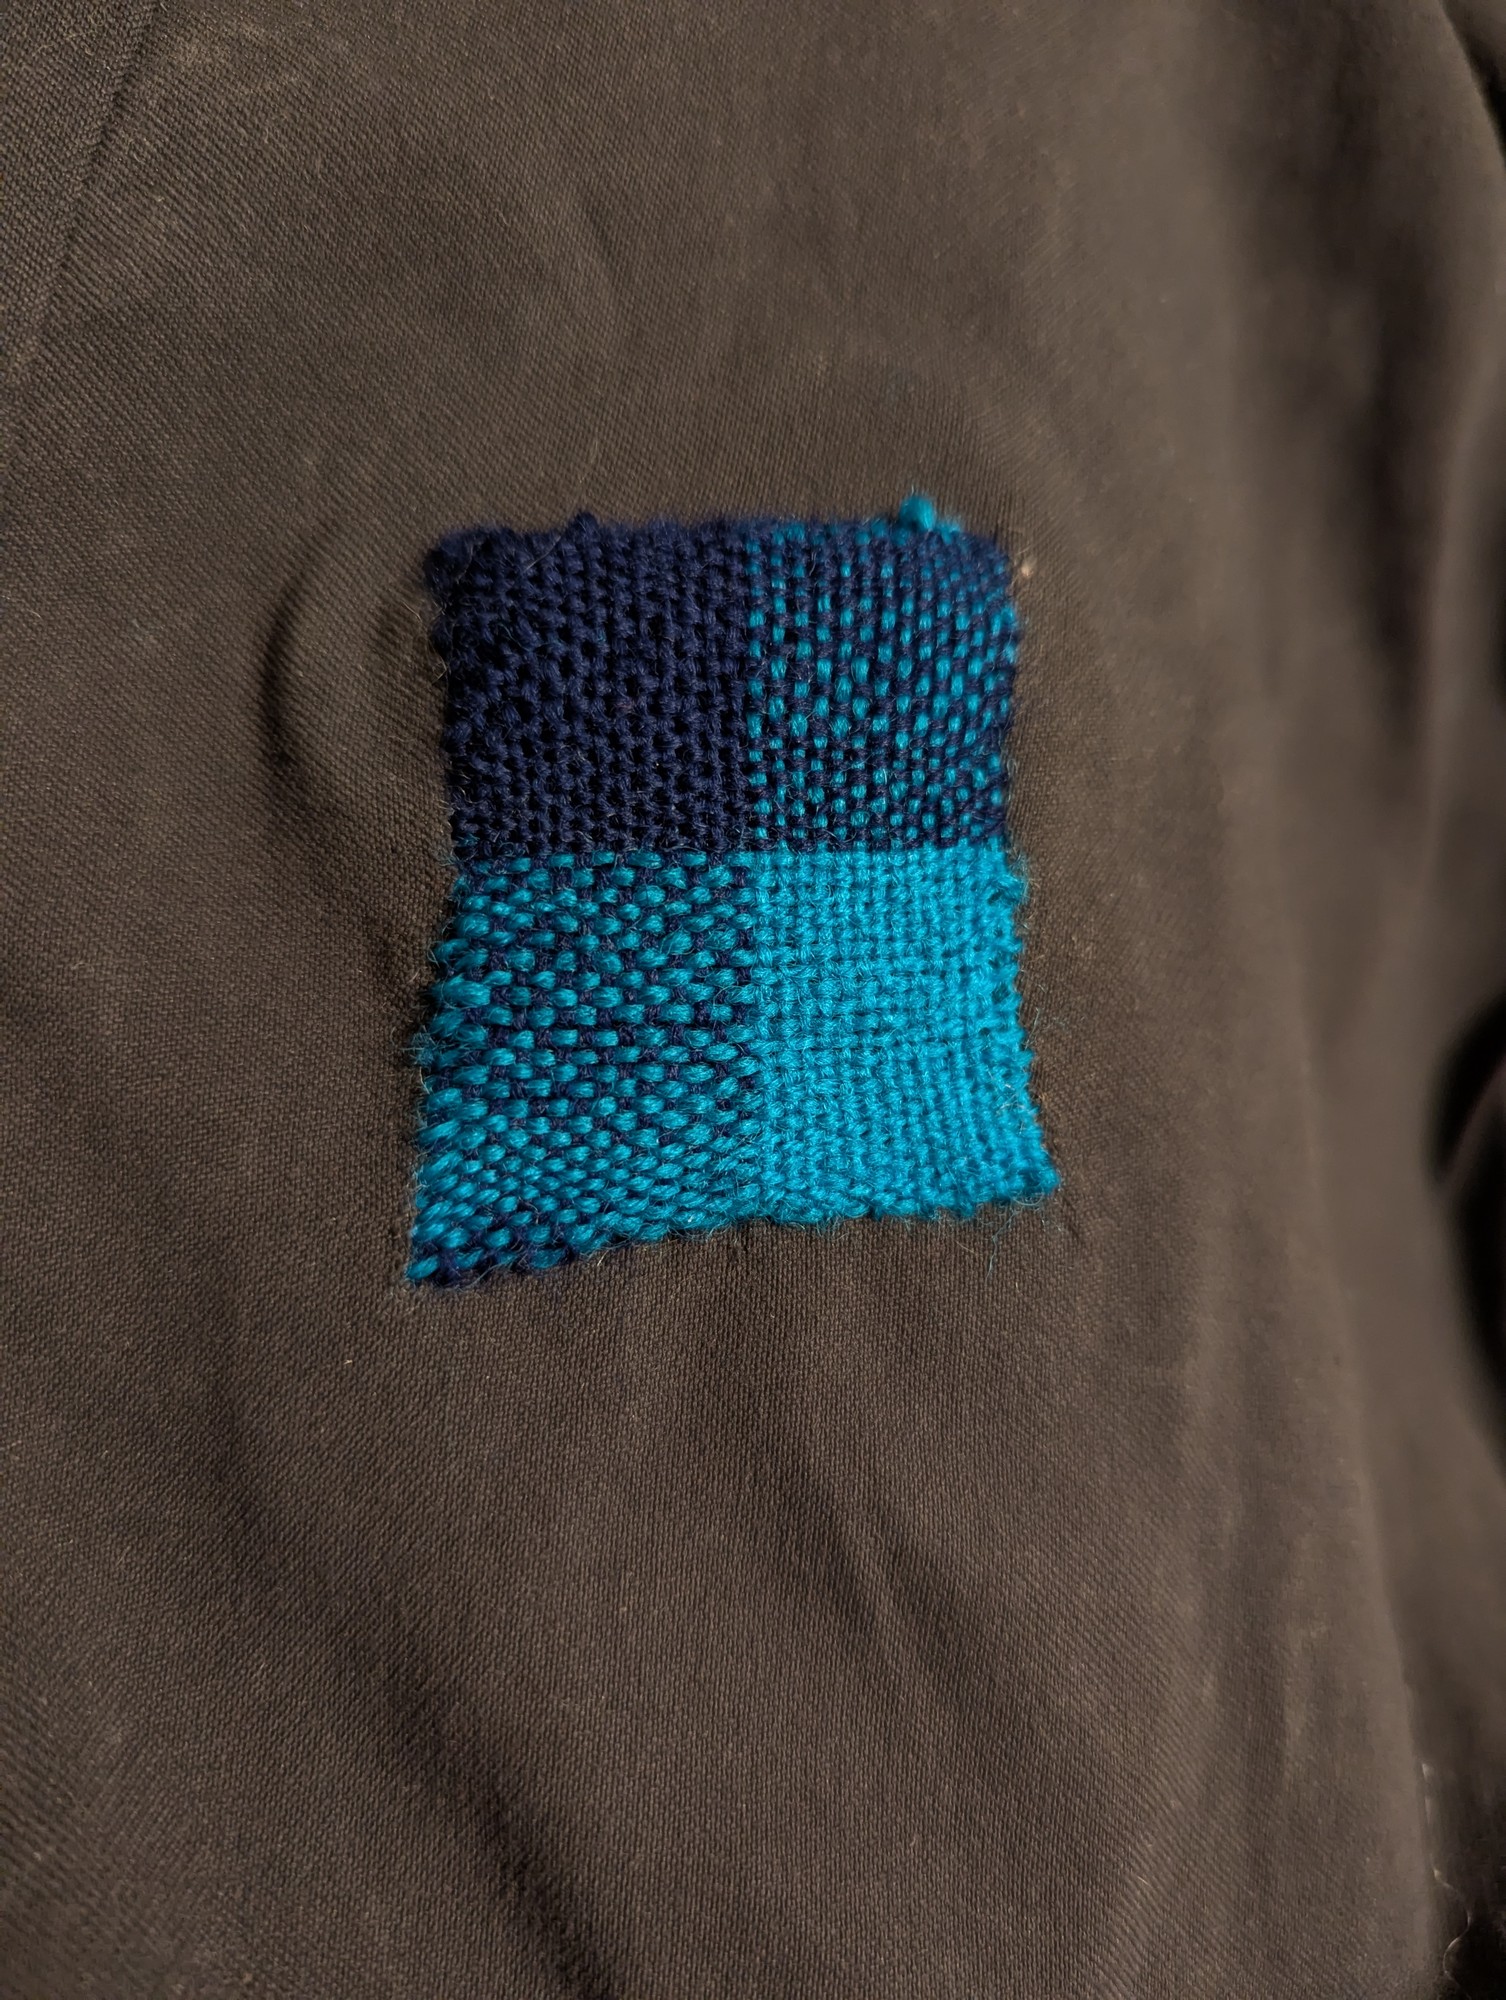
Still working on getting the end result square and with straight edges, but I like it.

finished

Another darn using a speedweve loom
14


Cut it in a nice shape, drilled the holes.

Painted the whole thing, including some foam I cut up for a better seal.

(Ignore the giant mess lol...my family neglected this garage)

I think it turned out nice. Should prevent some spill damage doo.

Temps before and after in the same exact test conditions (same tune, benchmark, no background apps etc). I used Furmark and Cinebench 2024)

GPU before: 62 GPU, 85 Hot, 76 Mem

GPU after: 55 GPU, 78 Hot, 66 Mem (adjusted for +3C ambient)

CPU before: 62C

CPU after: 63C (66C recorded, but ambient was +3C)

No benchmark score improvements but the GPU temp dropped a lot.

15
submitted 5 months ago by to c/diy@beehaw.org


UPDATE - I think I fixed it: comment link

Hi

After a thermostat / potentiometer replacement, my fridge produces ice / snow at the back even on the minimum ("min" setting, the one next to OFF).

The thermostat was replaced because the fridge just never turned on anymore.

The cooling plate is INSIDE the fridge because the one in the back wall of the fridge no longer worked. The same person did this too and worked for years with no ice, and we were really happy with it.

I thought this was caused by a clogged drain pipe so I found it, chopped it off completely because it was a botch job (or seemed like it) and replaced it with a catcher so the water still falls in the evaporator tray

Before:

Cleaned it with a long cable and by pouring water with dish detergent down the hole...

After:

But the ice formed back to the same amount within 1-2 weeks :-/

I took apart the old thermostat and found that it has these 2 screws in it.

I destroyed the whole thing to take out the screws completely from inside it, but I could turn them from outside too. What is the use of these? Can I adjust the cooling by turning them somehow?

I suspect that the fridge is now cooling more, therefore is creating more ice. What else could be the issue?

This ice did not use to form before the thermostat replacement.

The fridge / freezer is about 20 years old I think. It's labeled Arctic but according to the guy that fixed it for us, it's actually a rebadge, but I don't remember exactly what brand he said it was. May have been Gorenje or Beko. It has 2 compressors for the fridge and freezer and they're completely separate from each other.

Ideas?

16


I am adding a UV light to my furnace coils. I decided to cut an access panel for easier cleaning and access to the UV light. I did not realize there were these triangular end covers for the A-frame of the furnace evaporator coils.

I don’t see them anywhere online when looking up diagrams of furnace coils. When I search online, it is also not clear if these covers are necessary. Are these covers beneficial? Or can I take one side off to fit the UV light underneath the A-frame?

17


cross-posted from: https://lemmy.dbzer0.com/post/67700053

Supposedly, apparently, pros use metal pistol attachments for nozzle-less expansion foam canisters. Does anyone know why?

AFAICT, the pistols are a bit costly. The pistols themselves can get clogged and add a maintenance burden. You need to then buy a can of special cleaning solution (is it acetone?), to spray through the pistol after every use.

I have always used the foam for DiYers: a canister with a nozzle and long plastic straw. The straws are trivial to work with: you twist a screw into the end of the straw when done to seal it off. The stuff in the straw still dries out but it’s easily cleared by plunging it. A coat hanger can push it all out in one piece.

Twice those things have fucked me. I buy a huge can of the stuff and use it for one small squirt somewhere. Then the stuff cures inside the can near the outlet, thus sealing it off. There is no recourse because label even tells you that you’re going to get fucked. The label says “one time use”. Indeed, they expect you to blow the whole load in a single giant ejaculation. WTF? Now I have cans of barely used expansion foam with lots of liquid trapped inside the can. I don’t recall if I tried the spraying it upside down trick to clear the nozzle.

So I have to wonder, is the pro stuff any different? Wouldn’t the pro canister outlet self-seal just the same? A hardware store near me is going out of business and I have a chance to buy a pistol at ½ price. Not sure it’s worth it.

18
submitted 6 months ago by to c/diy@beehaw.org


Bought an old Car Seat and weldid it on to the remnants of my old office chair. With a bit of steal tube in the midel, since the hidrolic hight ajustment was to long.

19
submitted 6 months ago by to c/diy@beehaw.org


We have two sets of glass doors and one of them is missing the screen door (thanks previous owners) - any idea who might sell a replacement?

From all of the ones I've found, they all seem to be double rollers where the top ones just push against the top - ours actually hang almost like a zipline (you can slightly see the wheel at the screw)

I'd love to do this myself instead of replacing the entire door but cant actually seem to find someone selling a kit..

Any ideas? The only other idea I have is to just use a retractable, but having an actual door would be ideal.

20


I’m trying to coordinate a repair from a far distance - overseas. I am told the shower drain leaks because the fiberglass showerpan flexes (it was likely not bedded properly, installed by amateur house flippers that did not know what they were doing). A plumber came and replaced the drain pipe for a rediculously high cost. Did not fix the problem. They abandoned me.

One option is to remodel.. tear out the showerpan and redo the subfloor which is likely rotton wood (guessing). But I really want to avoid crazy costs. It seems to me like there should be a way to do some perhaps unconventional plumbing. A crawl space is below the shower.

I hate accordian drain pipes. Probably no self-respecting pro plumber would install one. But in the case at hand, it seems like it would solve the moving drain pipe issue.

Another thought, and what I hope someone can advise on: What about a short rigid drain pipe that goes into a rubber gasket-like fitting (e.g. like that in the attached pic), which then goes into a bigger pipe? Wouldn't that tolerate a slight amount of vertical movement as the showerpan flexes? Note: the pic shows an accordian pipe going into the rubber fitting -- that is not what I mean. I consider the accordian pipe a competing option. I want to know if a rigid pipe can be inserted into a rubber gasket fitting.

Fiberglass is a bad choice, no?

If I do bite the bullet and install a new showerpan, fiberglass seems like a bad choice. Why is that still being used? In fact, I think enabled metal showerpans are an older technology, but they seem more robust. I have one in a bathroom which is bedded on air (i.e. just the perimeter of the showerpan is supported). But the thing seems bomb-proof. It will never flex.

Why is plastic and fiberglass used? They require proper bedding, and the bedding can always fail later on. I’ve seen videos were ppl have to later on drill holes in the shower pan to inject expansion foam to add support after support is mysteriously lost. Fuck that. Is it that plastic and fiberglass are not as cold feeling when you first step on them? I cannot think of any other advantage.

21


I don't have the space or funds for investment in power tools to be practical. I love working with wood, had a job making D&D and TTRPG wooden accessories out of college, now I'm wanting to get back into the hobby and really learn joinery, etc.

Previously, I did lots of machine work, usually with machine planers, jointers, table saws, etc. As these aren't feasible for me right now, and I want to learn to work with my hands, I don't think these skills translate super well to woodworking with hand tools.

The books that I've found so far are DK's Woodworking: The Complete Step-By-Step Manual and Everyday Woodworking by Rex Kreuger. I think the former is the better book of the two, while Kreuger's book seems to be full of kind of weird projects, not sure if it's worth pursuing. Any books that are better? Pretty impressed by the step-by-step manual as I've reviewed it.

I've found local resale, both online and in-person, have been helpful for finding cheap hand tools. I've found a bench plane and a jointer plane for like NOTHING that are in pretty good condition. Trying to find a good, cheap tool for sharpening tools. I don't have a work bench, would like to build it myself eventually, but want to practice the basics first. Any tips for learning hand woodworking? Just joined Beehaw and so far loving these communities. Hope to hear from anyone with more knowlege than me! Also, I've been thinking of joining a woodworking guild. Would that be worth it? My local is like 25 dollars a year.

22


cross-posted from: https://lemmy.dbzer0.com/post/66371627

I have 2 methods for descaling toilets in my house, which has quite hard water.

(using physics) high pressure washer

Yeah, you read that right. I setup a high pressure washer inside my home and blast it into my toilet. It works. I think it did the job in under 15 min.

I actually freaked out at first because I thought I was looking at a shattered porcelain bowl. But in fact the urine stone that built up over the years was a solid layer a few millimeters thick. So it shattered the limescale into big pieces that looked like a broken cereal bowl in my toilet bowl, but the porcelain was fine.

Of course it’s not pretty. When you blast a toilet bowl with high pressure water, it blasts back at you. Not ideal to have toilet scum blasting back in my face and all over the floor and wall behind me. When the first wave of spashback hit me I snapped into what must have resembled Jessie Ventura in Predator, where he mowed down the forest with a helicopter machine gun... “aaahh! die motherfucker!” as the shower from the toilet persisted. Hence why I only used this method once. I suppose that’s why it’s my original idea and no YouTubers are telling people to do that.

(using chemistry) acids

After a few yrs it was time to descale again, this time trying acid.

Vinegar is useless. Probably just too weak. Bleach (which was used alone, obviously not combined with any acids), was also useless.

So I bought some pricey proprietary acid in a powder form, which is labeled specifically for this purpose. Instructions direct letting it sit for 30 min. I don’t put stock into that.. not with my toilets after years of buildup. So I let it sit overnight. It bubbles up, so I can see it’s doing some work. But it’s no match for my brown urine stone. So I use a power drill with a really stiff nylon brush attachment (not the flimsy attachments that are intended for toilet bowls which are just like a hand held toilet brush but with a shank). It’s slower than the pressure washer. The spinning brush does not get into corners well, so it takes hours. It’s not as messy as the pressure washer but still not great that strong acid is splashing around getting on my drill and attacking anything metallic. I suppose I should oil all exposed metal parts before doing this.

I wonder if I should stop being stingey and go heavy on the acid. I wonder if chemicals alone can really do all the work without need for mechanical force. Although the ring around the low edge of the rim is hard to give an acid bath to.

better methods?

YT videos often mention “brick acid”. Not sure what that is but it does not seem to exist where I am. Or perhaps that’s the same as whatever proprietary stuff I used.

Is there a long term fix? I normally do no regular maintenance. If I brush the bowls weekly or something, is it feasible to keep the limescale from ever starting?

Chemists say urine stone is caused by urine mixing with water -- which is a bit baffling because surely urine is composed mostly of water to begin with. So the question is, what about the hippy mantra: “yellow, let it mellow; brown, flush it down”? Does urine stone accumulate quicker if you flush every time (thus urine mixes with more water)? 1 flush per 10 urinations means much less water is introduced into the mix. OTOH, the urine has lots of time to become urine stone as it sits.

I once looked at the low-water consuming toilet in a water depleted region, like Las Vegas. It was like a pressure washer integrated into the toilet. Instead of a cistern full of water, it had some kind of device in the cistern. Flushes were fast and violent to minimize water use. I wonder if that design would also be anti-scaling.

I also suspect ultrasonic cleaners could perhaps be of use here. Wouldn’t it solve the problem if a toilet bowl had an integrated ultrasonic generator that runs periodically? Or if I could submerse one manually sometimes?
23
VHS Slipcover Maker (vhs.texs.org)
submitted 7 months ago by to c/diy@beehaw.org


VHS Slipcover Maker

Quickly make custom VHS slipcases to help you complete your collection. This slipcover generator automatically pulls movie posters, logos, and metadata to design custom sleeve designs for your custom VHS project.

24
Hot Water Shutoff (lemmy.dbzer0.com)


So this place was made into a duplex and they forced a hot water heater into a small closet. Maybe I'm not understanding properly but why is there not a hot water Shutoff valve there? The hot water wasn't shutting fully off on the tub, so the valve stem likely just needs to be replaced, not hard.. quick cheap replacement usually... But when I went to shut off the hot water I found this.

Side note, I also found their was no exhaust vent for the dryer a couple years ago, we had to have someone cut a whole where the exhaust was ran, but just sat up against the exterior wall with no outlet. (Obviously a fire hazard). Shit happens, but am I wrong that a shut off valve should be there?

25


We have two dogs, which mostly get along fine. But have fought in the past. My wife just got a new job that is not WFA, so there is not always someone at home with the two of them.

The older dog stays in our bedroom, while the younger one in the living room, with the run of the house.

We also have cats, and they have litter boxes in our bathroom, so i keep the door cracked for them to. come and go. But my son's big orange cat pushes the door open enough the older dog can get out of the room.

Today when I left the house i took a piece of rope, tired it to the doorknob (door swings into the room) on the room side of the door, then using a caribeaner connected the rope to the curtain hold outside our room. This prevented the door from being pushed open any further, however when I got home the dog had pushed the door closed, preventing the cats from getting to their litter boxes.

I am looking for something cheap, or hopefully i can make, that will hold the door in place, open just enough for the cats, but not the dog.

I was looking at something like this, but we have a sweep under the door that would prevent this from working.

ETA: The rope contraption

The sweep, because without it the cats that sleep outside our bedroom at night, fight with the cats that sleep inside our bedroom at night.

view more: next ›