No problem. The S-video with the N64 should look better with the 2x pro but it might not be the best choice for the PS2. A lot of the PS2 library is 480i, which the 2x supports but it uses Bob deinterlacing. The GBScontrol is the best budget option since you can use motion adaptive deinterlacing (it does not support composite or S-video) I have seen some people recommend this pre built version. https://www.aliexpress.us/item/3256804850466089.html
Good catch on the typo, once the branding request is merged I'll fix that
If you're going with a scaler, it's definitely worth it to invest in better cables (even though the n64 uses the same connector as snes, it does not support rgb without mods)
https://insurrectionindustries.com/product/nintendo-s-video/
https://insurrectionindustries.com/product/sony-playstation-rgb-scart-cable/
https://insurrectionindustries.com/product/super-nintendo-entertainment-system-rgb-scart-cable/
https://www.amazon.com/HD-Retrovision-Premium-YPbPr-Component/dp/B07TL6L7MY
Some helpful videos: https://youtu.be/VYkWtkvhS9c https://youtu.be/fi7csYj00BU
Also if you're not too attached to using original hardware, you might want to take a look at getting a mister to play ps1 and before systems (the new super station is a good choice https://retroremake.co/pages/superstation%E1%B5%92%E2%81%BF%E1%B5%89 )
I would say "probably". A lot of TVs don't have great scaling from 240p, 480p, and 480i content so a dedicated scaler will look better in most cases. Also be aware that the Ossc Pro does need an additional add-on for S-video (which for an unmodified N64 is its best output).
Upscaler is the correct term. If you are looking for the best possible image to recreate a CRT, the retrotink 4k is the best option. It will require a good TV though, something like a LG C4. The reason being to get good looking scanlines, you need 4k, 120hz, and vrr.
The retrotink 4k also supports all your inputs (Xbox 360 HDMI, n64 s-video, snes rgb, PS2 component, etc...).
Here is a good video why the 120hz is important for recreating the crt feel (a little old and retrotink 4k has only gotten better since then) https://youtu.be/3ZmPkozY6Cg
You other options for a good scaler are the Morph 4K and the ossc pro. This spreadsheet has a good in depth comparison between all three https://docs.google.com/spreadsheets/d/16FBPBD3A1vN_khznTUO1bGrb3LxTIQXfwWfusPeNSsw/edit?usp=drivesdk
I go through different switchers to various inputs of the retrotink4k. I avoid composite to keep it simple and get a better picture.
- Dreamcast -> VGA
- PS2 -> Component Switcher
- N64 -> Component Switcher
- GC -> HDMI GcVideo adapter (forcing 480p through swiss) -> HDMI Switch
- Nintendo Switch -> HDMI Switch
So after the volume was fixed I discovered the board . Turns out there were multiple issues. First the charge led was dead (tested with multimeter in diode mode) so that is swapped out with a blue one. Then EM8 needed a reflow to get a good connection across. The final issue was a bad trace under the cartridge slot from F2 to D1. For that I added the bodge wire seen in the photo.

Picked up a fairly cheap sp that had lots of corrosion on metal parts (power switch, charge port, and volume slider). After cleaning it all up and replacing the volume slider and audio cap, it still had low volume.Turns out there was a broken trace between the volume pad and the U6 (There should be continuity from the via I solder to, over to the via right next to the s in SW11). Adding the bodge fix the issue.

Wobbling Pixels put together a good comparison between CE, Morph, and OSSC Pro. According to that sheet dealing with sync, the OSSC has issues with switching resolutions if the aspect ratio is set to 1:1 instead of something like 4:3
All the soldering was straight forward on this one. Just used j-tip iron with leaded plus lots of flux. The one pin that was partially corroded had enough left, so it only has to be bent back.


Definitely a donor board, the other side was worse (you can see the power switch to the right, it just fell off).

Had to replace this ribbon connector to get the drive working reliability again. It probably could have used a little more solder but everything is solid so I'm not messing with it further.

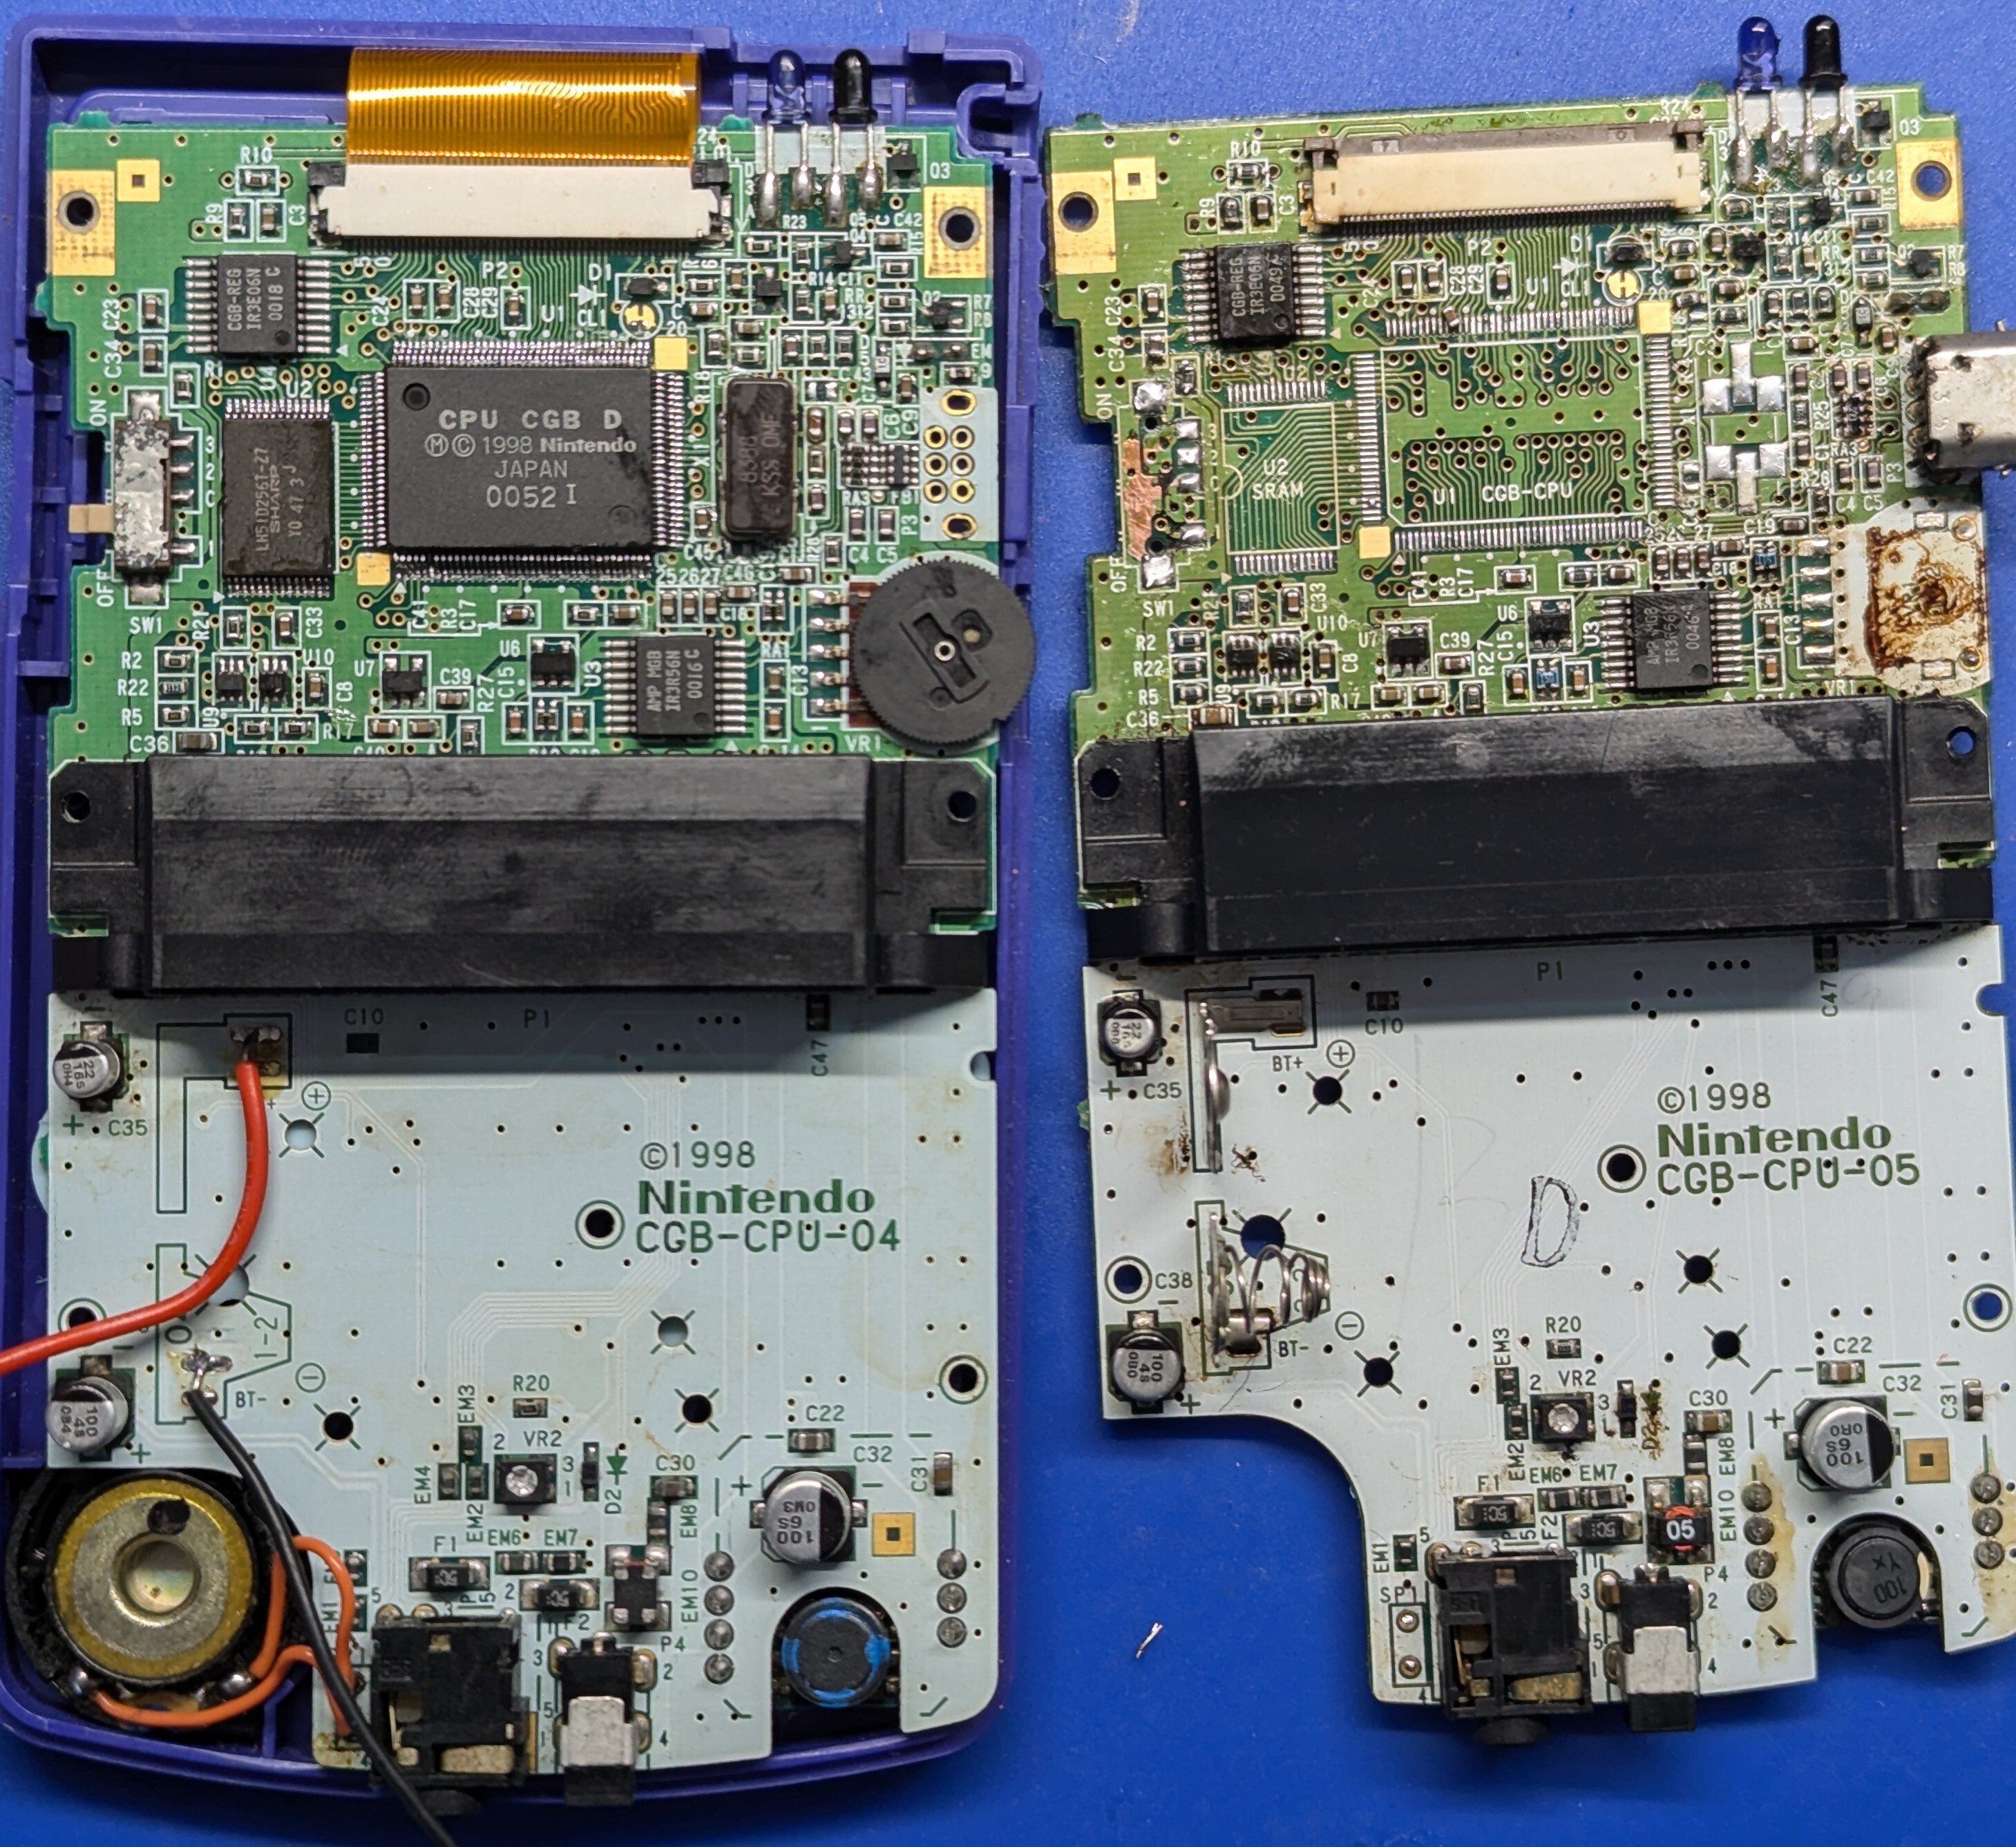
Some background, I originally removed the chips from the board on the left for a Pocket Color Build. It's original fault was no power, which turned out to be a dirty power switch and corroded battery contacts.
The new board had signs of corrosion under the solder mask and previous work (bent ram pins and bridges on the cpu). I decided to move the chips on the other instead of trying to restore the traces. Soldering all went well, until my hand slipped while testing if the connections were solid. One of the pins (bottom left) is pretty bent and the pad on the end was partially lifted.
I was able to heat all those back up and confirm no bridges and the pads are connected. Booted up a quick game to test a screen, sounds and all the buttons. Everything is working.
Moral of the story, be careful and don't put too much pressure on those pins.
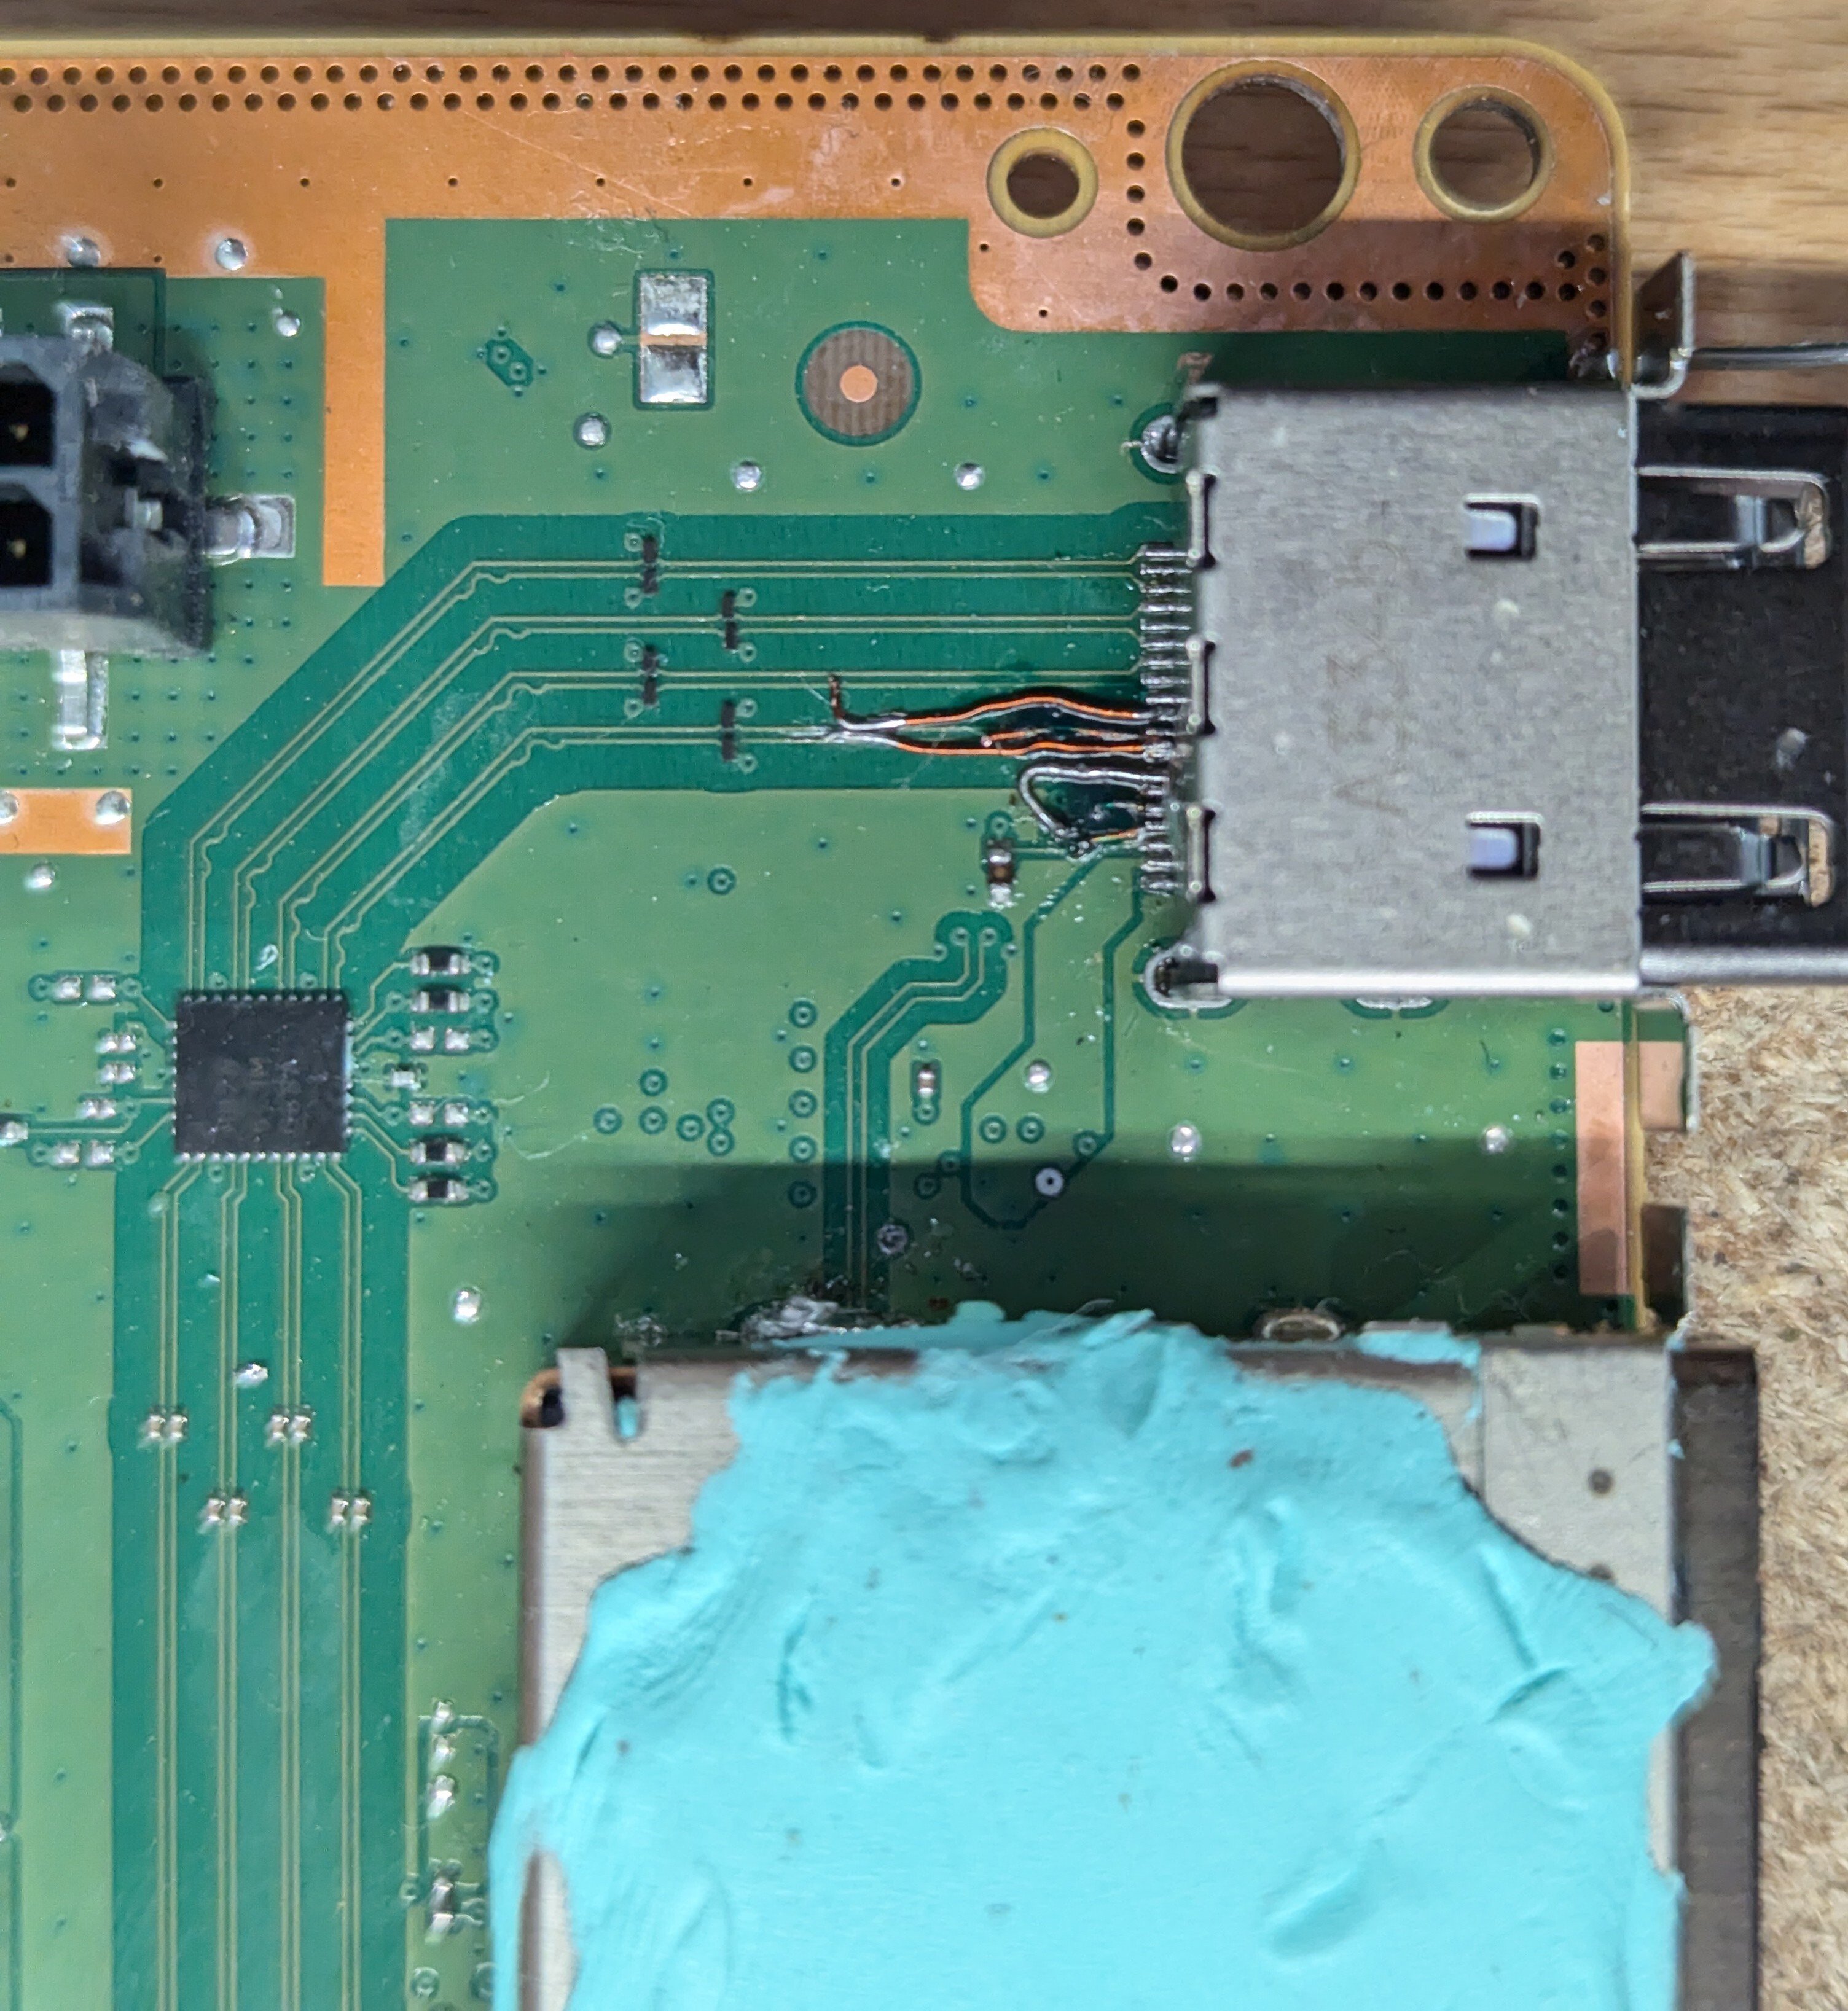
This was my first attempt doing a trace repair on a HDMI port. Seems like everything seems to be working after replacing those caps as well. Played through the tutorial of gears 5 with no issues.
What I've tested:
- Playing downloaded game
- Playing a Blu-ray
- Playing on a 4k TV and 1440 monitor. This one the auto detect preferred 120hz 1080p but manually selecting resolution works great.
What I've learned:
- Wired all the pads before soldering the port. I attached the front wires after the port was soldered. Should have just done them all.
- A cheap grinding pen is so much easier to use than a knife to expose the traces.
- 0201 are very hard to work with.
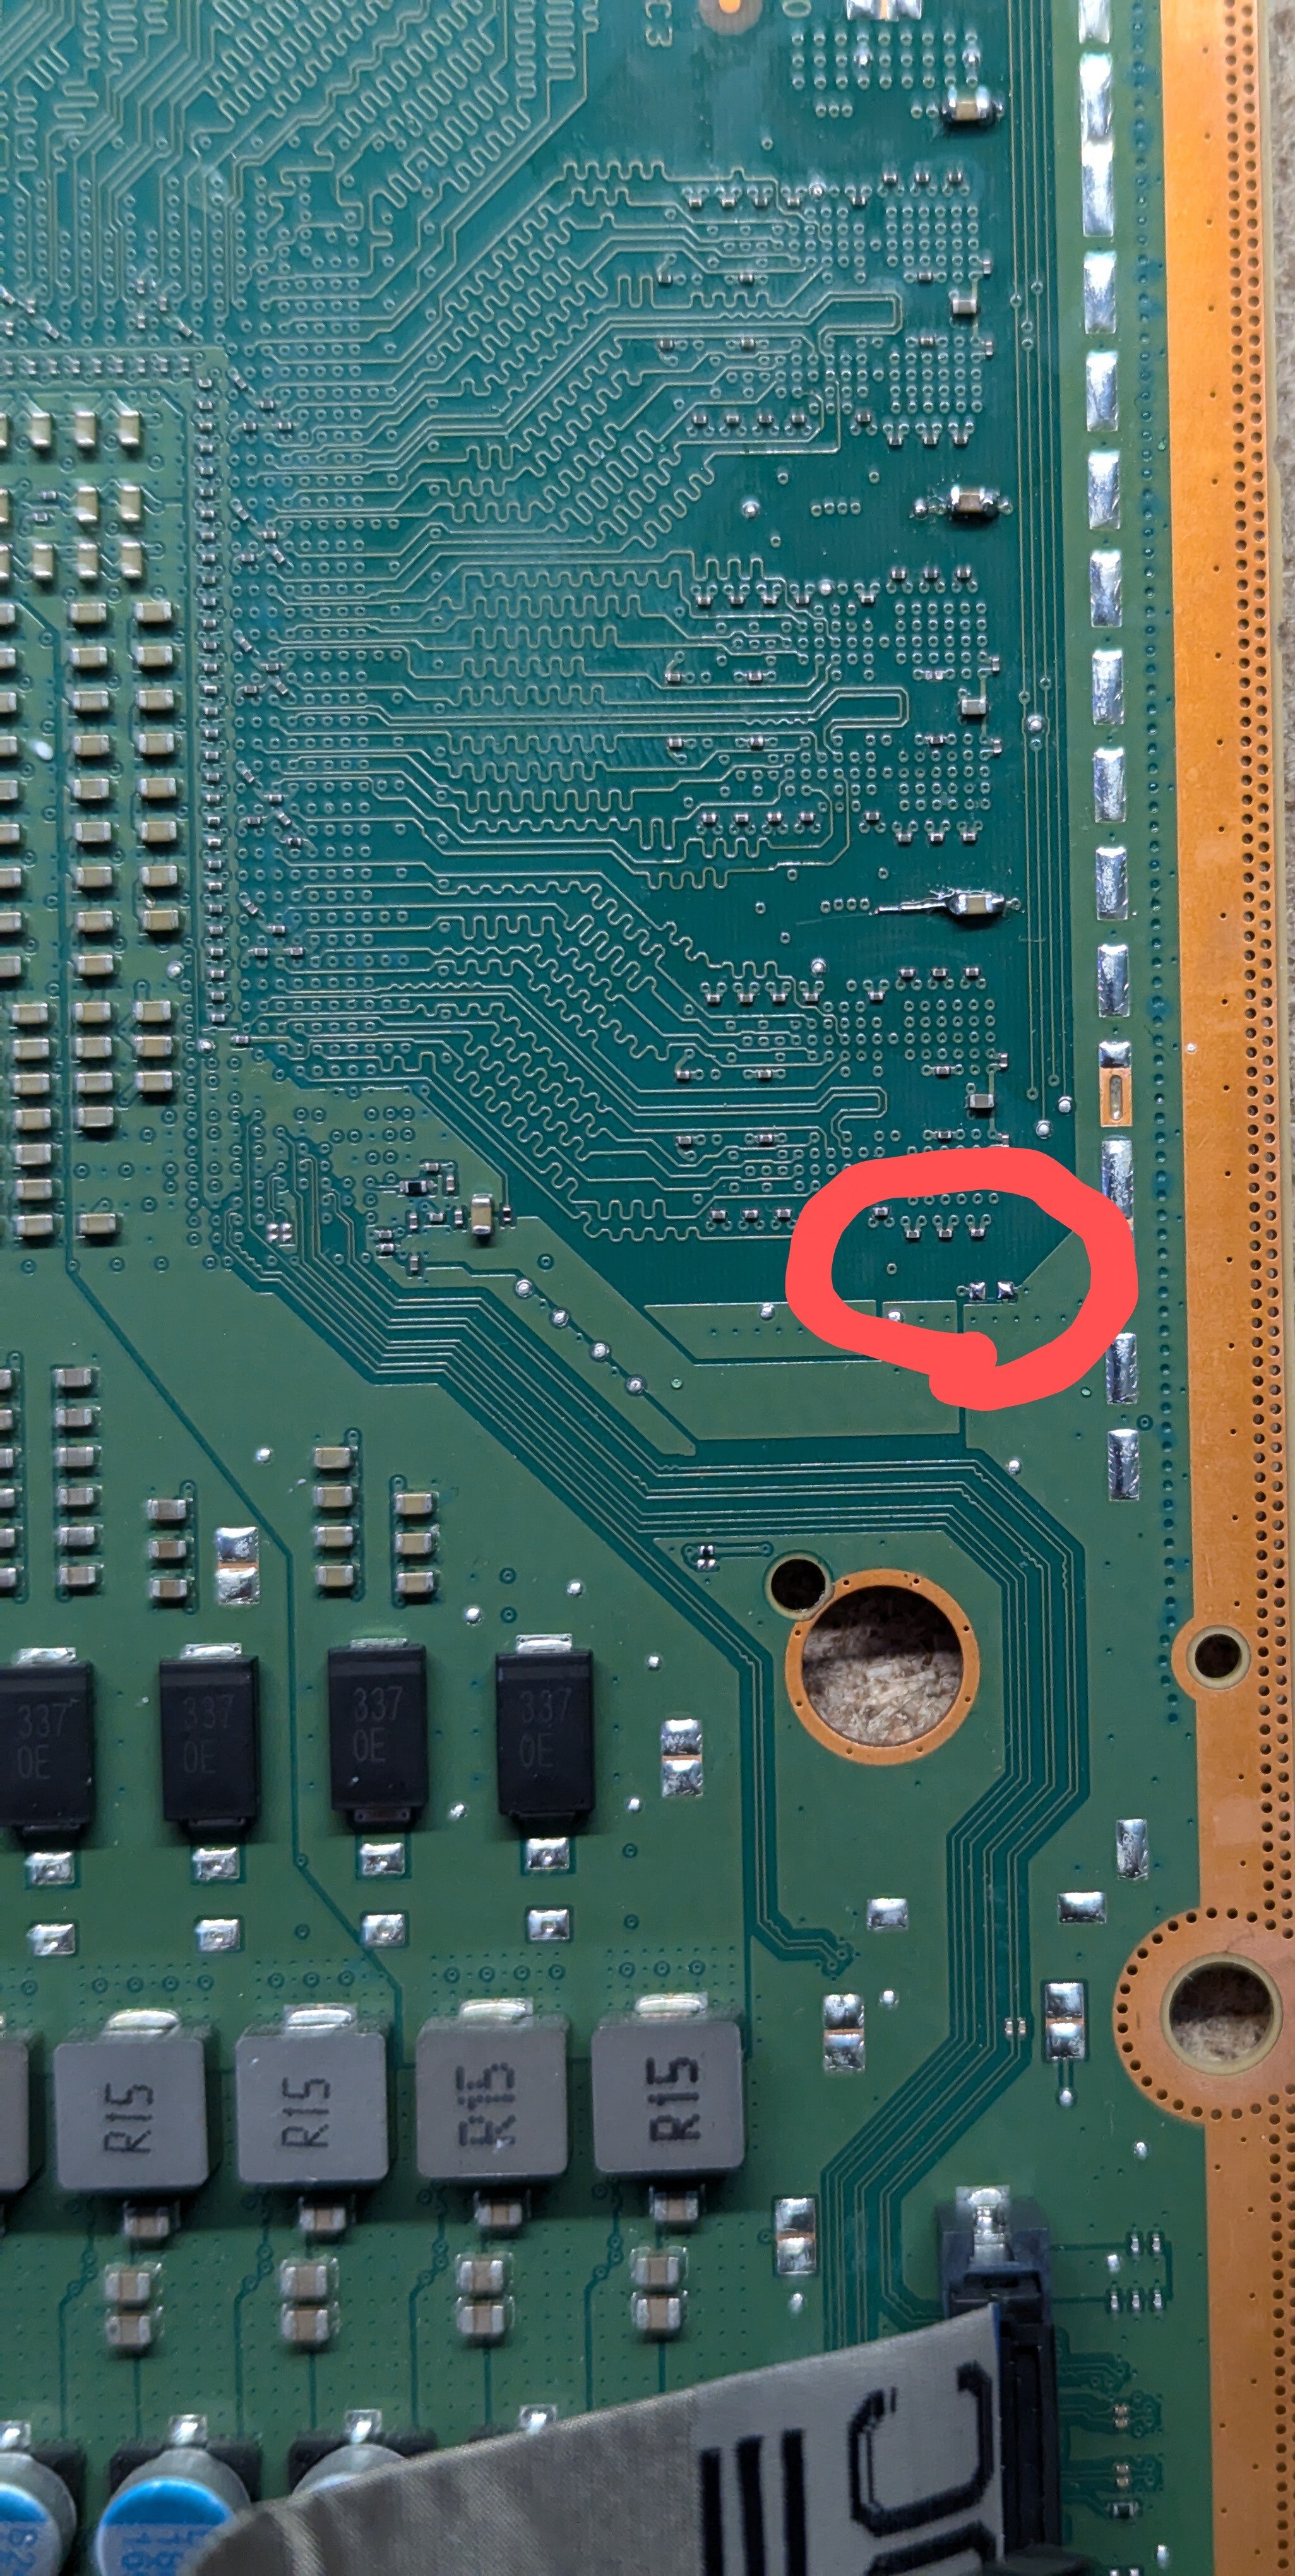
Picked up this Series X to do a trace repair for the hdmi, turns out 2 caps were ripped off the board as well. The one was still partially connected and easy to bodge. The second circled is missing. I'm curious if anyone knows the replacement value.
The similar caps in the area all read between 18.6 to 19.6 uf when out of circuit, so it could be a few values (though no guarantee this cap wasn't unique and completely different).
view more:
next ›