[–] 4 points 1 month ago

I actually wrote a guide myself around the same time this superhero Valve employee was writing this script. I got to test it out after I got my setup working and the script ran saying, "Success!" Which admittedly made me laugh because after 5 days of working on it using sources from Reddit, Discord and Steam it really did feel like a success.

  • source
  • [–] 2 points 1 month ago

    Depending on the VPN location I use, Degoog landed me in quite a few Honeypots displayed as Gandalf in ascii. Eventually I gave up trying to use the public instances with a VPN and had to fall back to another search engine.

  • source
  • parent
  • context
  • [–] 2 points 1 month ago (1 child)

    I've always loved Gnome, even when it looked like Mate. I do feel like customization isn't perfect but I love the clean layout, snappy behavior and multi-desktop implementation. I worry that it won't be given the same love KDE gets, but I know the Gnome team works hard to make a solid DE. I might switch back to it this week. I've been using Labwc for awhile, but I do miss just using my desktop rather than editing the config files to get close to the same experience.

  • source
  • parent
  • context
  • [–] [S] 1 point 1 month ago

    I've been using the F-Droid app Blorp, testing its features. I might try switching to another client and see if the app was the limiting factor.

    Also, sorry about the ads in the gallery. I couldn't see them I guess thanks to my pihole/VPN? I stopped using Google Drive and Dropbox ages ago. Nextcloud and Proton Drive are all I have now.

  • source
  • parent
  • context
  • [–] [S] 2 points 1 month ago

    This is true, the mic did not appear to be in series with anything critical since I did lift a trace in the Onn remote. When I looked at the board I saw how small and close together the traces were. I didn't have the datasheet for the model of Mic I found on the board, so I just decided the remote was better without it entirely. It may not have been the most elegant solution but it did work. I will consider the razor blade option in the future once I get some leads that are both thin and sharp enough to pierce the small traces.

  • source
  • parent
  • context
  • [–] [S] 3 points 1 month ago (2 children)

    This is the mindset I had when I posted my procedure. While I could have gotten all three and de-soldered it properly, it isn't something most people can do. I didn't want my post technique to feel unapproachable by people with small tools and steady hands. Thanks for mentioning this since I forgot to!

  • source
  • parent
  • context
  •  

    I made a quick gallery of my recent adventure taking apart two remotes which is shared below:

    Sony Bravia TV Universal Remote

    Onn 4K Plus Streaming Device Remote

    Procedure: Both remotes had plastic tabs holding them together. I was able to pry them apart with a guitar pick (credit card would work too) and separate the body from the internal remote board. The Sony remote (Green circuit board) was kind enough to label the component as "MIC1" with the screen printing so I flipped it over and removed the black adhesive covering over the Mic hole. The Mic hole is very small and I did try a few things before settling for a #1 flathead screwdriver from my iFixIt kit. The irony of using that kit to destroy something is not lost on me here. Anyway, I placed the screwdriver into the empty Mic hole and applied firm even pressure and let the flathead dig into the board. I went slow and could tell I was making progress when the Mic component on the other side of the board lifted away. At that point I backed out the screwdriver and used tweezers to pull off the Mic. Then quick reassembly and testing and all functions were good!

    For the Onn 4k Plus Streaming remote (Black circuit board) I was able to follow the same procedure above where I used the pick to open the remote, used the screwdriver to apply even pressure to screw into the Mic hole and lift the component from underneath until I could get tweezers under it. I did however encounter an issue where a copper trace lifted with the component. It was very thin and I peeled back only enough to get a razor blade under it and sever it from the board. Then re-assemble and tested with no issues. All in all, for me with experience taking electronics apart it was about 20 minutes of working. I have one more Onn remote and a Samsung remote with a solar charger on the back to do next.

    To get ahead of the comments on why I didn't use a razor blade or heat gun to remove the mic: I tried a razor blade at first on the Sony remote but discovered that the component was soldered so close to the board that I would have to destroy the screenprint to get underneath it. Unfortunately I don't trust myself with a heat gun either since I didn't have Kapton tape to protect the other components.

    If there is enough interest I can post the reassembled remotes for matching them or images of the Samsung remote surgery when I do it as well. Hope you all find this encouraging for how to do it on your own!

    Gallery of Images: https://postimg.cc/gallery/tHX4fyD

    Onn 4K Plus Streaming Remote microphone location just  below the LED lightt
    [–] -1 points 2 months ago

    In the community post he advises that he, and others, looked into the controversy and decided that based on the moderation changes that they could work with Hyperland going forward. They also posted all of this publicly and discussed it rationally with their community. All of their donations are publicly available and they communicated the intent behind the donations: to help support ALL open source.

    They didn't play favorites, they didn't backpedal on their reasoning and they showed transparency while supporting open source. I don't understand the controversy here?

  • source
  • parent
  • context
  •  

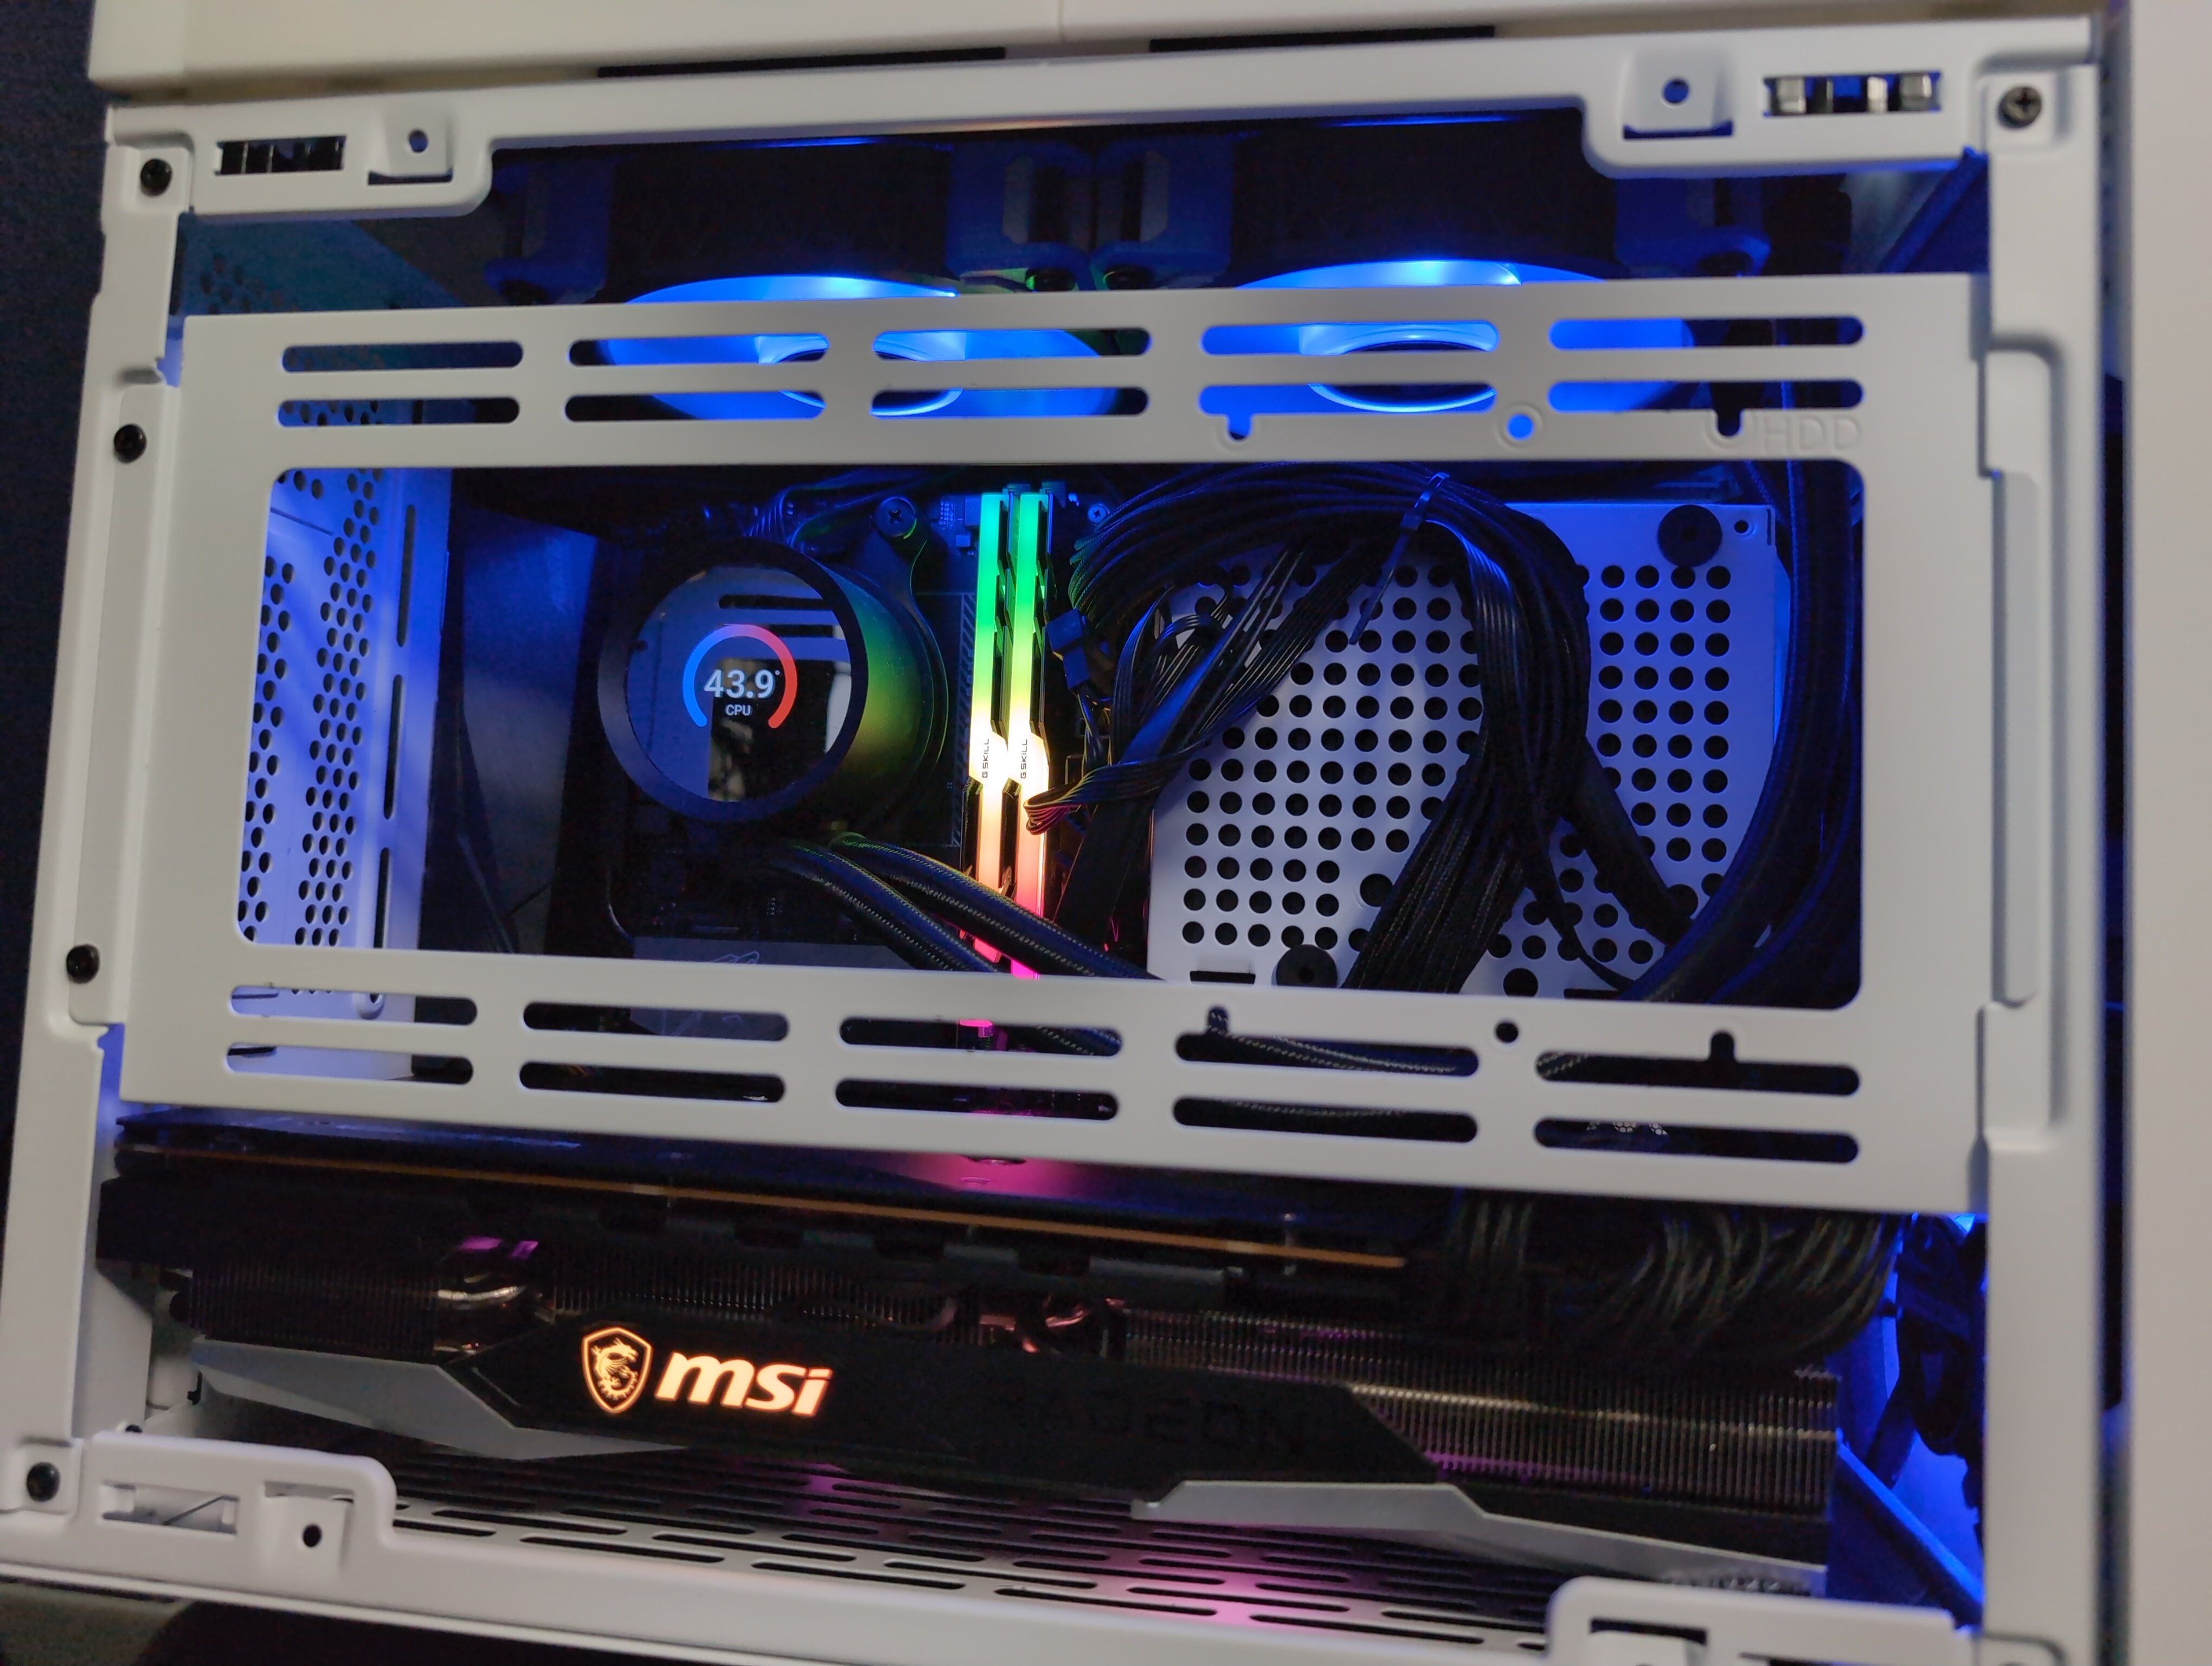
    Edit: Dropped one more internal photo and fully expecting the community let me know that's definitely not how to route motherboard and fan cables 😂

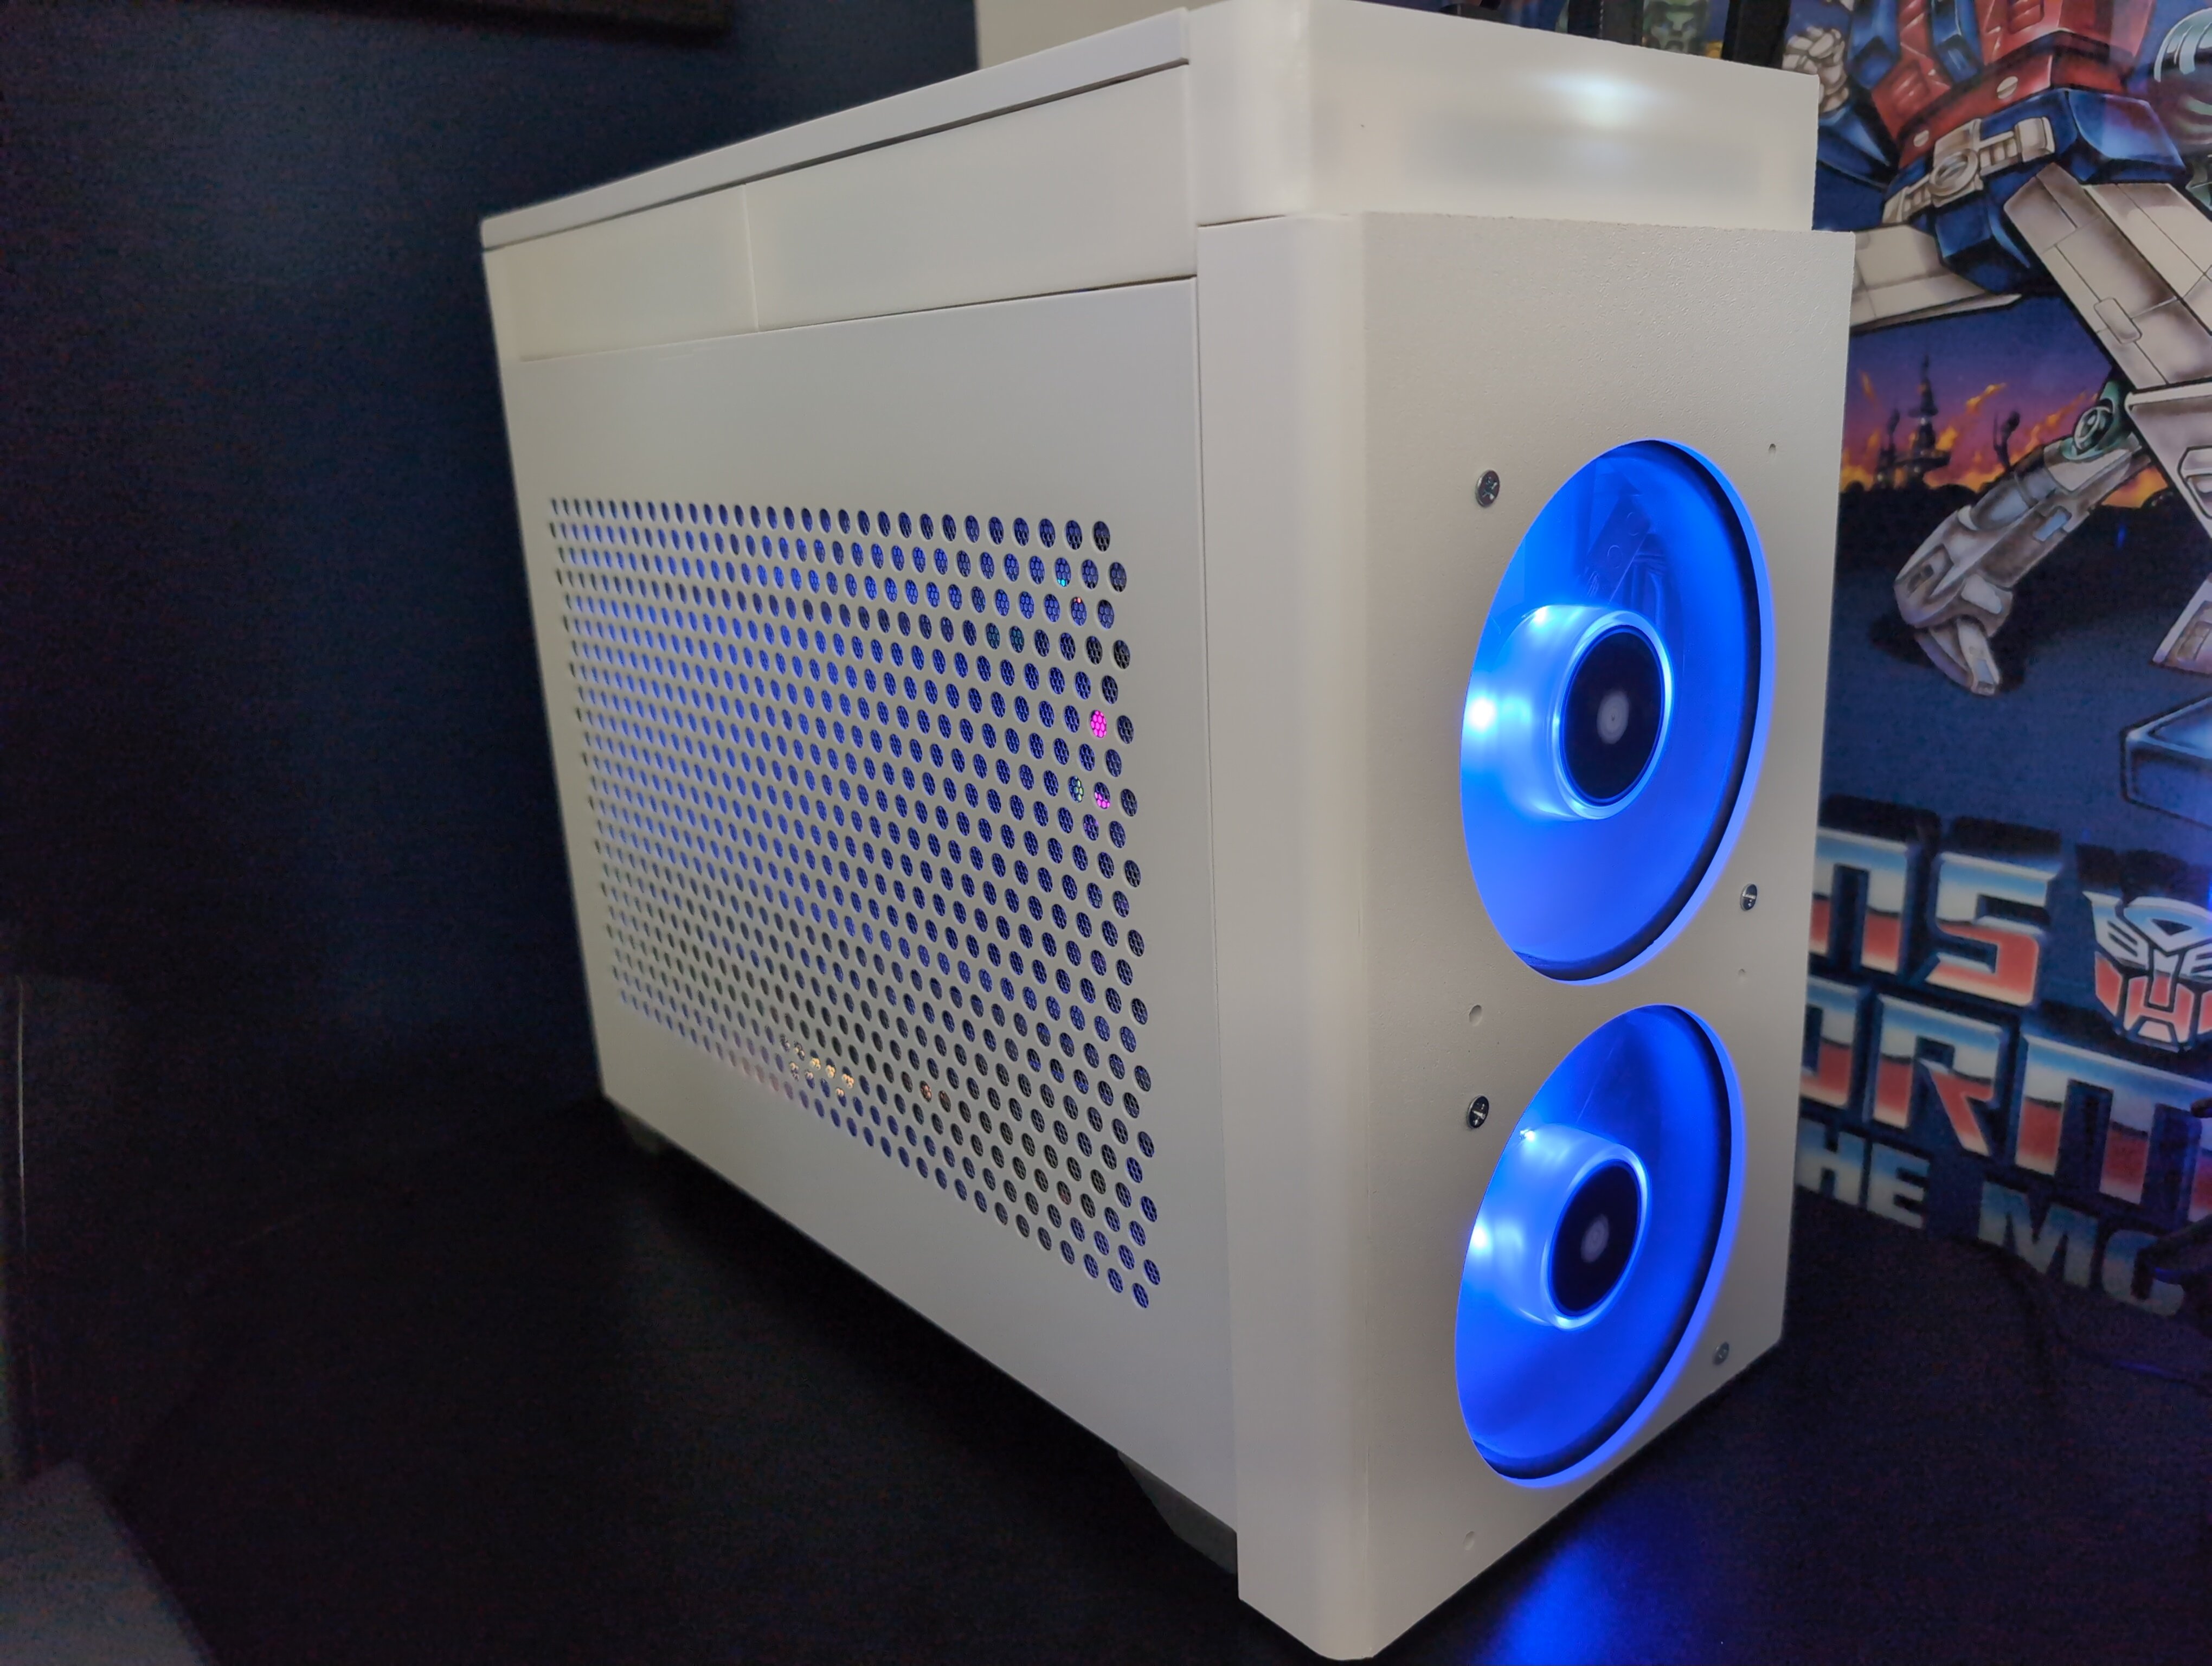
    Wanted to post this here as I'm barely able to call this SFF anymore. I went a little crazy on thingiverse and printed both the Top Hat mod by NaturalNetworks and the dual front fan mod by isotope_jx who both shared their incredible designs. I paired the top hat mod with my Kraken 240mm AIO and the front fan mod is being paired with two Corsair ML120 Pros. I can definitely say my case airflow has improved including the bottom of the case where my GPU sits. Got about 8 degrees lower on the GPU while idle and about 10 degrees under full load. CPU still testing. I did not cut the front of my case as mentioned on thingiverse for the front fan mod so it likely isn't giving the CPU as much air as it could be getting. There are some small gaps but that definitely came down to printer variance. I did PLA for the top hat mod and ASA for the front fan. 50% in-fill on both, supports enabled, using orcaslicer and Qidi Plus 4 printer. Was able to print the entire front fan as one piece but top hat mod I did have to leave in smaller pieces and build it. Rest of the rig info is below. I won't be sharing the inside of my case photos as my cable management is shameful but if there are pictures you want to see let me know!

    NR200 All Mesh Side Panels Gigabyte Aorus B550i Pro AX Ryzen 5800X3D Kraken 240 AIO in Push Config Corsair SF750 Platinum 32GB GSkill GDDR4 4000MHz RAM (Running at 3800MHz) MSI 7900 XTX Gaming Trio Classic (PTM7950 Mod for GPU die)

    view more: next ›